Note: If your computer has a secondary hard disk drive installed, remove the secondary hard disk drive to get easier access to the front USB connector on the system board.
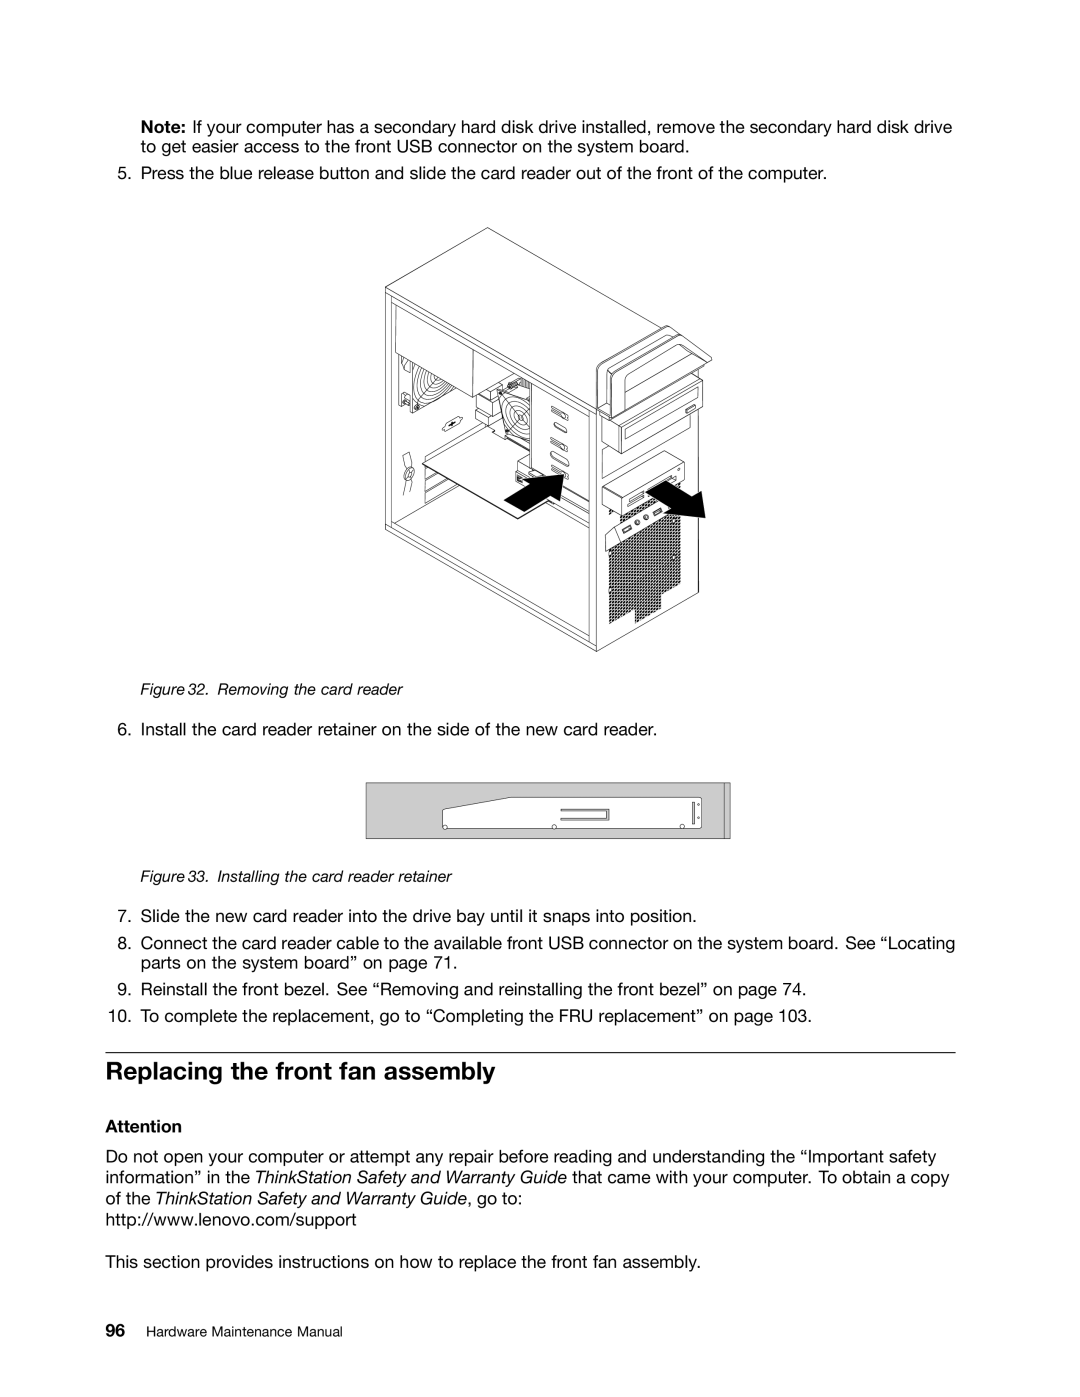
5. Press the blue release button and slide the card reader out of the front of the computer.
Figure 32. Removing the card reader
6. Install the card reader retainer on the side of the new card reader.
Figure 33. Installing the card reader retainer
7.Slide the new card reader into the drive bay until it snaps into position.
8.Connect the card reader cable to the available front USB connector on the system board. See “Locating parts on the system board” on page 71.
9.Reinstall the front bezel. See “Removing and reinstalling the front bezel” on page 74.
10.To complete the replacement, go to “Completing the FRU replacement” on page 103.
Replacing the front fan assembly
Attention
Do not open your computer or attempt any repair before reading and understanding the “Important safety information” in the ThinkStation Safety and Warranty Guide that came with your computer. To obtain a copy of the ThinkStation Safety and Warranty Guide, go to:
http://www.lenovo.com/support
This section provides instructions on how to replace the front fan assembly.