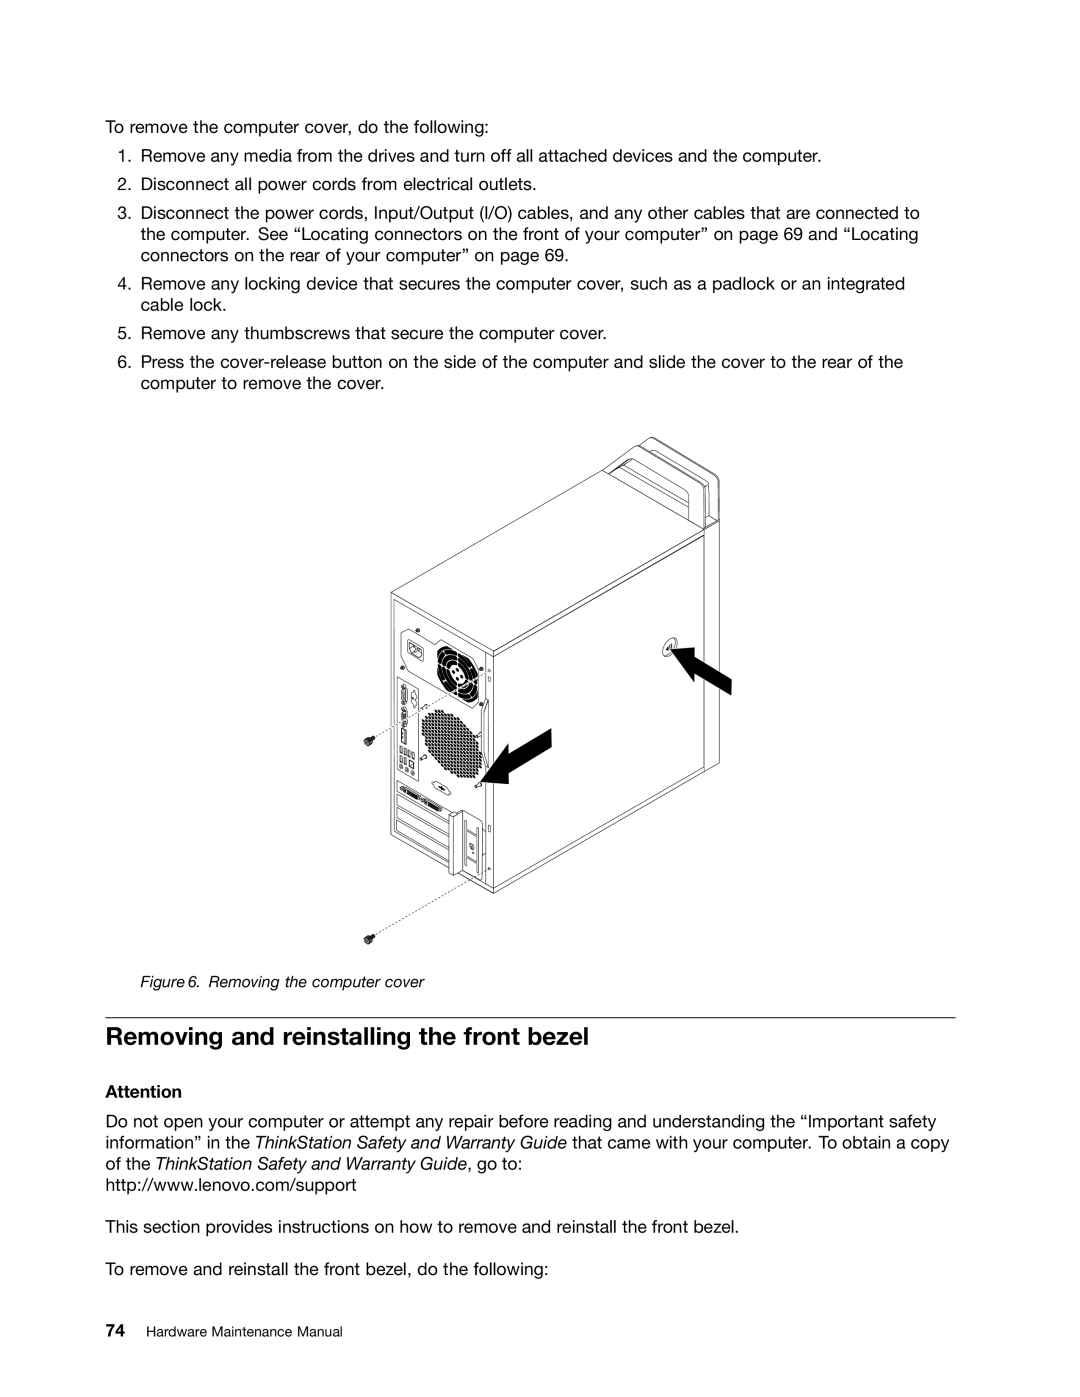
To remove the computer cover, do the following:
1.Remove any media from the drives and turn off all attached devices and the computer.
2.Disconnect all power cords from electrical outlets.
3.Disconnect the power cords, Input/Output (I/O) cables, and any other cables that are connected to the computer. See “Locating connectors on the front of your computer” on page 69 and “Locating connectors on the rear of your computer” on page 69.
4.Remove any locking device that secures the computer cover, such as a padlock or an integrated cable lock.
5.Remove any thumbscrews that secure the computer cover.
6.Press the
Figure 6. Removing the computer cover
Removing and reinstalling the front bezel
Attention
Do not open your computer or attempt any repair before reading and understanding the “Important safety information” in the ThinkStation Safety and Warranty Guide that came with your computer. To obtain a copy of the ThinkStation Safety and Warranty Guide, go to:
http://www.lenovo.com/support
This section provides instructions on how to remove and reinstall the front bezel.
To remove and reinstall the front bezel, do the following:
