Appendix C: DDNS Setup (Advanced)
Step 4 of 4: Connect to the DDNS Address in the Client Software
NOTE:Pleaseallow10~15minutesfortheDDNSserverstoupdatewithyournewDDNSaddress before attempting to connect.
Finally you must connect to the NVR’s DDNS address. You will use the DDNS address whenever you want to connect to your NVR over the Internet.
To connect to the NVR’s DDNS address:
1Install the Client Software for PC on a remote computer, and
(![]() ) to open.
) to open.
2The Add NVR Wizard opens. Click Enter Wizard.
NOTE: If the Add NVR Wizard doesn’t open, click Help>Open Wizard.
3Click Add.
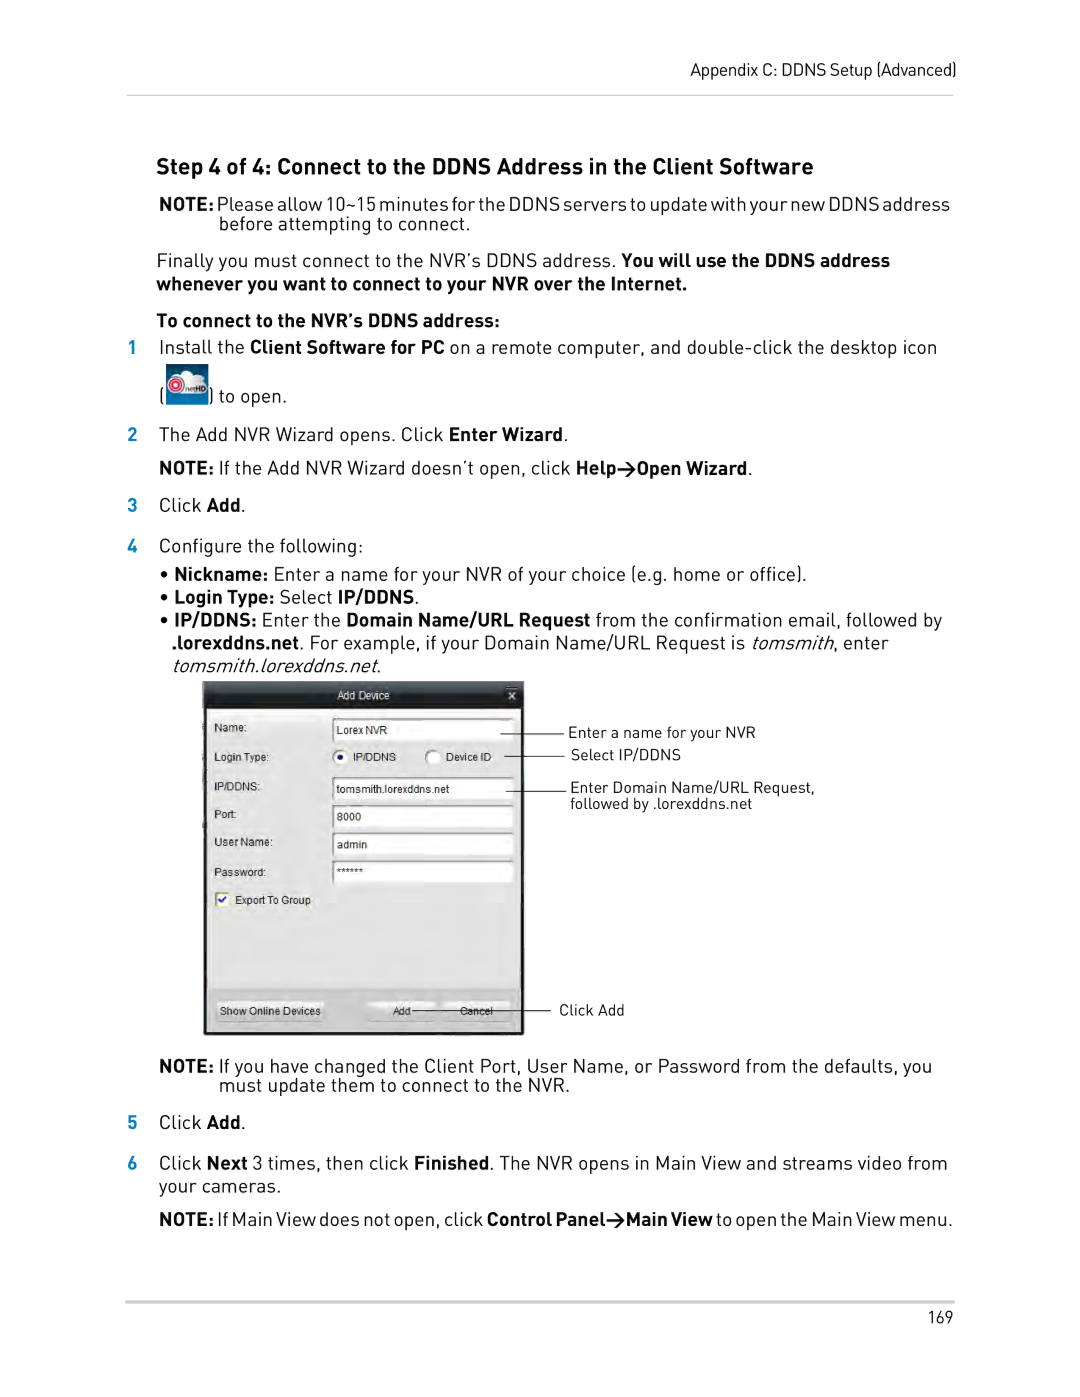
4Configure the following:
•Nickname: Enter a name for your NVR of your choice (e.g. home or office).
•Login Type: Select IP/DDNS.
•IP/DDNS: Enter the Domain Name/URL Request from the confirmation email, followed by
.lorexddns.net. For example, if your Domain Name/URL Request is tomsmith, enter tomsmith.lorexddns.net.
Enter a name for your NVR
Select IP/DDNS
Enter Domain Name/URL Request, followed by .lorexddns.net
Click Add
NOTE: If you have changed the Client Port, User Name, or Password from the defaults, you must update them to connect to the NVR.
5Click Add.
6Click Next 3 times, then click Finished. The NVR opens in Main View and streams video from your cameras.
NOTE: IfMain View doesnotopen,clickControl Panel>Main View toopenthe Main View menu.
169
