7.2 Hard Disk Installation
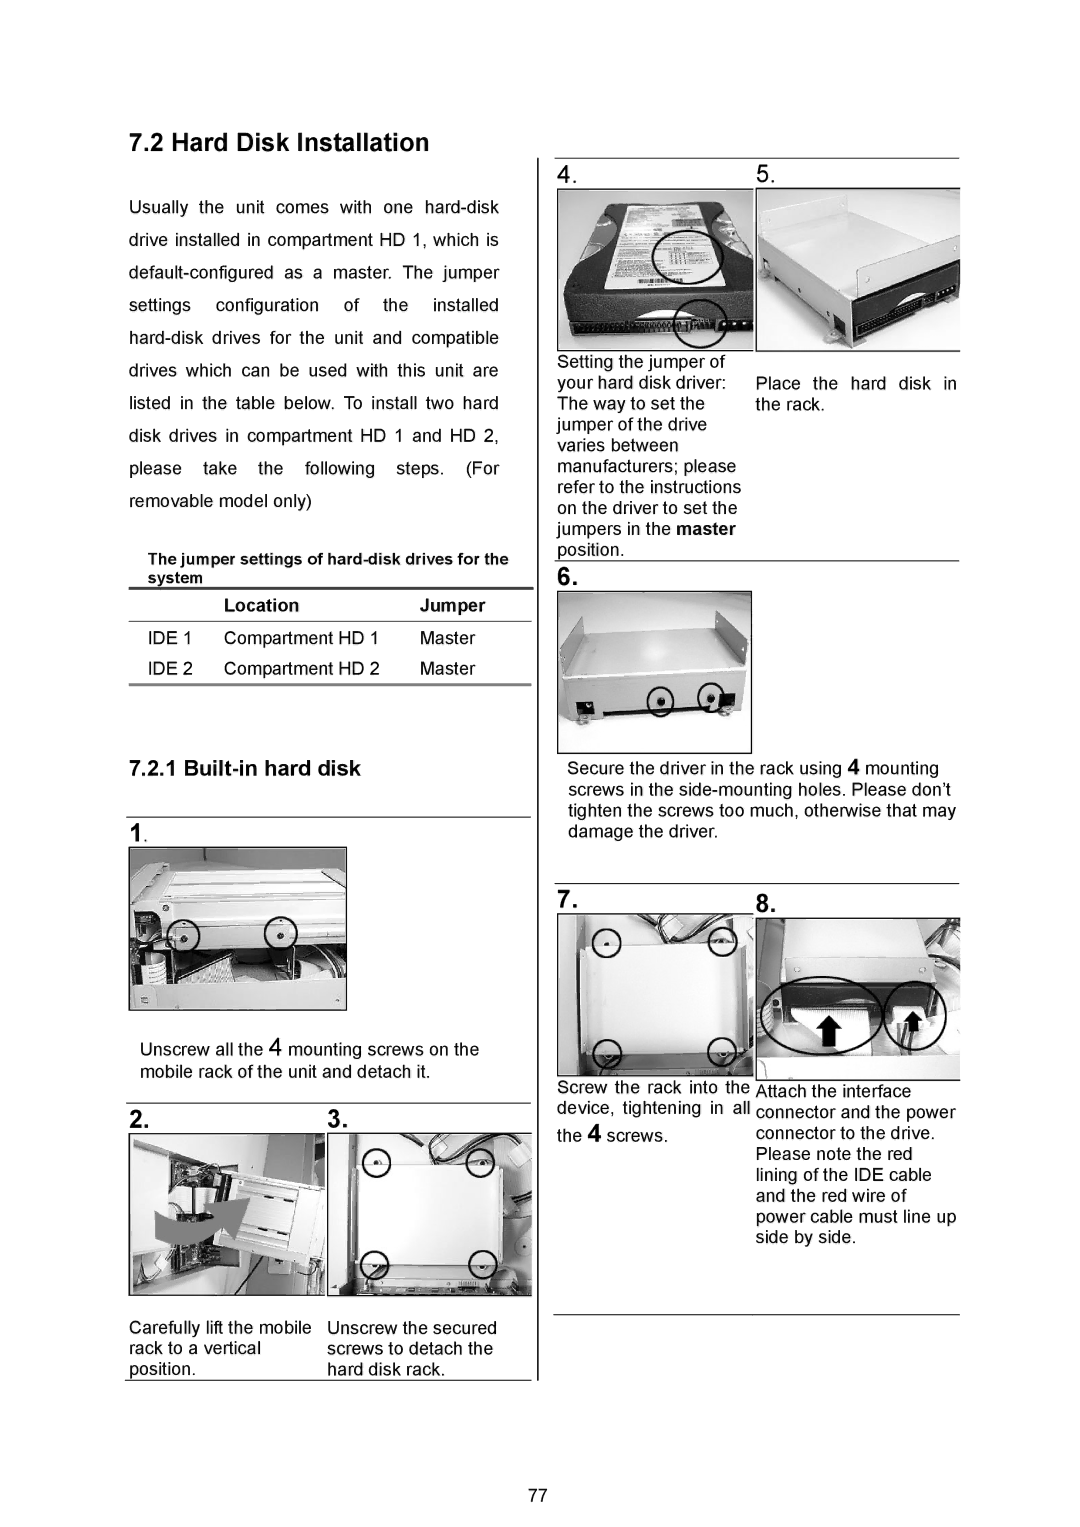
4.5.
Usually the unit comes with one
The jumper settings of
Setting the jumper of your hard disk driver: The way to set the jumper of the drive varies between manufacturers; please refer to the instructions on the driver to set the jumpers in the master position.
Place the hard disk in the rack.
system
| Location | Jumper |
IDE 1 | Compartment HD 1 | Master |
IDE 2 | Compartment HD 2 | Master |
7.2.1 Built-in hard disk
1.
Unscrew all the 4 mounting screws on the mobile rack of the unit and detach it.
2.3.
Carefully lift the mobile | Unscrew the secured |
rack to a vertical | screws to detach the |
position. | hard disk rack. |
6.
Secure the driver in the rack using 4 mounting screws in the
7.8.
Screw the rack into the Attach the interface device, tightening in all connector and the power
the 4 screws. connector to the drive. Please note the red lining of the IDE cable and the red wire of power cable must line up side by side.
77