Hooking Up Your VCR
Connections to TV with Audio Video Inputs
Because you purchased a
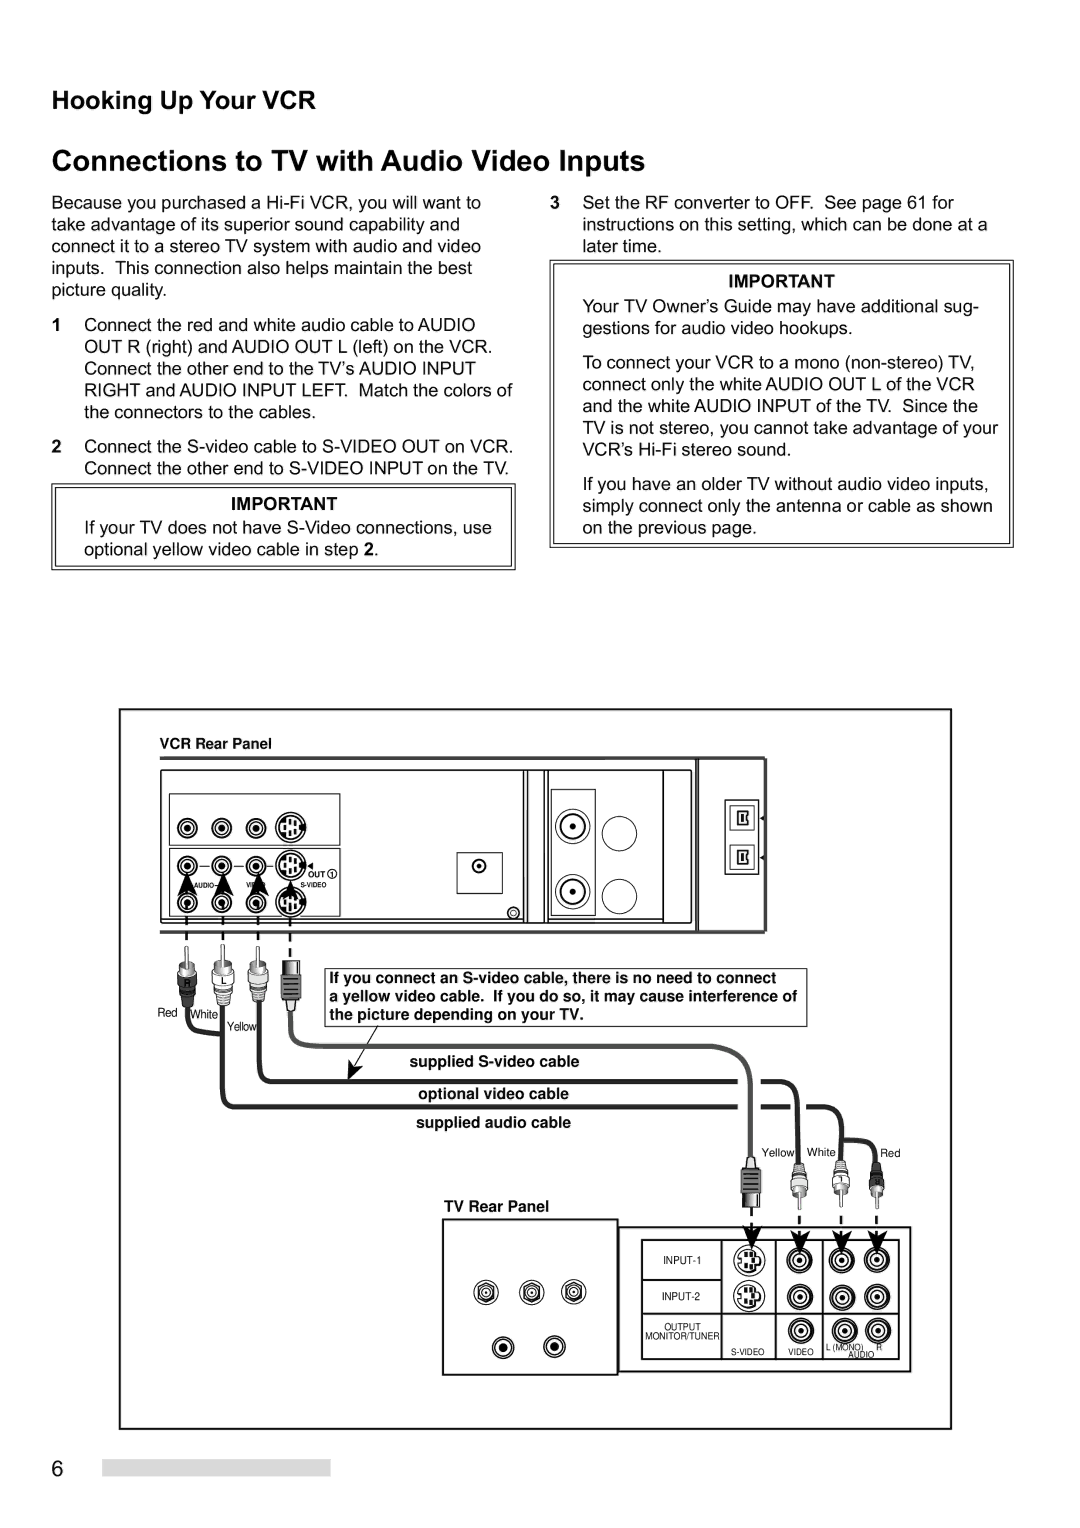
1Connect the red and white audio cable to AUDIO OUT R (right) and AUDIO OUT L (left) on the VCR. Connect the other end to the TVÕs AUDIO INPUT RIGHT and AUDIO INPUT LEFT. Match the colors of the connectors to the cables.
2Connect the
IMPORTANT
If your TV does not have
3Set the RF converter to OFF. See page 61 for instructions on this setting, which can be done at a later time.
IMPORTANT
Your TV OwnerÕs Guide may have additional sug- gestions for audio video hookups.
To connect your VCR to a mono
If you have an older TV without audio video inputs, simply connect only the antenna or cable as shown on the previous page.
VCR Rear Panel
| OUT 1 |
AUDIO |
R | L |
|
Red White
Yellow
If you connect an
a yellow video cable. If you do so, it may cause interference of the picture depending on your TV.
supplied
optional video cable
supplied audio cable
TV Rear Panel
Yellow | White |
| Red | ||
|
|
|
| L | RR |
|
|
|
|
| |
|
|
|
|
| |
|
|
|
|
| |
OUTPUT |
|
|
|
|
|
MONITOR/TUNER |
|
|
|
|
|
VIDEO | L (MONO) | R | |||
| AUDIO | ||||
6