14Chapter 1. Television Overview
TV Front Panel, Power Button and Indicators
Front Control Panel
To access the front control panel, gently press on the panel door located below the Mitsubishi logo on the front of the TV. The shaded buttons on the front control panel and the power button duplicate keys on the remote control.
See “Remote Control Overview” in chapter 3, “TV Opera- tion,” for further details on the functions of these buttons.
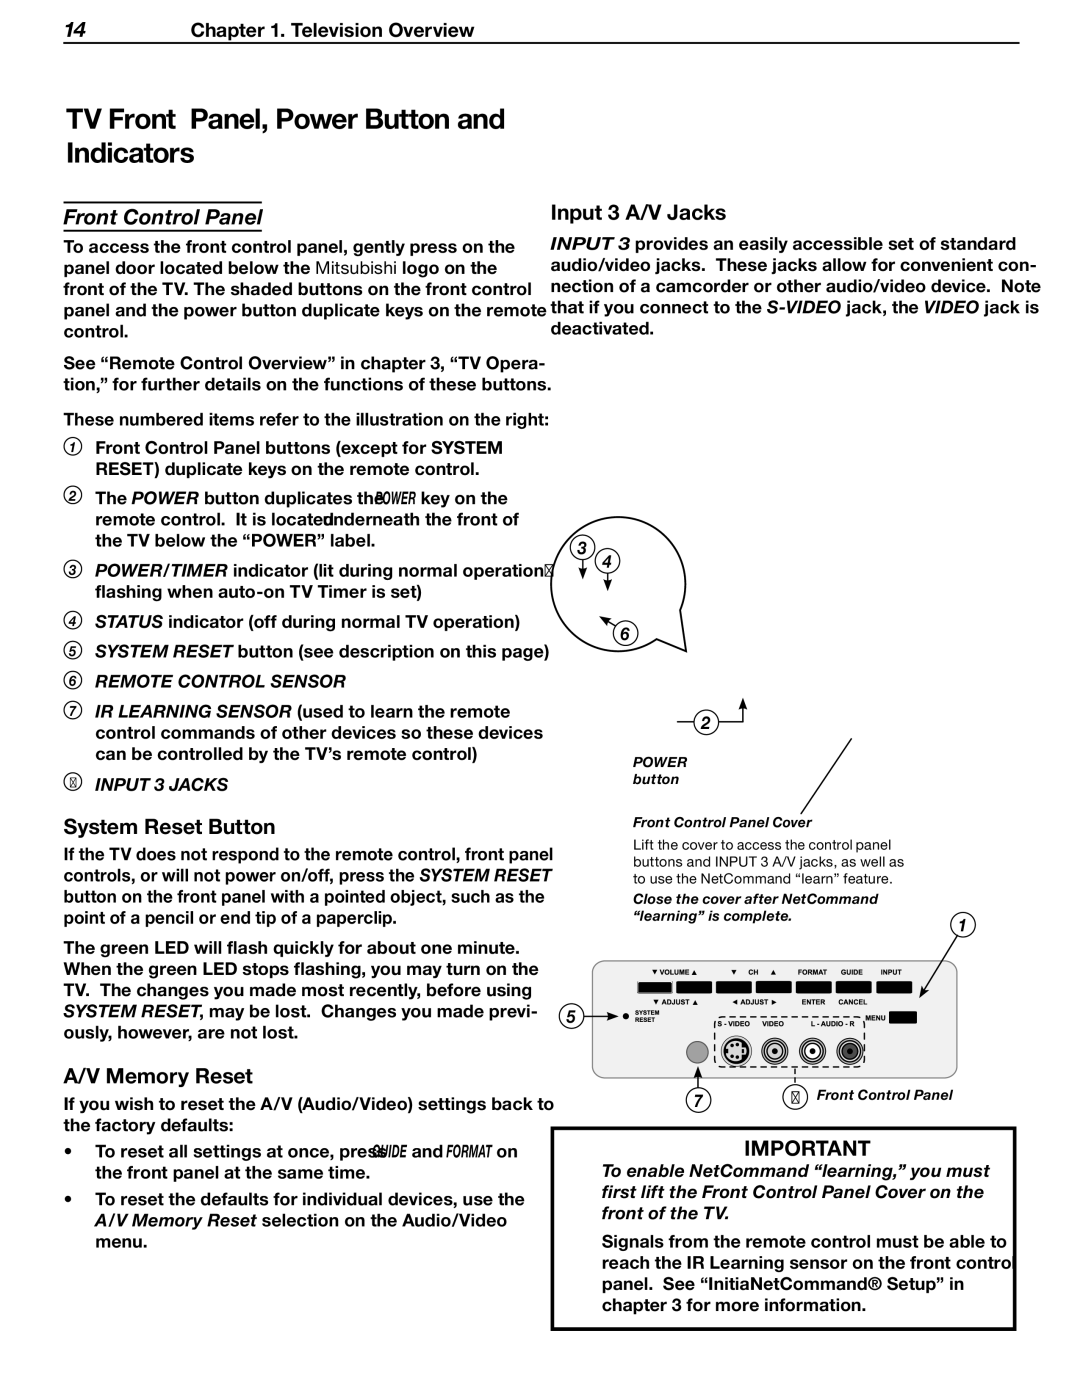
These numbered items refer to the illustration on the right:
1Front Control Panel buttons (except for SYSTEM RESET) duplicate keys on the remote control.
2The POWER button duplicates the POWER key on the remote control. It is located underneath the front of the TV below the “POWER” label.
3POWER/TIMER indicator (lit during normal operation; flashing when
4STATUS indicator (off during normal TV operation)
5SYSTEM RESET button (see description on this page)
6 REMOTE CONTROL SENSOR
7IR LEARNING SENSOR (used to learn the remote control commands of other devices so these devices can be controlled by the TV’s remote control)
8INPUT 3 JACKS
Input 3 A/V Jacks
INPUT 3 provides an easily accessible set of standard audio/video jacks. These jacks allow for convenient con- nection of a camcorder or other audio/video device. Note that if you connect to the
3 4
6
2
POWER button
System Reset Button
If the TV does not respond to the remote control, front panel controls, or will not power on/off, press the SYSTEM RESET button on the front panel with a pointed object, such as the point of a pencil or end tip of a paperclip.
The green LED will flash quickly for about one minute. When the green LED stops flashing, you may turn on the TV. The changes you made most recently, before using
SYSTEM RESET, may be lost. Changes you made previ- 5 ously, however, are not lost.
Front Control Panel Cover
Lift the cover to access the control panel buttons and INPUT 3 A/V jacks, as well as to use the NetCommand “learn” feature.
Close the cover after NetCommand “learning” is complete.
1
A/V Memory Reset | 7 | 8 Front Control Panel | |
If you wish to reset the A/V (Audio/Video) settings back to | |||
|
|
the factory defaults:
•To reset all settings at once, press GUIDE and FORMAT on the front panel at the same time.
•To reset the defaults for individual devices, use the A/V Memory Reset selection on the Audio/Video menu.
IMPORTANT To enable NetCommand “learning,” you must first lift the Front Control Panel Cover on the front of the TV.
Signals from the remote control must be able to reach the IR Learning sensor on the front control panel. See “Initial NetCommand® Setup” in chapter 3 for more information.