MultiFRAD II User Guide
If your network DOES NOT include a file server, we recommend disabling Auto Learn; the MultiFRAD or the network administrator can assign the network numbers.
If your network DOES include a file server, we recommend enabling Auto Learn and allowing the MultiFRAD to learn the IPX network numbers from the file server. WARNING: If the file server and MultiFRAD lose power, the MultiFRAD may reboot quicker than the server and assign the network numbers before the file server can; the MultiFRAD polls the server 20 times and if it receives no response it will assign the network numbers.
If you select No for Auto Learn, record the network numbers assigned by the network file server for each of the four frame types (Raw (802.3), LLC (802.2), EthernetII (Type II), SNAP) in the space provided below.
RAW (802.3) Frames Network Number _____________
LCC (802.2) Frames Network Number ______________
TYPE_II Frames Network Number _________________
SNAP Frames Network Number ___________________
WAN Network Number __________________________
When you manually assign network numbers, you must make sure they match the network numbers assigned to your local file server (if any).
12.WAN: Enter the WAN network number for the Frame Relay WAN Port by clicking the Network Number box, backspacing through the default number, and entering your new WAN Number. Make sure the WAN network number is the same as the MultiFRAD on the other end of the link.
The WAN network number has to be assigned by the Network Administrator and must be unique throughout the entire internetwork.
Note: The WAN port does not have the capability of learning the network number, unlike the LAN port (i.e., the WAN port does not have a file server).
13.Click OK when you are satisfied with your selections.
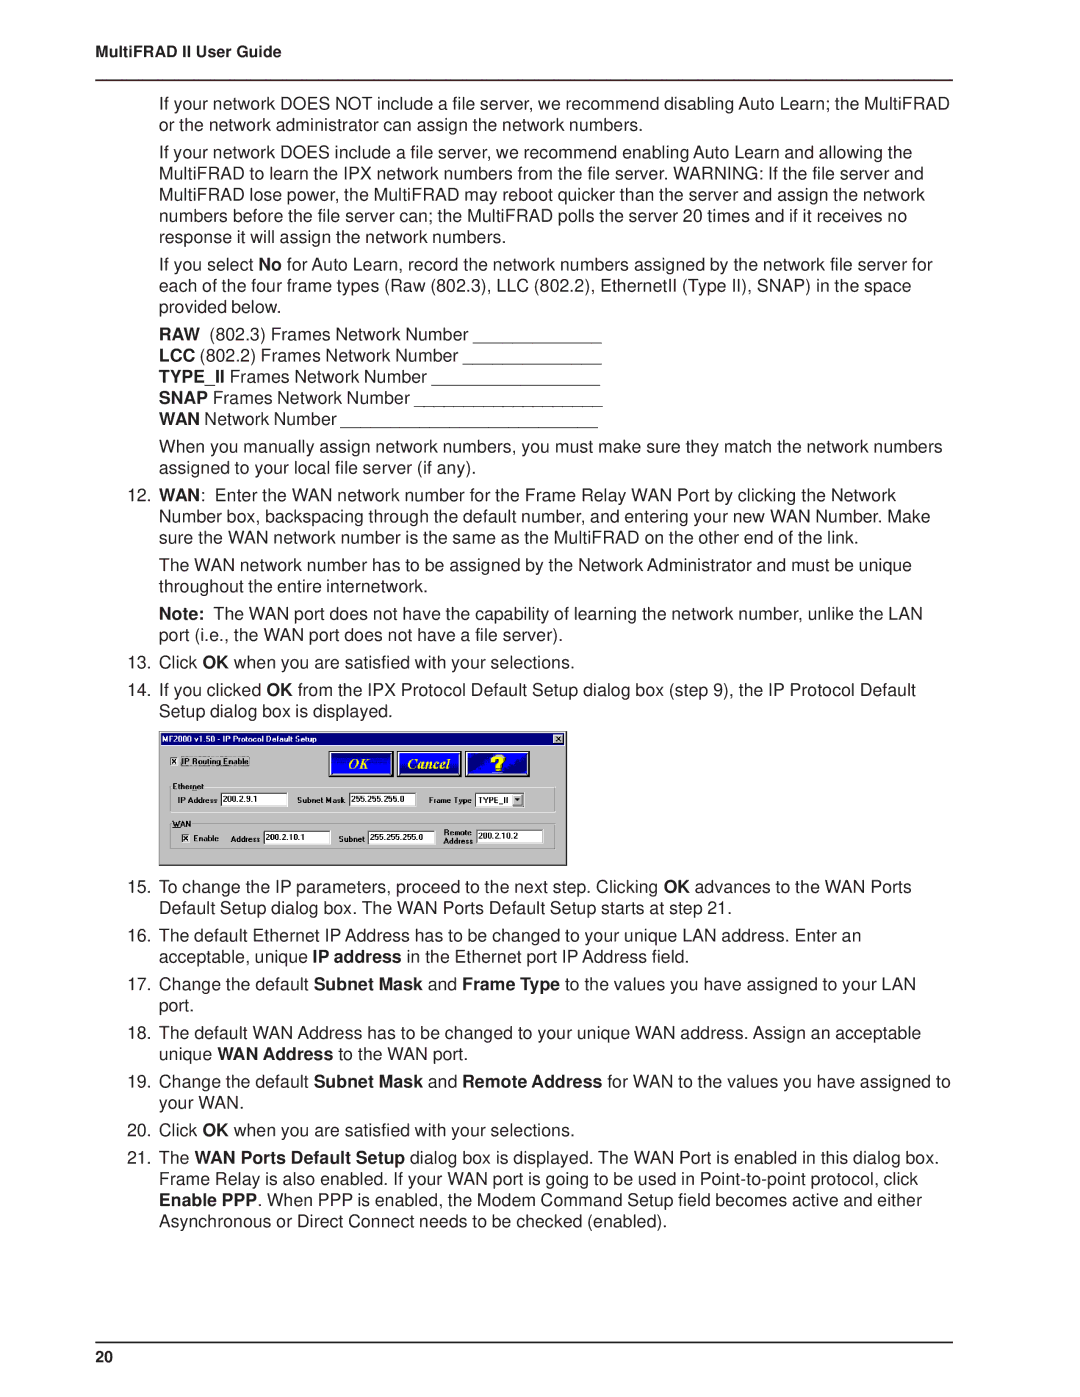
14.If you clicked OK from the IPX Protocol Default Setup dialog box (step 9), the IP Protocol Default Setup dialog box is displayed.
15.To change the IP parameters, proceed to the next step. Clicking OK advances to the WAN Ports Default Setup dialog box. The WAN Ports Default Setup starts at step 21.
16.The default Ethernet IP Address has to be changed to your unique LAN address. Enter an acceptable, unique IP address in the Ethernet port IP Address field.
17.Change the default Subnet Mask and Frame Type to the values you have assigned to your LAN port.
18.The default WAN Address has to be changed to your unique WAN address. Assign an acceptable unique WAN Address to the WAN port.
19.Change the default Subnet Mask and Remote Address for WAN to the values you have assigned to your WAN.
20.Click OK when you are satisfied with your selections.
21.The WAN Ports Default Setup dialog box is displayed. The WAN Port is enabled in this dialog box. Frame Relay is also enabled. If your WAN port is going to be used in
20