MECHANICAL INSTALLATION — NEW BATTERY
Dry Charged Batteries (continued)
After electrolyte is added, check the open circuit terminal voltage of the battery. If a
When a dry charged battery has been activated and not put into service, it must be maintained, handled, and kept charged like any other wet battery.
Charged and Moist Batteries — Activation
The activation characteristics of the charge and moist batteries differ from conventional dry charged batteries in initial fill level, specific gravity readings, and initial testing procedures.
These batteries are activated the same as dry charged batteries except each cell is filled to the bottom of the vent well. It is only necessary to let it stand 10 minutes after electrolyte is added. The specific gravity will typically fall to a range of 1.200 to 1.230 (corrected to 80°F [26.7°C]). This does not indicated low performance capability. After several days of charge and discharge in normal vehicle service, the specific gravity will rise and level out at a full charge value of 1.245 to 1.255.
To determine the performance capability of these batteries during initial activation, they should be given a load test following the 10 minute soak period.
The battery should not be load tested unless the electrolyte temperature is at least 60°F (15.5°C). Apply a test load equal to 1/2 the cold cranking performance at 0°F
If the voltage readings are below the minimum values, charge the battery at a slow charge rate and retest. If the battery fails the second test, reject it.
Removing Old Battery
Before removing the old battery, carefully note the location of the positive battery terminal and mark the polarity on the positive cable. By doing this, you will avoid installing the new battery reversed (which could damage the electrical system). Remove the ground cable connector first. This precaution will avoid damage to wiring, and/or the battery, by accidental "grounds" with tools.
Use the proper size box, or pen end wrench, when removing battery cables.
Inspect the battery tray for possible damage or corrosion. Be sure the tray and
Cables
Battery cables must carry large starting currents with a minimum loss of voltage, since engine cranking speed is dependent on the voltage available at the starting motor.
Examine the cables to ensure the insulation is intact and the terminal connectors and bolts are not corroded. Replace all unserviceable parts. Also consider replacing cables that have temporary terminal ends bolted on. Temporary or emergency terminals should be replaced with new cables as soon as possible. As the acid corrodes terminals and cables, their resistance increases and the voltage loss between the battery and the starter increases. This increase in resistance due to corrosion also restricts the flow of charging current to the battery. This condition will eventually cause the battery to become undercharged and the plates will become sulfated.
Installation
Be sure the battery has been charged as described in this section. If using an MQ Power battery, charge the battery as described in the low
Make sure the battery is level in the battery rack. Be sure there are no foreign objects lying in the tray that may cause damage to the bottom of the battery container. The hold- down should be tightened snugly, but not to the point where the battery cracks or distorts.
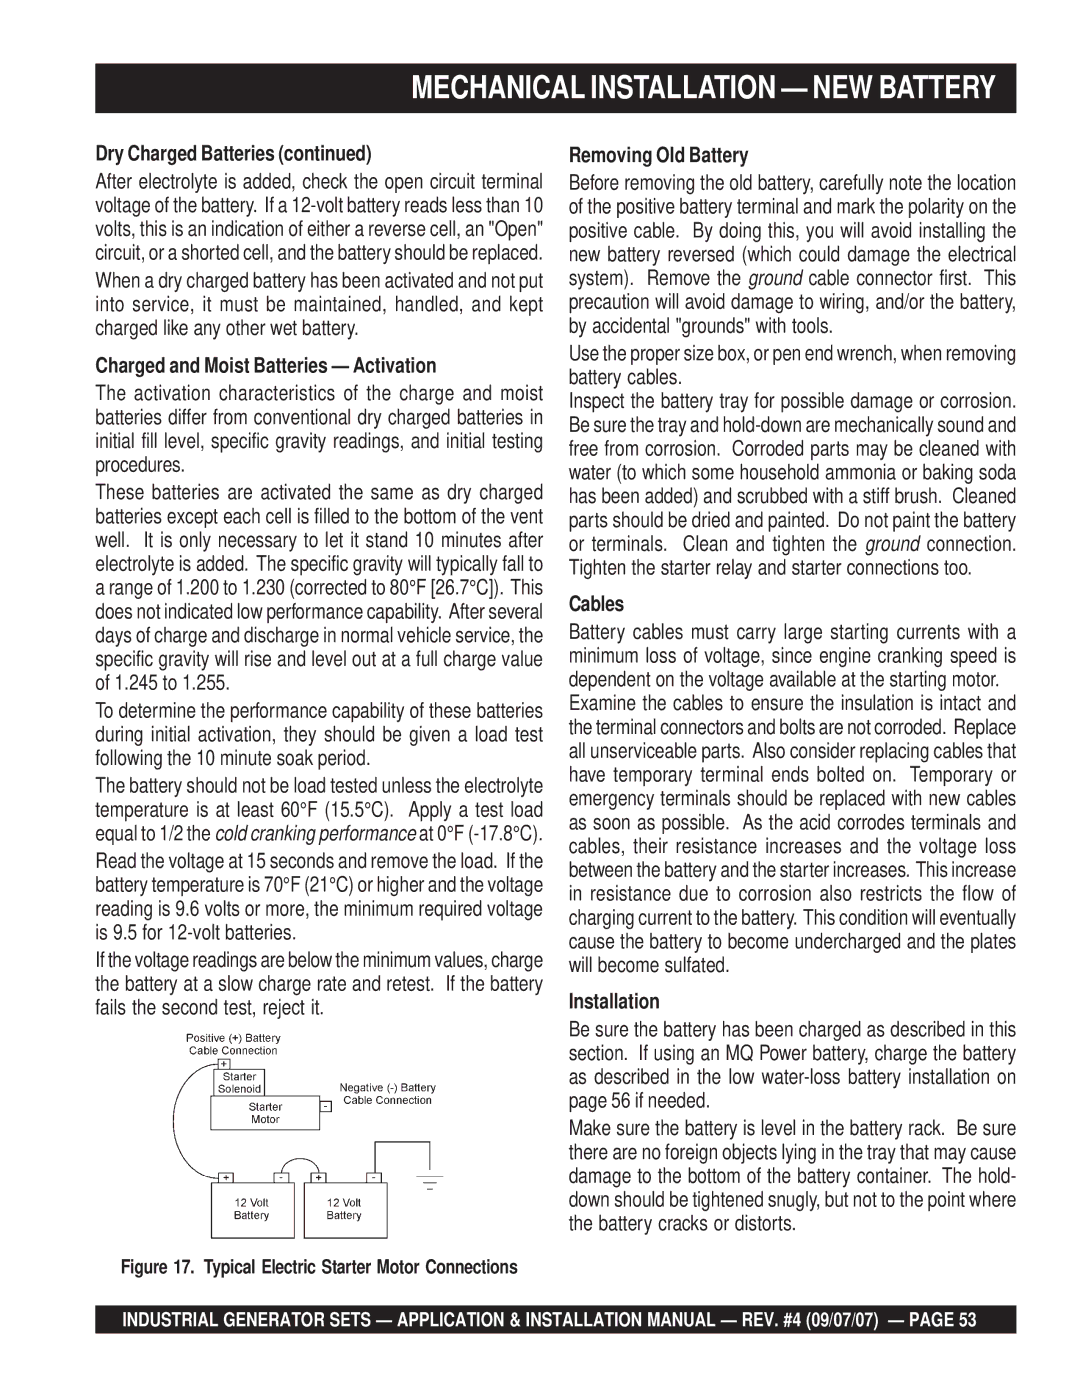
Figure 17. Typical Electric Starter Motor Connections
INDUSTRIAL GENERATOR SETS — APPLICATION & INSTALLATION MANUAL — REV. #4 (09/07/07) — PAGE 53