Muratec MFX-C2500 manual Configuring basic network settings, Selecting the authentication type

Models: MFX-C2500

1 160
Download 160 pages 23.29 Kb
Page 94
Image 94

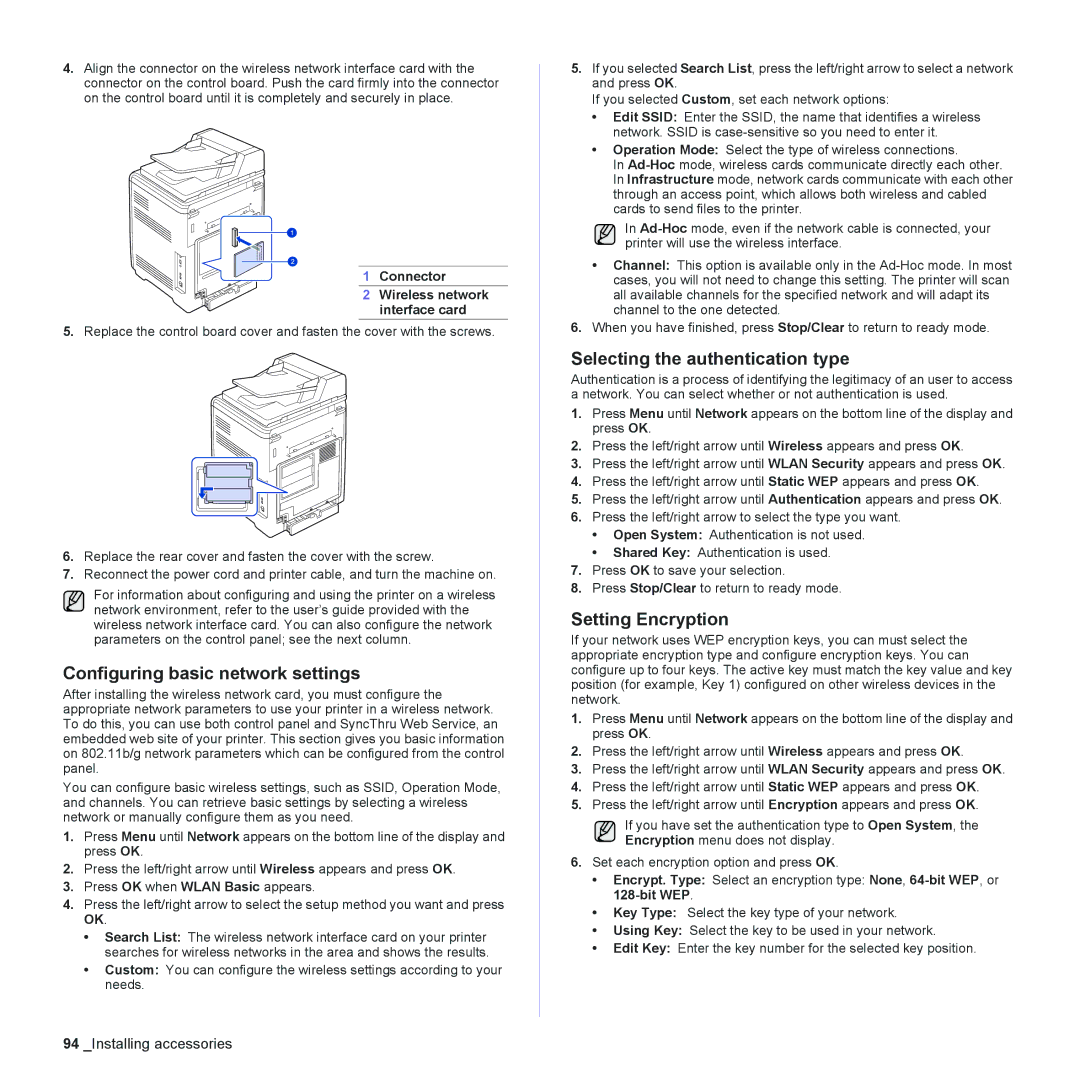
4.Align the connector on the wireless network interface card with the connector on the control board. Push the card firmly into the connector on the control board until it is completely and securely in place.

1 Connector

2 Wireless network interface card

5.Replace the control board cover and fasten the cover with the screws.

6.Replace the rear cover and fasten the cover with the screw.

7.Reconnect the power cord and printer cable, and turn the machine on.

For information about configuring and using the printer on a wireless network environment, refer to the user’s guide provided with the wireless network interface card. You can also configure the network parameters on the control panel; see the next column.

Configuring basic network settings

After installing the wireless network card, you must configure the appropriate network parameters to use your printer in a wireless network. To do this, you can use both control panel and SyncThru Web Service, an embedded web site of your printer. This section gives you basic information on 802.11b/g network parameters which can be configured from the control panel.

You can configure basic wireless settings, such as SSID, Operation Mode, and channels. You can retrieve basic settings by selecting a wireless network or manually configure them as you need.

1.Press Menu until Network appears on the bottom line of the display and press OK.

2.Press the left/right arrow until Wireless appears and press OK.

3.Press OK when WLAN Basic appears.

4.Press the left/right arrow to select the setup method you want and press OK.

Search List: The wireless network interface card on your printer searches for wireless networks in the area and shows the results.

Custom: You can configure the wireless settings according to your needs.

5.If you selected Search List, press the left/right arrow to select a network and press OK.

If you selected Custom, set each network options:

Edit SSID: Enter the SSID, the name that identifies a wireless network. SSID is case-sensitive so you need to enter it.

Operation Mode: Select the type of wireless connections.

In Ad-Hocmode, wireless cards communicate directly each other. In Infrastructure mode, network cards communicate with each other through an access point, which allows both wireless and cabled cards to send files to the printer.

In Ad-Hocmode, even if the network cable is connected, your printer will use the wireless interface.

Channel: This option is available only in the Ad-Hoc mode. In most cases, you will not need to change this setting. The printer will scan all available channels for the specified network and will adapt its channel to the one detected.

6.When you have finished, press Stop/Clear to return to ready mode.

Selecting the authentication type

Authentication is a process of identifying the legitimacy of an user to access a network. You can select whether or not authentication is used.

1.Press Menu until Network appears on the bottom line of the display and press OK.

2.Press the left/right arrow until Wireless appears and press OK.

3.Press the left/right arrow until WLAN Security appears and press OK.

4.Press the left/right arrow until Static WEP appears and press OK.

5.Press the left/right arrow until Authentication appears and press OK.

6.Press the left/right arrow to select the type you want.

Open System: Authentication is not used.

Shared Key: Authentication is used.

7.Press OK to save your selection.

8.Press Stop/Clear to return to ready mode.

Setting Encryption

If your network uses WEP encryption keys, you can must select the appropriate encryption type and configure encryption keys. You can configure up to four keys. The active key must match the key value and key position (for example, Key 1) configured on other wireless devices in the network.

1.Press Menu until Network appears on the bottom line of the display and press OK.

2.Press the left/right arrow until Wireless appears and press OK.

3.Press the left/right arrow until WLAN Security appears and press OK.

4.Press the left/right arrow until Static WEP appears and press OK.

5.Press the left/right arrow until Encryption appears and press OK.

If you have set the authentication type to Open System, the Encryption menu does not display.

6.Set each encryption option and press OK.

Encrypt. Type: Select an encryption type: None, 64-bit WEP, or 128-bit WEP.

Key Type: Select the key type of your network.

Using Key: Select the key to be used in your network.

Edit Key: Enter the key number for the selected key position.

94 _Installing accessories

Page 94
Image 94
Muratec MFX-C2500 manual Configuring basic network settings, Selecting the authentication type, Setting Encryption

MFX-C2500 specifications

The Muratec MFX-C2500 is a versatile multifunction printer designed for businesses that require efficient printing, scanning, copying, and faxing capabilities. This device stands out in the competitive market of office technology with its robust feature set and advanced technologies, making it a reliable workhorse for any workplace.

One of the key features of the MFX-C2500 is its high-speed printing capability, with an output speed of up to 25 pages per minute in both color and black and white. This rapid performance ensures that documents can be produced quickly, thus enhancing productivity in busy office environments. The printer supports a resolution of up to 1200 x 1200 dpi, ensuring that printed materials are sharp, clear, and professional-looking.

Additionally, the MFX-C2500 offers a high monthly duty cycle, allowing it to handle substantial workloads without compromising on speed or quality. This makes it an ideal choice for medium to large businesses that require reliable performance over extended periods.

In terms of scanning capabilities, the MFX-C2500 is equipped with a fast and efficient document feeder that can process double-sided documents. This feature not only saves time but also reduces paper usage, making it an environmentally friendly choice. The scanner also offers a variety of formats, including PDF, JPEG, and TIFF, making it easy to digitize documents for storage or sharing.

The MFX-C2500 also features advanced connectivity options, including USB, network, and wireless printing capabilities. Users can print directly from a variety of devices, such as smartphones and tablets, thanks to its compatibility with mobile printing technologies like Apple AirPrint and Google Cloud Print. This flexibility ensures that users can access the printer from virtually anywhere in the office.

Security is another important consideration, and the MFX-C2500 addresses this with robust security features that protect sensitive information. The device includes user authentication options and secure printing protocols, ensuring that only authorized personnel have access to the printer’s functions.

Lastly, the MFX-C2500 incorporates advanced energy-saving technologies, helping businesses reduce their environmental footprint while also lowering utility costs. It meets Energy Star certification standards, which is an important consideration for companies aiming for sustainability.

In summary, the Muratec MFX-C2500 is a powerful and efficient multifunction printer that combines high-speed performance, advanced scanning capabilities, and robust security features, making it an excellent choice for businesses looking to enhance their workflow and productivity.