NCT480 System Installation Procedures
This section describes procedures for the site in which the NCT480 system is to be installed. The section describes the following:
•Measure Rack Space
•Install the NCT480 Box Chassis
•Connecting a Console
•Connecting the
•Connecting the
•Attach and Apply Power
Measure Rack Space
To ensure stability of rack, you must install your NCT480 system from the bottom to the top of the rack. Before you install any of the chassis, measure the total rack space required to install your system. The required rack space depends on the number of NCT480 box chassis that you plan to use.
The NCT480 is 1.96inches (1U) in height and 10.2 inches (26 cm) in depth.
Install the NCT480 Box Chassis
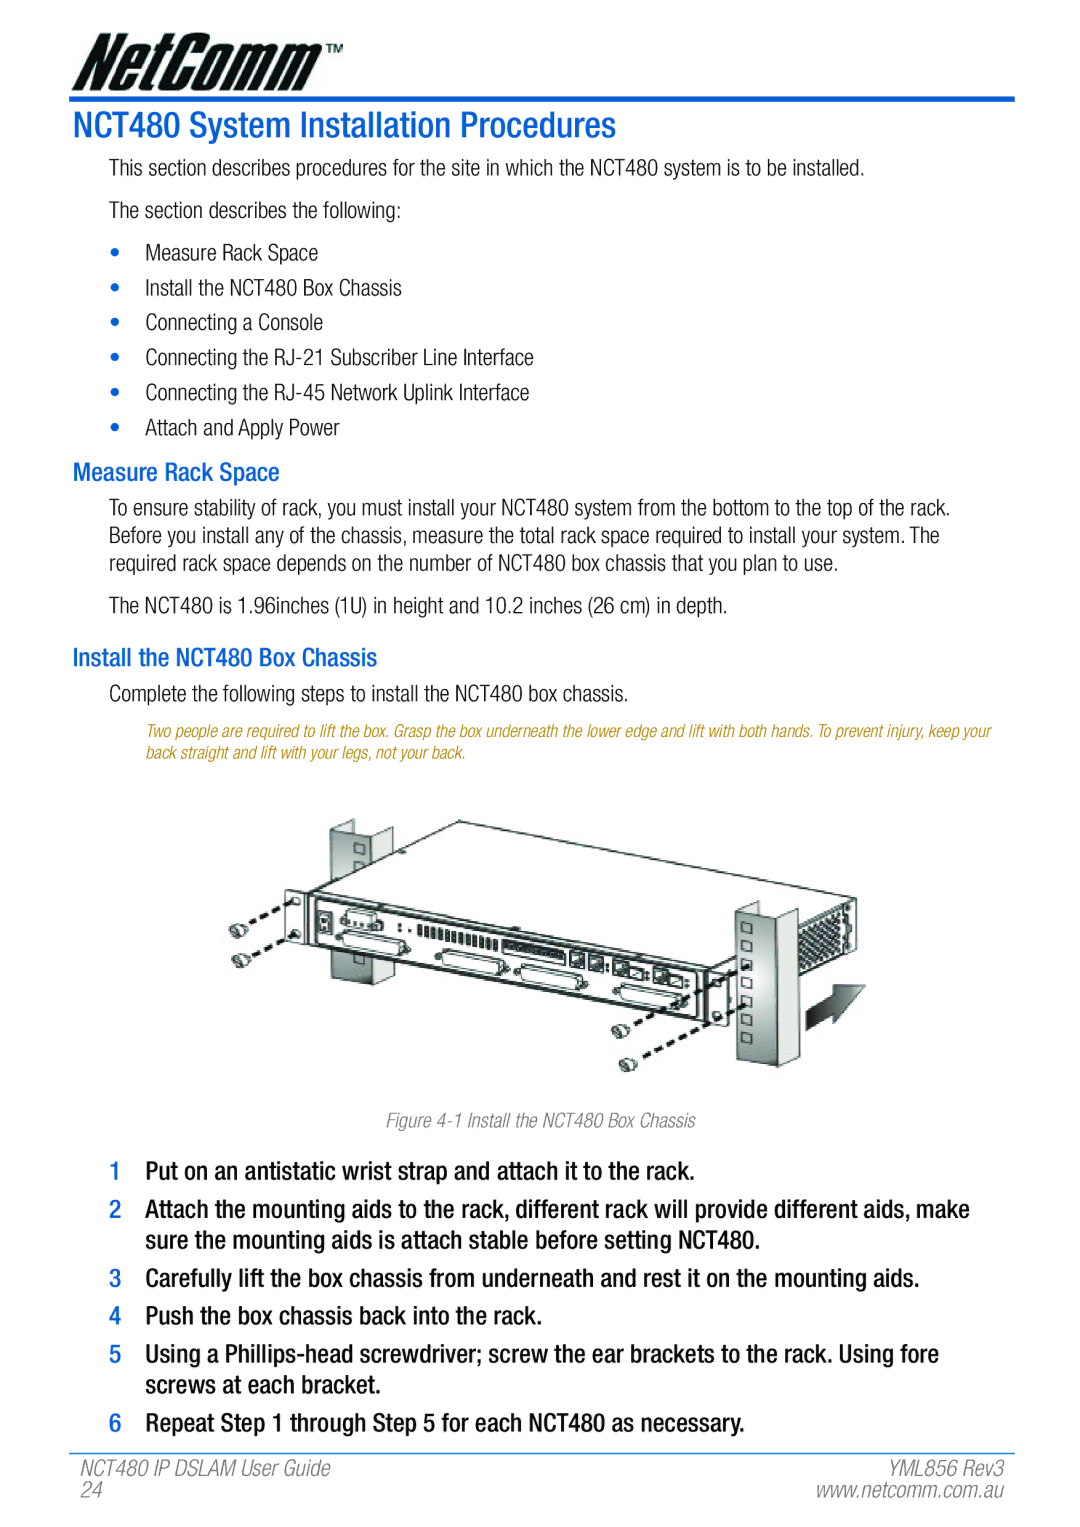
Complete the following steps to install the NCT480 box chassis.
Two people are required to lift the box. Grasp the box underneath the lower edge and lift with both hands. To prevent injury, keep your back straight and lift with your legs, not your back.
Figure 4-1 Install the NCT480 Box Chassis
1Put on an antistatic wrist strap and attach it to the rack.
2Attach the mounting aids to the rack, different rack will provide different aids, make sure the mounting aids is attach stable before setting NCT480.
3Carefully lift the box chassis from underneath and rest it on the mounting aids.
4Push the box chassis back into the rack.
5Using a
6Repeat Step 1 through Step 5 for each NCT480 as necessary.
NCT480 IP DSLAM User Guide | YML856 Rev3 |
24 | www.netcomm.com.au |