N300 Wireless Dual Band ADSL2+ Modem Router DGND3300v2 User Manual
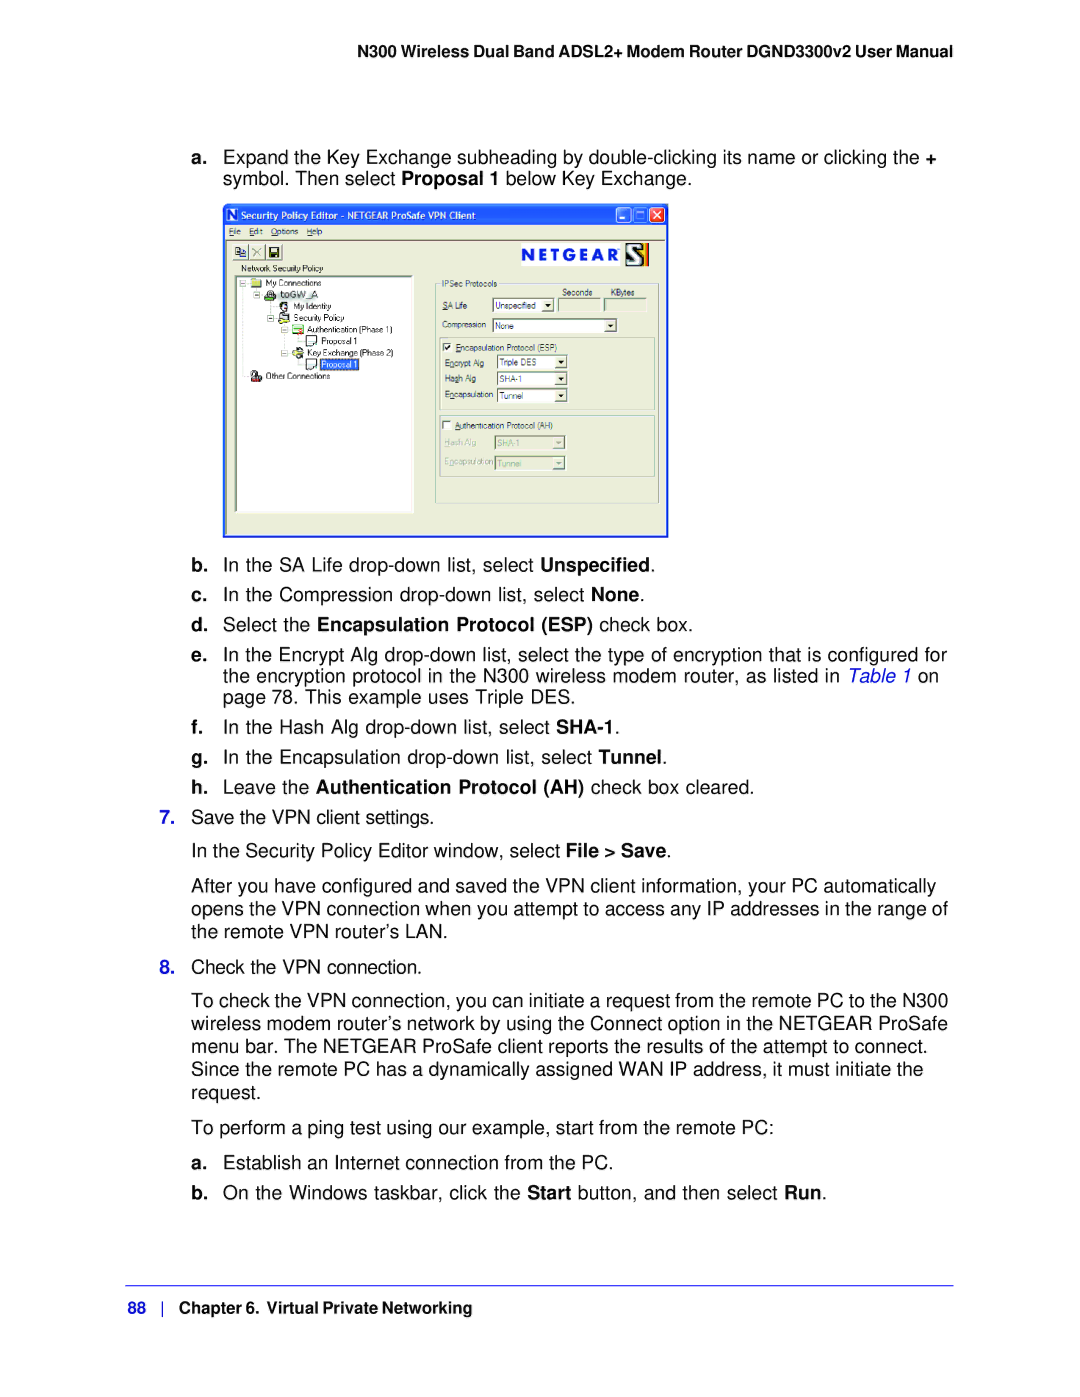
a.Expand the Key Exchange subheading by
b.In the SA Life
c.In the Compression
d.Select the Encapsulation Protocol (ESP) check box.
e.In the Encrypt Alg
f.In the Hash Alg
g.In the Encapsulation
h.Leave the Authentication Protocol (AH) check box cleared.
7.Save the VPN client settings.
In the Security Policy Editor window, select File > Save.
After you have configured and saved the VPN client information, your PC automatically opens the VPN connection when you attempt to access any IP addresses in the range of the remote VPN router’s LAN.
8.Check the VPN connection.
To check the VPN connection, you can initiate a request from the remote PC to the N300 wireless modem router’s network by using the Connect option in the NETGEAR ProSafe menu bar. The NETGEAR ProSafe client reports the results of the attempt to connect.
Since the remote PC has a dynamically assigned WAN IP address, it must initiate the request.
To perform a ping test using our example, start from the remote PC:
a.Establish an Internet connection from the PC.
b.On the Windows taskbar, click the Start button, and then select Run.