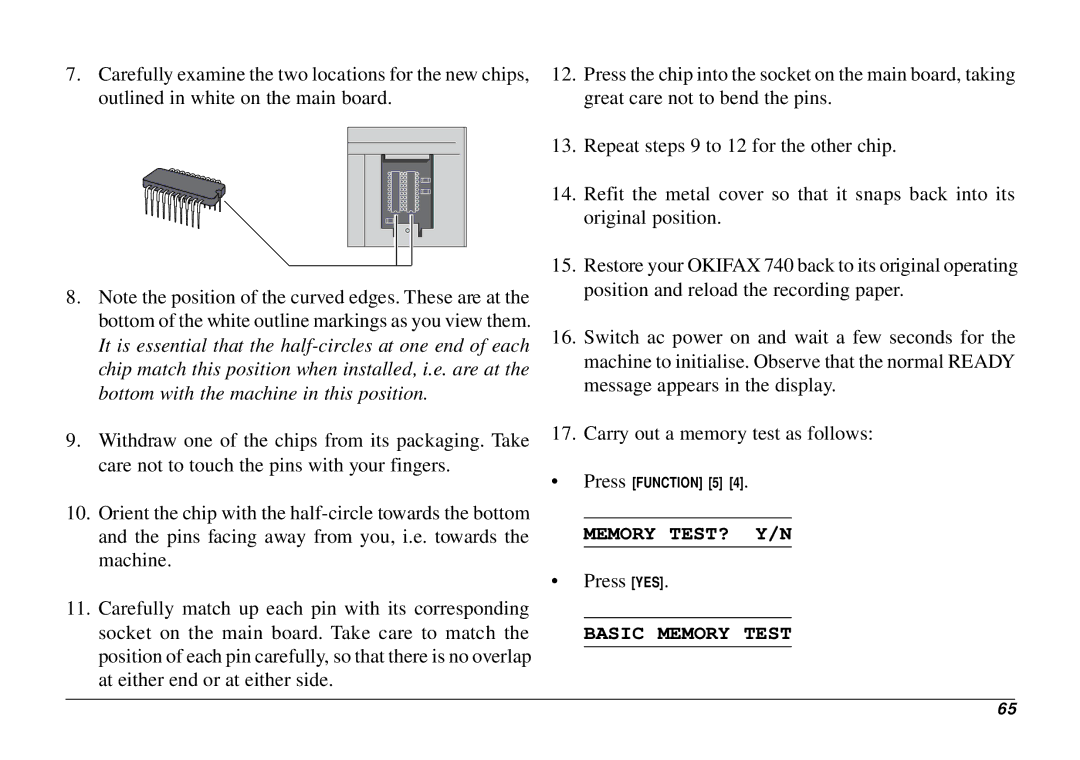
7.Carefully examine the two locations for the new chips, outlined in white on the main board.
8.Note the position of the curved edges. These are at the bottom of the white outline markings as you view them. It is essential that the
9.Withdraw one of the chips from its packaging. Take care not to touch the pins with your fingers.
10.Orient the chip with the
11.Carefully match up each pin with its corresponding socket on the main board. Take care to match the position of each pin carefully, so that there is no overlap at either end or at either side.
12.Press the chip into the socket on the main board, taking great care not to bend the pins.
13.Repeat steps 9 to 12 for the other chip.
14.Refit the metal cover so that it snaps back into its original position.
15.Restore your OKIFAX 740 back to its original operating position and reload the recording paper.
16.Switch ac power on and wait a few seconds for the machine to initialise. Observe that the normal READY message appears in the display.
17.Carry out a memory test as follows:
•Press [FUNCTION] [5] [4].
MEMORY TEST? Y/N
•Press [YES].
BASIC MEMORY TEST
65