Upload Voice Files to the Recorder
DSS Player has a feature to enable you to upload
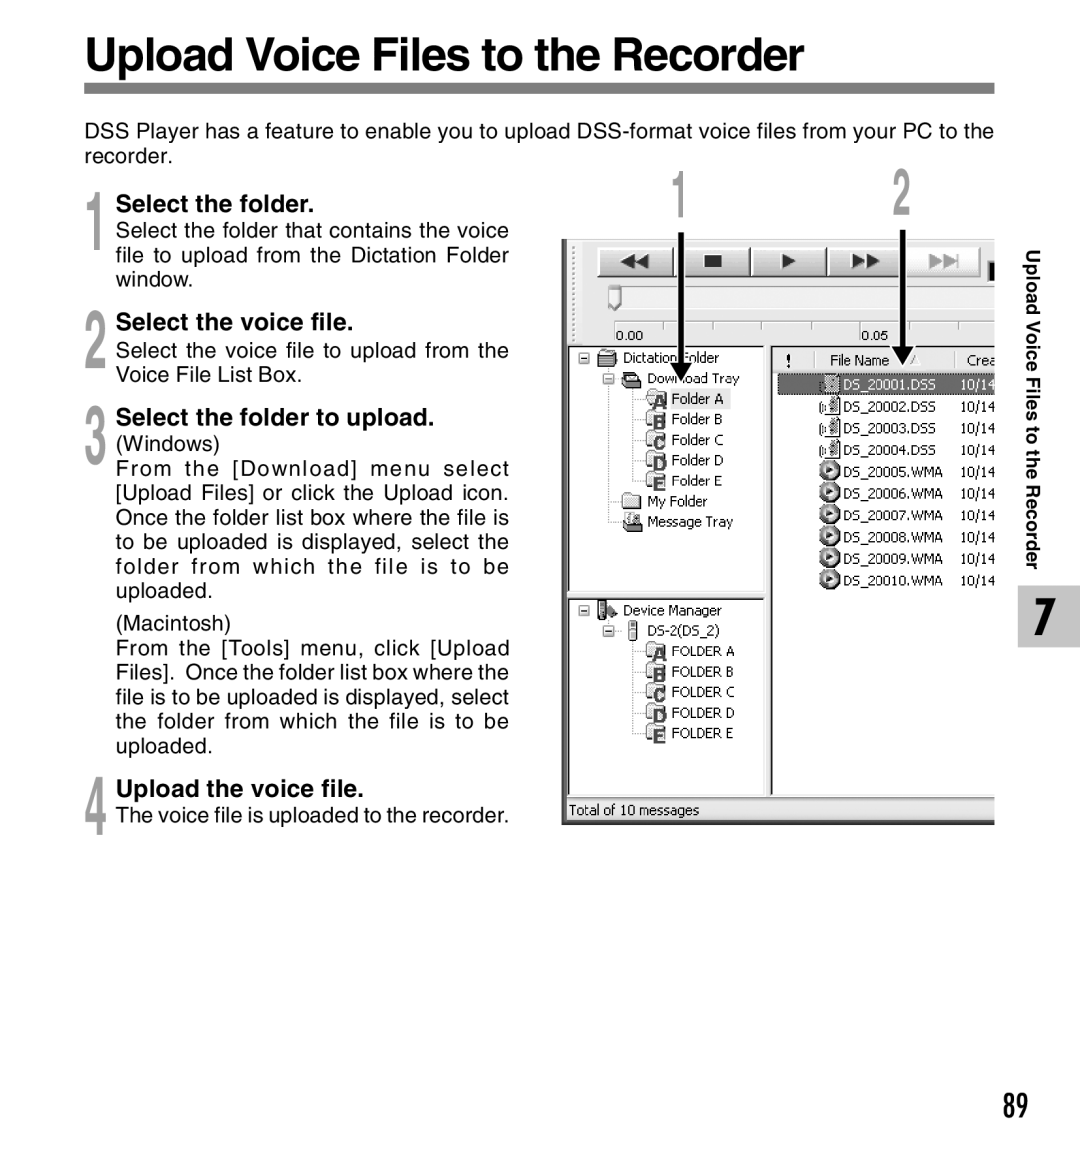
Select the folder. | 1 | 2 | ||
|
|
|
| |
Select the folder that contains the voice |
|
|
|
|
1 file to upload from the Dictation Folder |
|
|
|
|
window. |
|
|
|
|
Select the voice file. |
|
|
|
|
Select the voice file to upload from the |
|
|
|
|
|
|
|
| |
2 Voice File List Box. |
|
|
|
|
|
|
|
| |
Select the folder to upload. |
|
|
|
|
(Windows) |
|
|
|
|
3 From the [Download] menu select |
|
|
|
|
[Upload Files] or click the Upload icon. |
|
|
|
|
Once the folder list box where the file is |
|
|
|
|
to be uploaded is displayed, select the |
|
|
|
|
folder from which the file is to be |
|
|
|
|
uploaded. |
|
|
|
|
(Macintosh) |
|
|
|
|
From the [Tools] menu, click [Upload |
|
|
|
|
Files]. Once the folder list box where the |
|
|
|
|
file is to be uploaded is displayed, select |
|
|
|
|
the folder from which the file is to be |
|
|
|
|
uploaded. |
|
|
|
|
Upload the voice file. |
|
|
|
|
4 The voice file is uploaded to the recorder. |
|
|
|
|
Upload Voice Files to
the Recorder
7
89