Chapter 5 Preparation
<Notes>
≥Before connecting or disconnecting the dedicated cable, be absolutely sure to set the POWER switches on the unit and the
≥If the ECU DATA SAVE item on the <SW MODE> screen is set to OFF, the camera related settings among the adjustments and settings performed using the
It is however possible for the menu content settings to be written on the setup card.
When the unit is connected once again to the
≥When ON has been selected as the ECU DATA SAVE item setting on the <SW MODE> screen, the adjustments and settings performed using the
≥The unit’s USER switch does not function when the AJ- EC3E is connected.
≥When the
Unit shutter speed setting | |
S.S | SYNCHRO SCAN |
S.V | POSITION1 |
100 (60) | POSITION1 |
120 | POSITION2 |
250 | POSITION3 |
500 | POSITION4 |
1000 | POSITION5 |
2000 | POSITION6 |
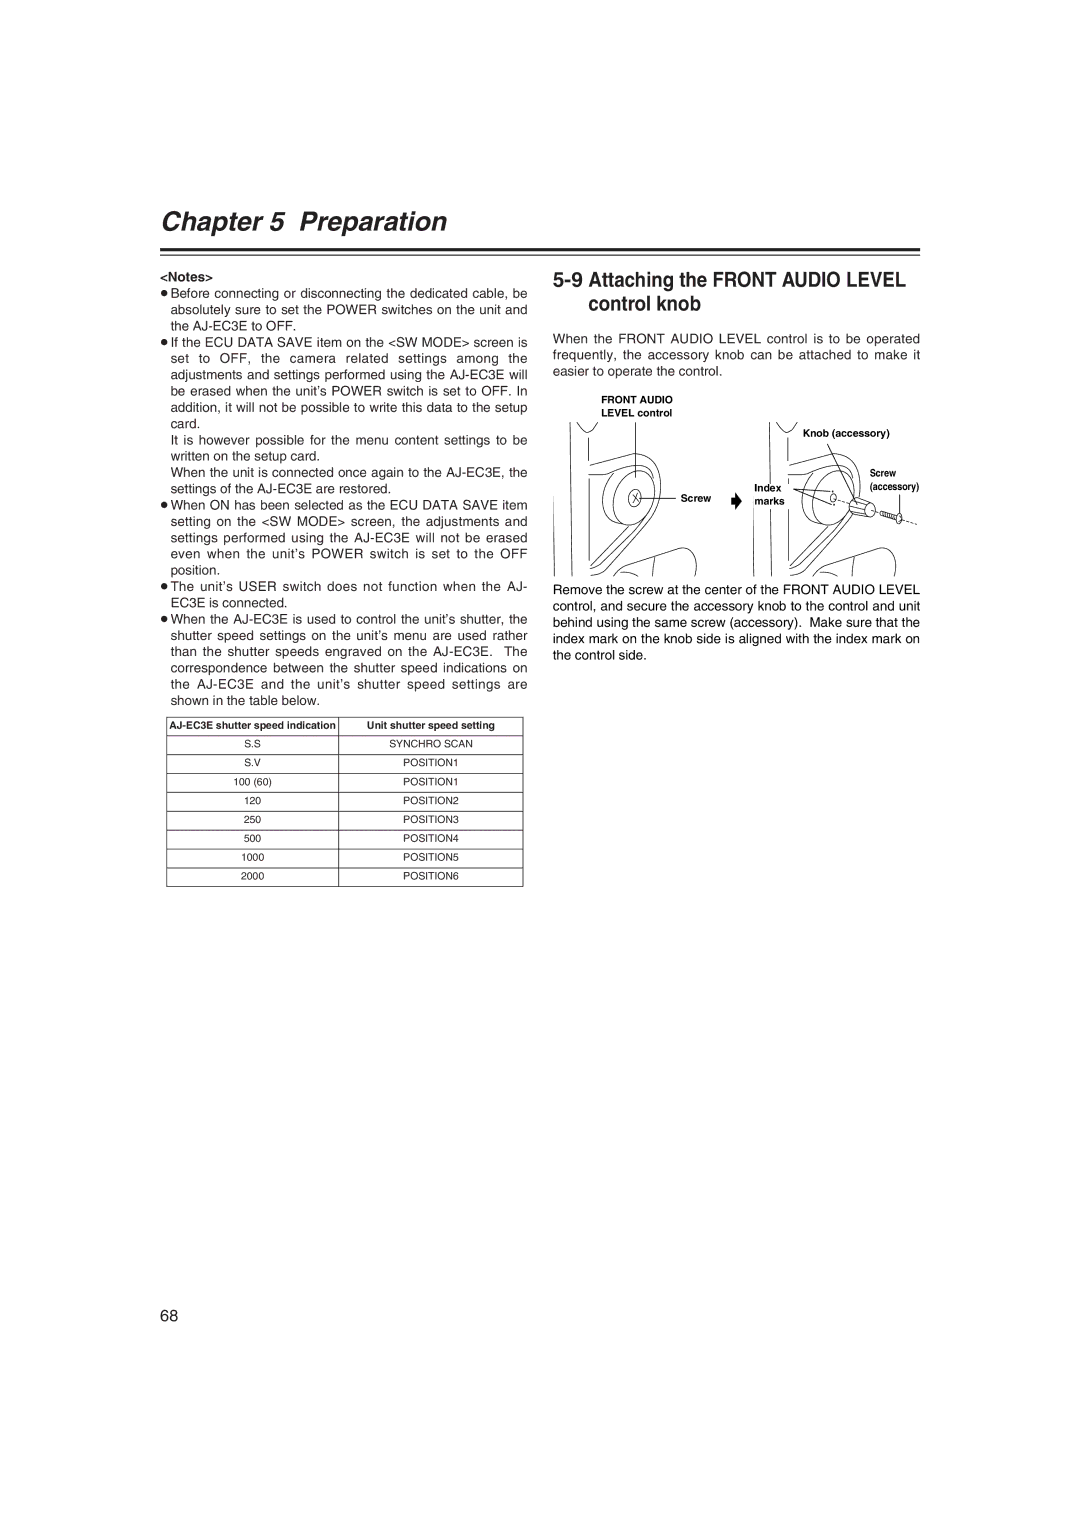
5-9 Attaching the FRONT AUDIO LEVEL control knob
When the FRONT AUDIO LEVEL control is to be operated frequently, the accessory knob can be attached to make it easier to operate the control.
FRONT AUDIO
LEVEL control
Knob (accessory)
Screw
Index(accessory)
Screw 5 marks
Remove the screw at the center of the FRONT AUDIO LEVEL control, and secure the accessory knob to the control and unit behind using the same screw (accessory). Make sure that the index mark on the knob side is aligned with the index mark on the control side.
68