Cards useable on this unit
(Chart continues from page 8.)
| +R | |
≥4.7 GB, 12 cm (5z) | ||
≥4.7 GB, 12 cm (5z) | ||
≥1.4 GB, 8 cm (3z) | ||
| ||
| – | |
|
| |
[+R] before finalization | ||
|
| |
|
| |
Video | Video | |
|
| |
As | As one time recording discs for | |
backup use (recordable until | ||
use | ||
the disc is full) | ||
| ||
|
| |
Approx. 8 hours | Approx. 8 hours | |
|
| |
Only after finalizing the disc | Only after finalizing the disc | |
(➡ 52, 68). | (➡ 52, 68). | |
|
| |
Up to 4k recording speed | Up to 8k recording speed discs. | |
discs. | ||
|
Type
Indicated in these instructions by
Data that can be recorded and played
Instructions
SD Memory Card
miniSDTM Card§
MultiMediaCard
[SD]
Still pictures
You can insert directly into the SD card slot.
§A miniSDTM card adaptor included with the
miniSDTM card is necessary.
≥You can play and transfer (dub) still pictures taken on a digital camera, etc. (➡ 34, 48).
≥You can set the DPOF (Digital Print Order Format) for automatic printing on your home printer or at a photo developing store (➡ 42, 68).
Getting started
No | No |
|
|
No | No |
|
|
No | No |
Only one is recorded.(➡ 56, | Only one is recorded.(➡ 56, |
Select MTS) | Select MTS) |
|
|
No (The picture is recorded in | No (The picture is recorded in |
4:3 aspect.) | 4:3 aspect.) |
|
|
Yes | Yes |
|
|
Yes (Disc space increases only when | Yes (Available space does not |
the last recorded title is erased.) | increase after erasing.) |
|
|
No | No |
≥We recommend using Panasonic discs and cards. We also recommend using
≥Discs from other manufacturers may not be recorded or played due to the condition of the recording.
≥You may not be able to record to
≥You cannot record programs that allow “One time only recording” to CPRM compatible
≥Compatible with: FAT 12 or FAT 16
Suitable SD Memory Cards
≥You can use SD Memory Cards with the following capacities (from 8 MB to 1 GB).
8 MB, | 16 MB, | 32 MB, | 64 MB, |
128 MB, | 256 MB, | 512 MB, | 1 GB (Maximum) |
≥Useable memory is slightly less than the card capacity.
≥Please confirm the latest information on the following website.
http://panasonic.co.jp/pavc/global/cs
(This site is in English only.)
≥If the SD Memory Card is formatted on other equipment, the time spent for recording may become longer. Also if the SD Memory Card is formatted on a PC, you may not be able to use it on this unit. In these cases, format the card on this unit (➡ 51, 68).
≥This unit supports SD Memory Cards formatted in FAT 12 system and FAT 16 system based on SD Memory Card Specifications.
≥We recommend using a Panasonic SD card.
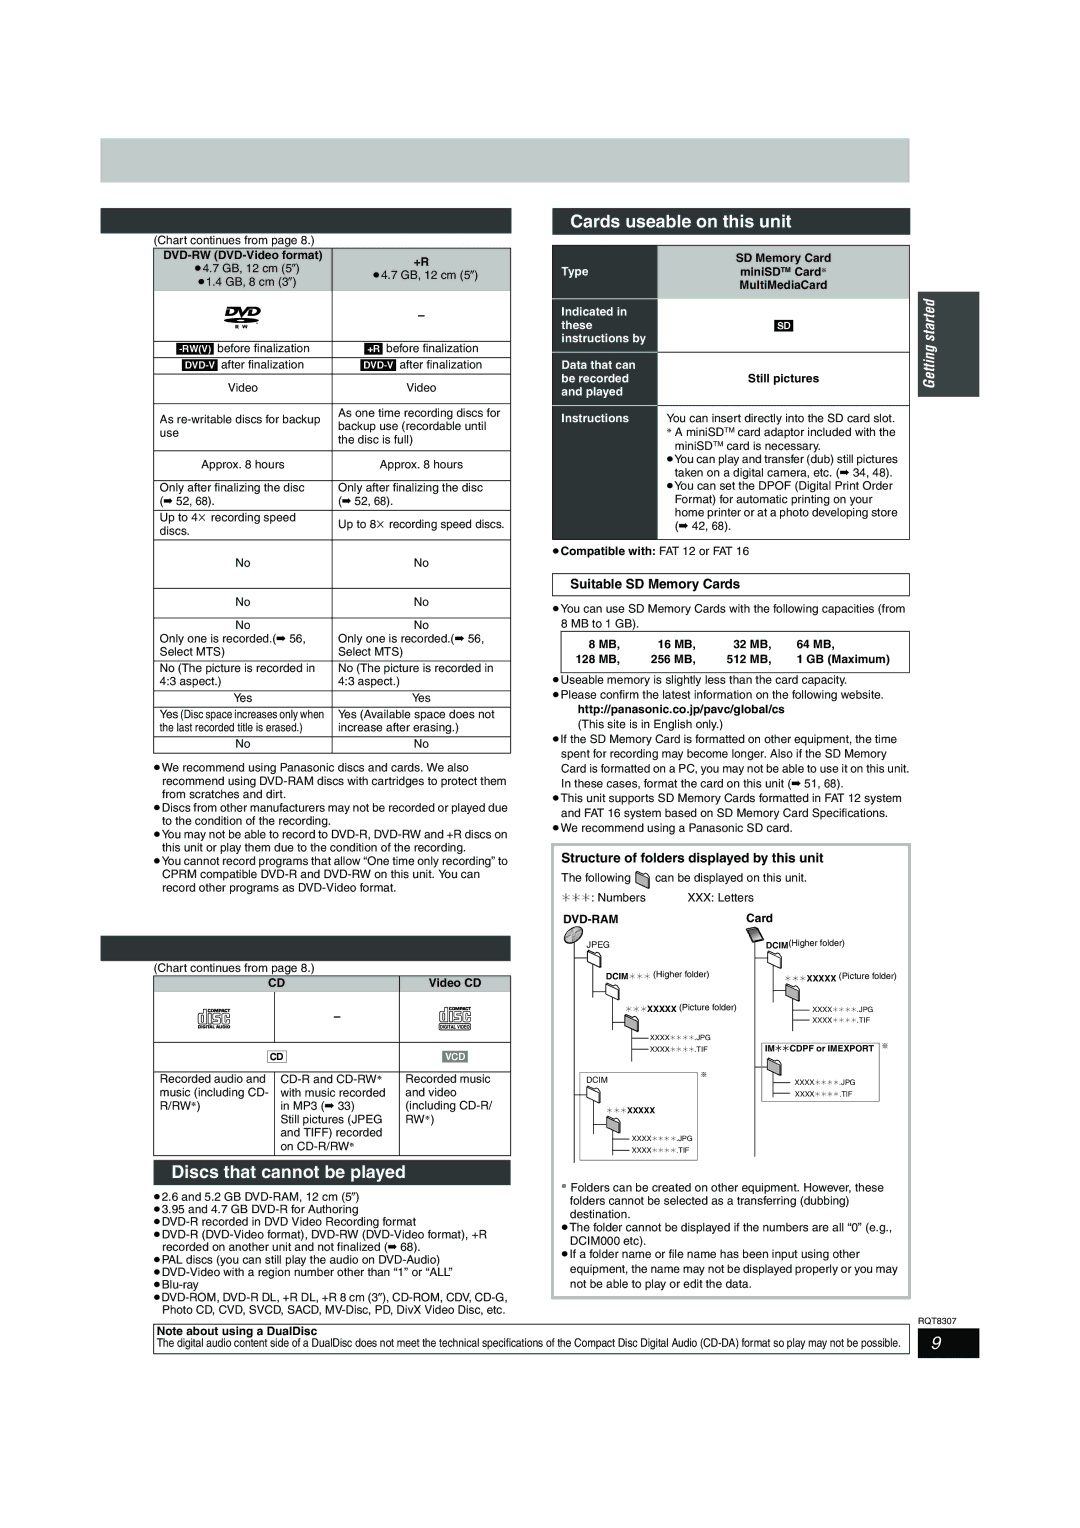
Structure of folders displayed by this unit
The following ![]() can be displayed on this unit.
can be displayed on this unit.
¢¢¢: Numbers | XXX: Letters |
(Chart continues from page 8.)
CD | Video CD | |
| – |
|
[CD] | [VCD] | |
Recorded audio and | Recorded music | |
music (including CD- | with music recorded | and video |
R/RW§) | in MP3 (➡ 33) | (including |
| Still pictures (JPEG | RW§) |
| and TIFF) recorded |
|
| on |
|
Discs that cannot be played
DVD-RAM
JPEG
DCIM¢¢¢ (Higher folder)
¢¢¢XXXXX (Picture folder)
XXXX¢¢¢¢.JPG
XXXX¢¢¢¢.TIF
§
DCIM
¢¢¢XXXXX
XXXX¢¢¢¢.JPG
XXXX¢¢¢¢.TIF
Card
![]() DCIM(Higher folder)
DCIM(Higher folder)
¢¢¢XXXXX (Picture folder)
XXXX¢¢¢¢.JPG
XXXX¢¢¢¢.TIF
IM¢¢CDPF or IMEXPORT §
XXXX¢¢¢¢.JPG
XXXX¢¢¢¢.TIF
≥2.6 and 5.2 GB
≥DVD-R recorded in DVD Video Recording format
≥PAL discs (you can still play the audio on
§Folders can be created on other equipment. However, these folders cannot be selected as a transferring (dubbing) destination.
≥The folder cannot be displayed if the numbers are all “0” (e.g., DCIM000 etc).
≥If a folder name or file name has been input using other equipment, the name may not be displayed properly or you may not be able to play or edit the data.
Note about using a DualDisc
The digital audio content side of a DualDisc does not meet the technical specifications of the Compact Disc Digital Audio
RQT8307
9