Getting started
Connection
Basic connections
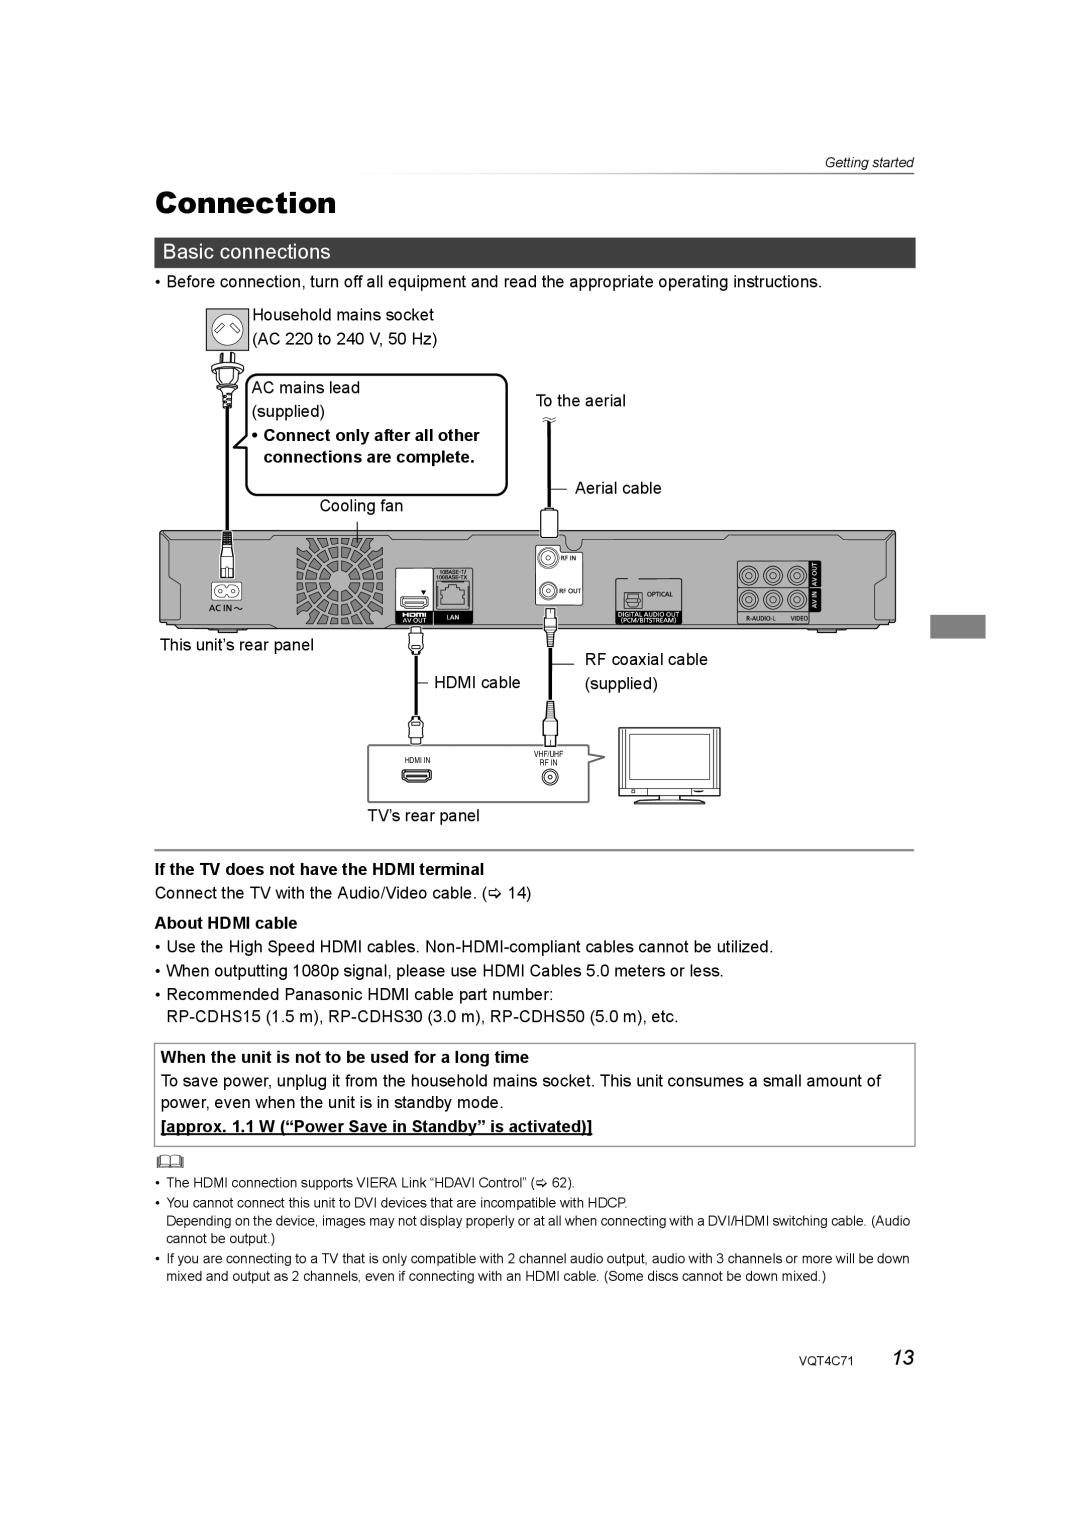
• Before connection, turn off all equipment and read the appropriate operating instructions.
Household mains socket (AC 220 to 240 V, 50 Hz)
AC mains lead | To the aerial | |
(supplied) | ||
|
•Connect only after all other connections are complete.
Aerial cable
Cooling fan
This unit’s rear panel | RF coaxial cable | |
| ||
HDMI cable | (supplied) | |
HDMI IN | VHF/UHF | |
RF IN | ||
|
TV’s rear panel
If the TV does not have the HDMI terminal
Connect the TV with the Audio/Video cable. (> 14)
About HDMI cable
•Use the High Speed HDMI cables.
•When outputting 1080p signal, please use HDMI Cables 5.0 meters or less.
•Recommended Panasonic HDMI cable part number:
When the unit is not to be used for a long time
To save power, unplug it from the household mains socket. This unit consumes a small amount of power, even when the unit is in standby mode.
[approx. 1.1 W (“Power Save in Standby” is activated)]
•The HDMI connection supports VIERA Link “HDAVI Control” (> 62).
•You cannot connect this unit to DVI devices that are incompatible with HDCP.
Depending on the device, images may not display properly or at all when connecting with a DVI/HDMI switching cable. (Audio cannot be output.)
•If you are connecting to a TV that is only compatible with 2 channel audio output, audio with 3 channels or more will be down mixed and output as 2 channels, even if connecting with an HDMI cable. (Some discs cannot be down mixed.)
VQT4C71 13
