PLANET IP PBX user’s manual
Note: If the IP PBX was shut down abnormally, Select Service
|
|
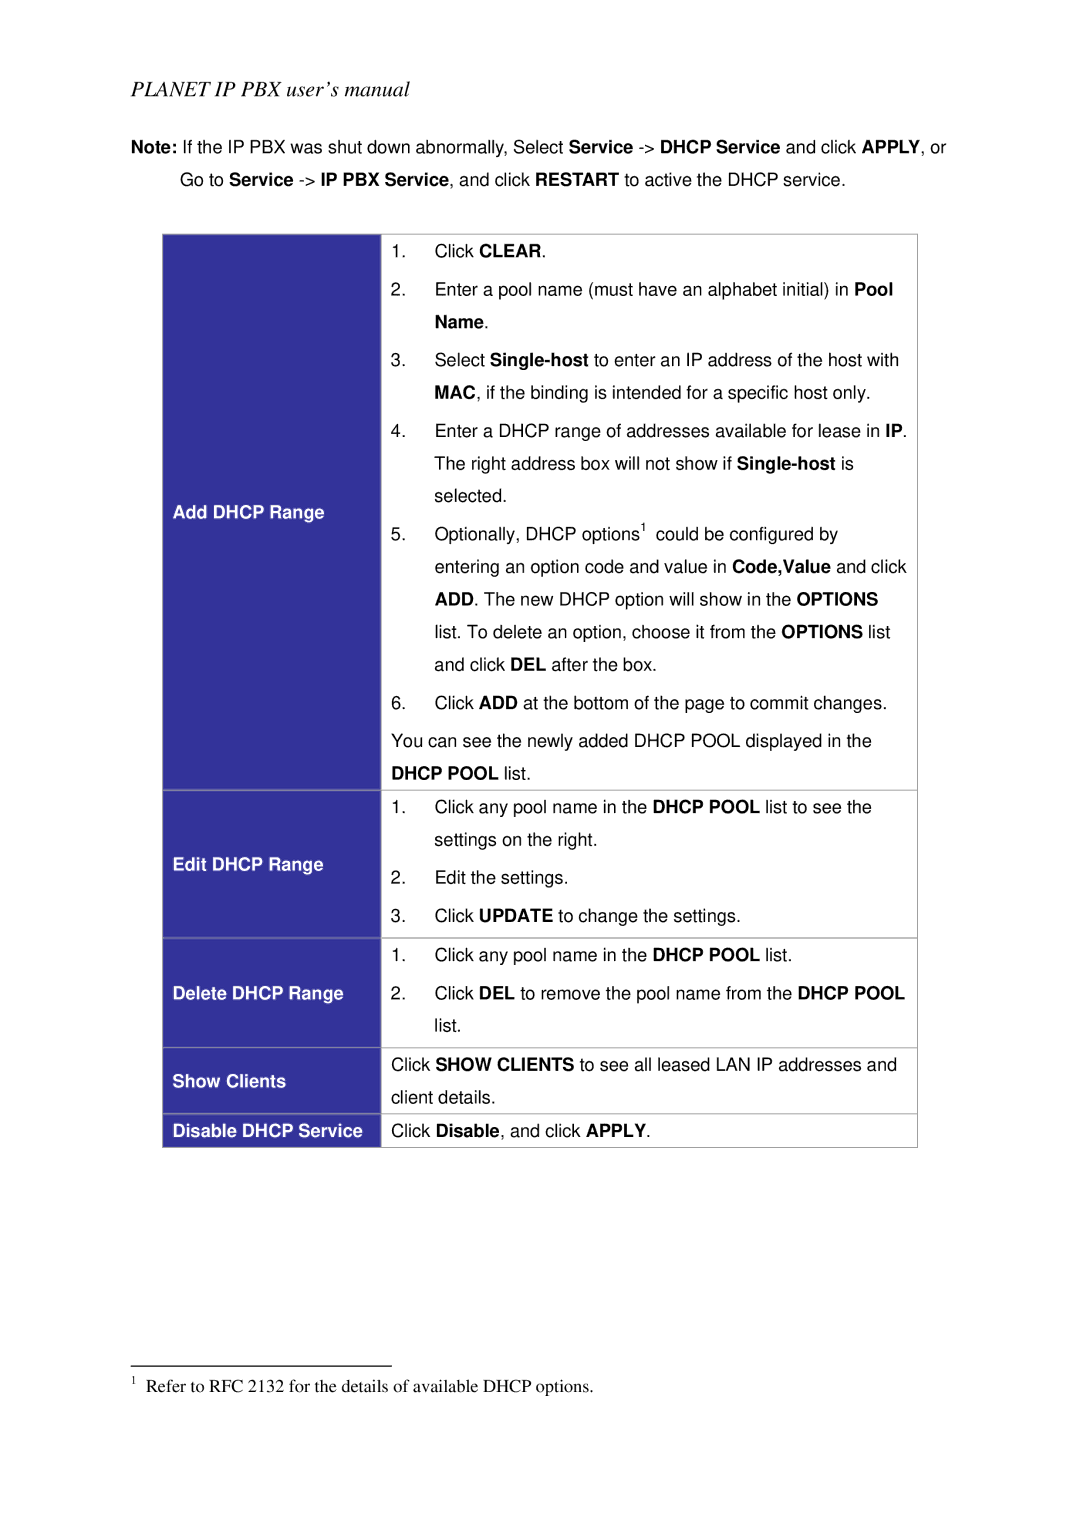
| 1. | Click CLEAR. |
|
|
| 2. | Enter a pool name (must have an alphabet initial) in Pool |
|
|
|
| Name. |
|
|
| 3. | Select |
|
|
|
| MAC, if the binding is intended for a specific host only. |
|
|
| 4. | Enter a DHCP range of addresses available for lease in IP. |
|
|
|
| The right address box will not show if |
| Add DHCP Range |
|
| selected. |
|
| 5. | Optionally, DHCP options1 could be configured by | |
|
|
| ||
|
|
|
| entering an option code and value in Code,Value and click |
|
|
|
| ADD. The new DHCP option will show in the OPTIONS |
|
|
|
| list. To delete an option, choose it from the OPTIONS list |
|
|
|
| and click DEL after the box. |
|
|
| 6. | Click ADD at the bottom of the page to commit changes. |
|
|
| You can see the newly added DHCP POOL displayed in the | |
|
|
| DHCP POOL list. | |
|
|
| 1. | Click any pool name in the DHCP POOL list to see the |
|
|
|
| settings on the right. |
| Edit DHCP Range |
| 2. | Edit the settings. |
|
|
| ||
|
|
| 3. | Click UPDATE to change the settings. |
|
|
|
|
|
|
|
| 1. | Click any pool name in the DHCP POOL list. |
| Delete DHCP Range |
| 2. | Click DEL to remove the pool name from the DHCP POOL |
|
|
|
| list. |
|
|
|
| |
| Show Clients |
| Click SHOW CLIENTS to see all leased LAN IP addresses and | |
|
| client details. | ||
|
|
| ||
| Disable DHCP Service |
| Click Disable, and click APPLY. | |
|
|
|
|
|
1Refer to RFC 2132 for the details of available DHCP options.