Holsten1AE_Basic_FM.book Page 12 Monday, November 6, 2000 8:10 PM
Faxing
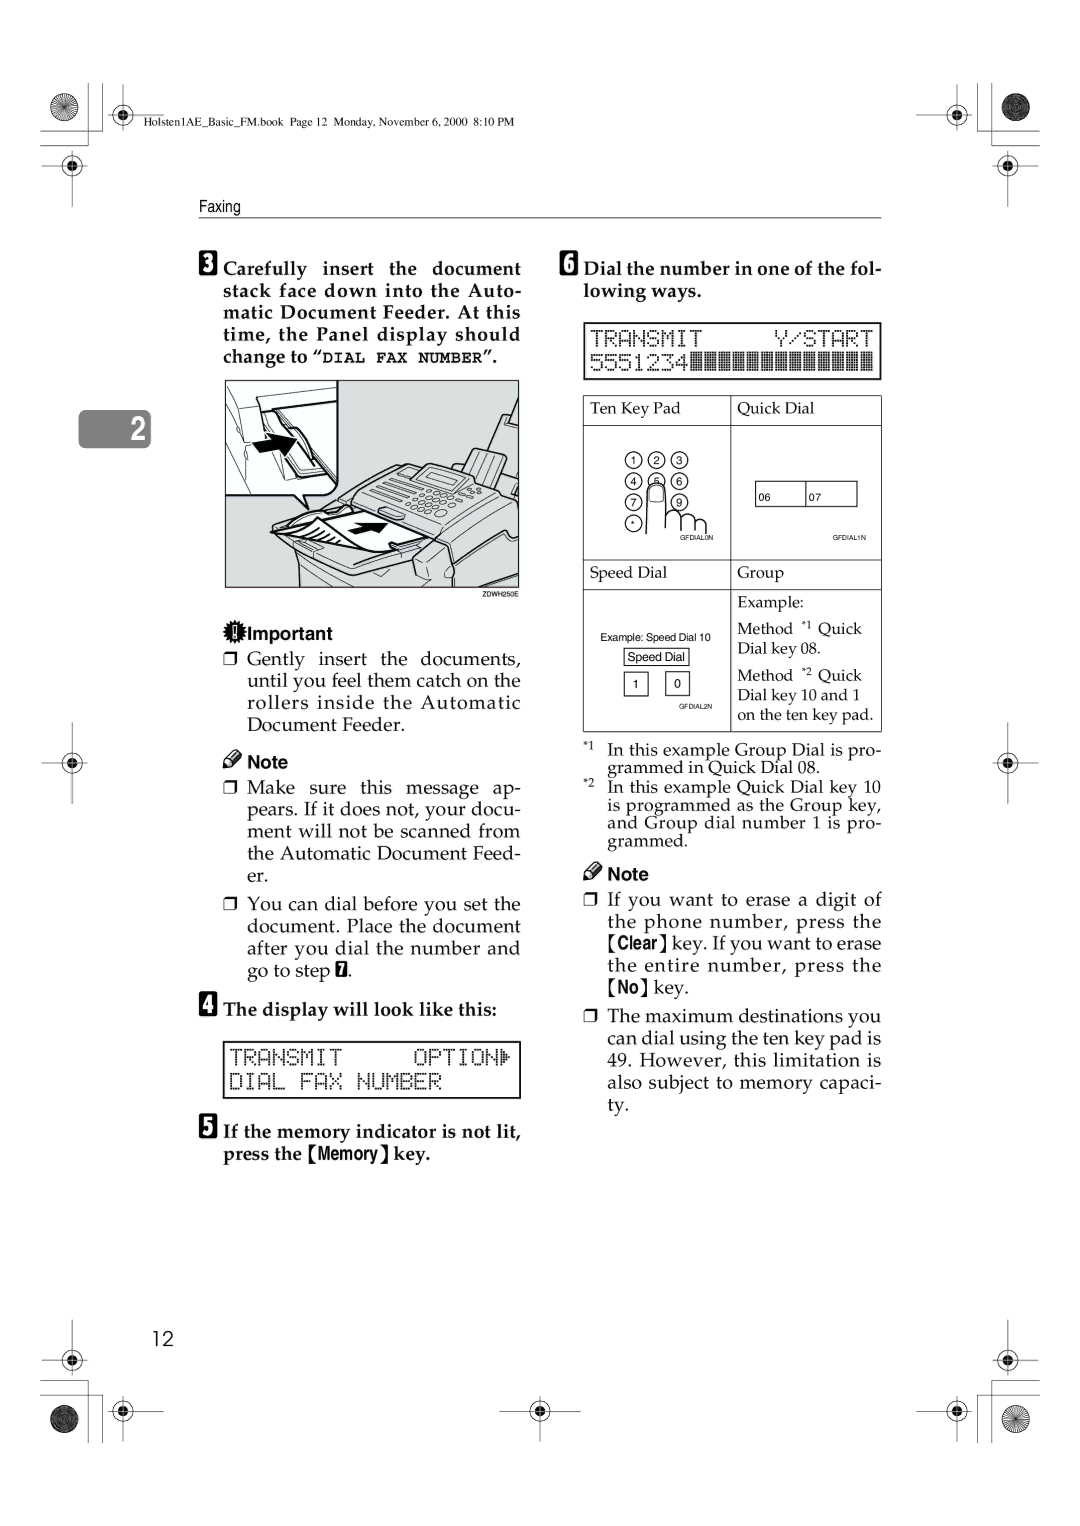
C Carefully insert the document stack face down into the Auto- matic Document Feeder. At this time, the Panel display should change to “DIAL FAX NUMBER”.
2 |
Important |
❒Gently insert the documents, until you feel them catch on the rollers inside the Automatic Document Feeder.
![]()
![]() Note
Note
❒Make sure this message ap- pears. If it does not, your docu- ment will not be scanned from the Automatic Document Feed- er.
❒You can dial before you set the document. Place the document after you dial the number and go to step G.
D The display will look like this:
TRANSMIT OPTIONi
DIAL FAX NUMBER
E If the memory indicator is not lit, press the {Memory} key.
F Dial the number in one of the fol- lowing ways.
TRANSMIT Y/START 5551234kkkkkkkkkkkkk
Ten Key Pad | Quick Dial |
| ||||
1 | 2 | 3 |
|
|
| |
4 | 5 | 6 |
|
|
| |
7 |
| 9 | 06 | 07 | ||
|
|
|
| |||
* |
|
|
|
|
| |
|
| GFDIAL0N |
|
| GFDIAL1N | |
Speed Dial |
| Group |
|
| ||
|
|
| Example: |
|
| |
Example: Speed Dial 10 | Method *1 | Quick | ||||
Dial key 08. | ||||||
Speed Dial | ||||||
|
|
| ||||
1 |
| 0 | Method *2 | Quick | ||
| Dial key 10 and 1 | |||||
|
| GFDIAL2N | ||||
|
| on the ten key pad. | ||||
|
|
| ||||
*1 In this example Group Dial is pro- grammed in Quick Dial 08.
*2 In this example Quick Dial key 10 is programmed as the Group key, and Group dial number 1 is pro- grammed.
![]()
![]() Note
Note
❒If you want to erase a digit of the phone number, press the {Clear} key. If you want to erase the entire number, press the {No} key.
❒The maximum destinations you can dial using the ten key pad is 49. However, this limitation is also subject to memory capaci- ty.
12