Operation
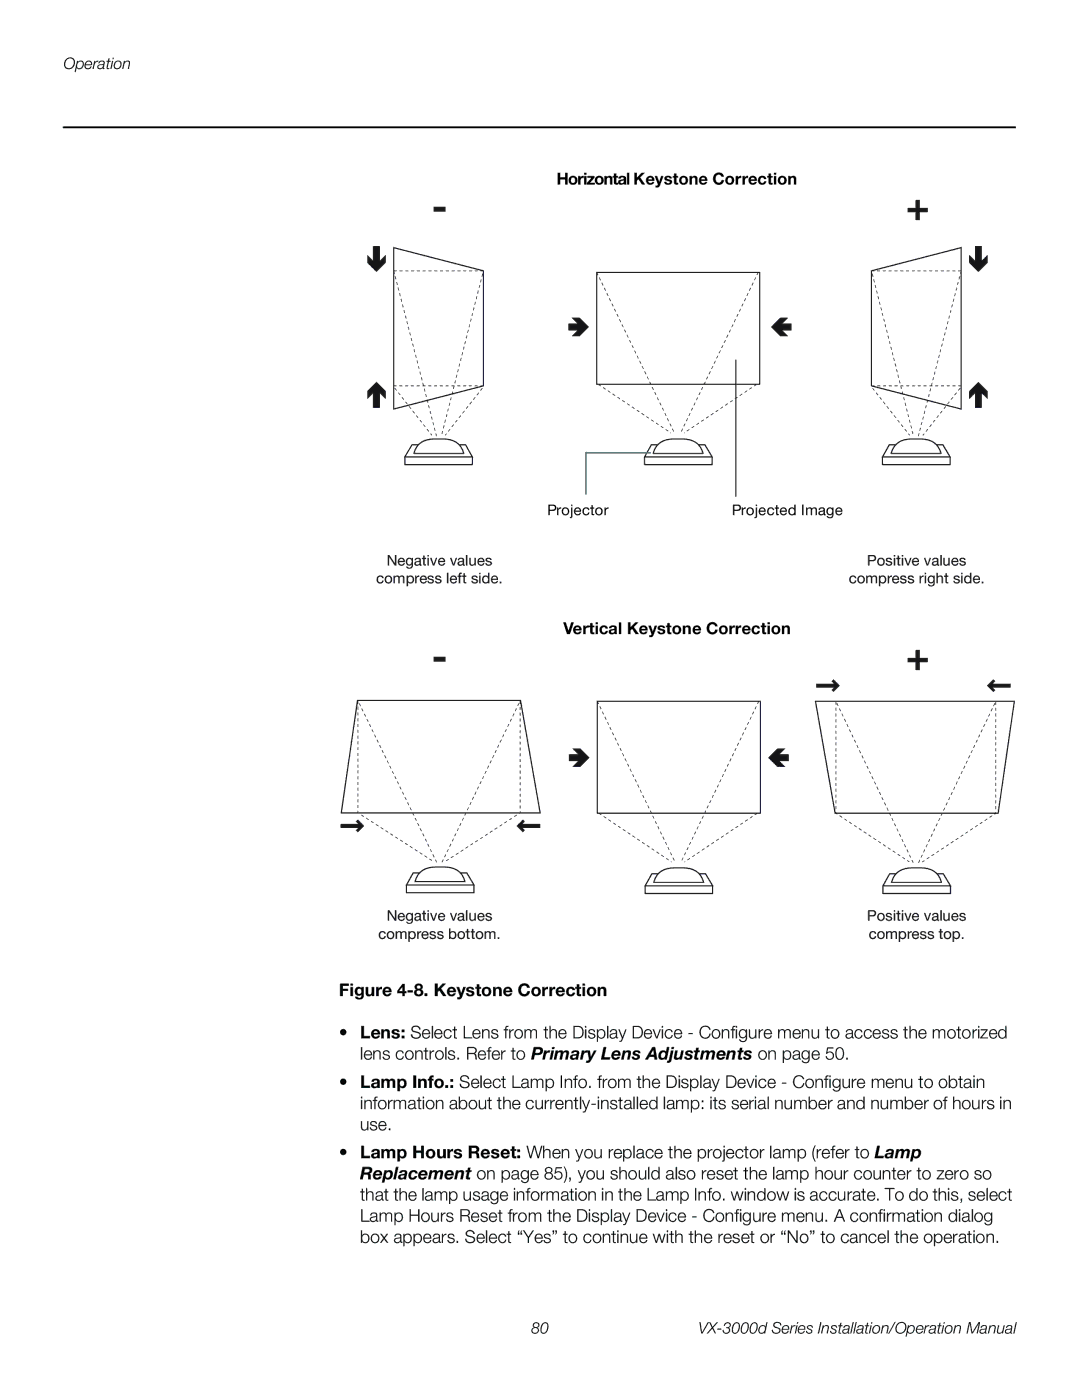
- | Horizontal Keystone Correction |
+ |
Projector | Projected Image |
Negative values |
|
|
|
|
|
|
|
|
| Positive values |
compress left side. |
|
|
|
|
|
|
|
|
| compress right side. |
- |
| Vertical Keystone Correction | ||||||||
+ | ||||||||||
|
|
|
|
|
|
|
|
|
|
|
|
|
|
|
|
|
|
|
|
|
|
|
|
|
|
|
|
|
|
|
|
|
|
|
|
|
|
|
|
|
|
|
|
|
|
|
|
|
|
|
|
|
|
|
Negative values | Positive values |
compress bottom. | compress top. |
Figure 4-8. Keystone Correction
•Lens: Select Lens from the Display Device - Configure menu to access the motorized lens controls. Refer to Primary Lens Adjustments on page 50.
•Lamp Info.: Select Lamp Info. from the Display Device - Configure menu to obtain
information about the
•Lamp Hours Reset: When you replace the projector lamp (refer to Lamp Replacement on page 85), you should also reset the lamp hour counter to zero so that the lamp usage information in the Lamp Info. window is accurate. To do this, select Lamp Hours Reset from the Display Device - Configure menu. A confirmation dialog
box appears. Select “Yes” to continue with the reset or “No” to cancel the operation.
80 |