Identification of features
Side
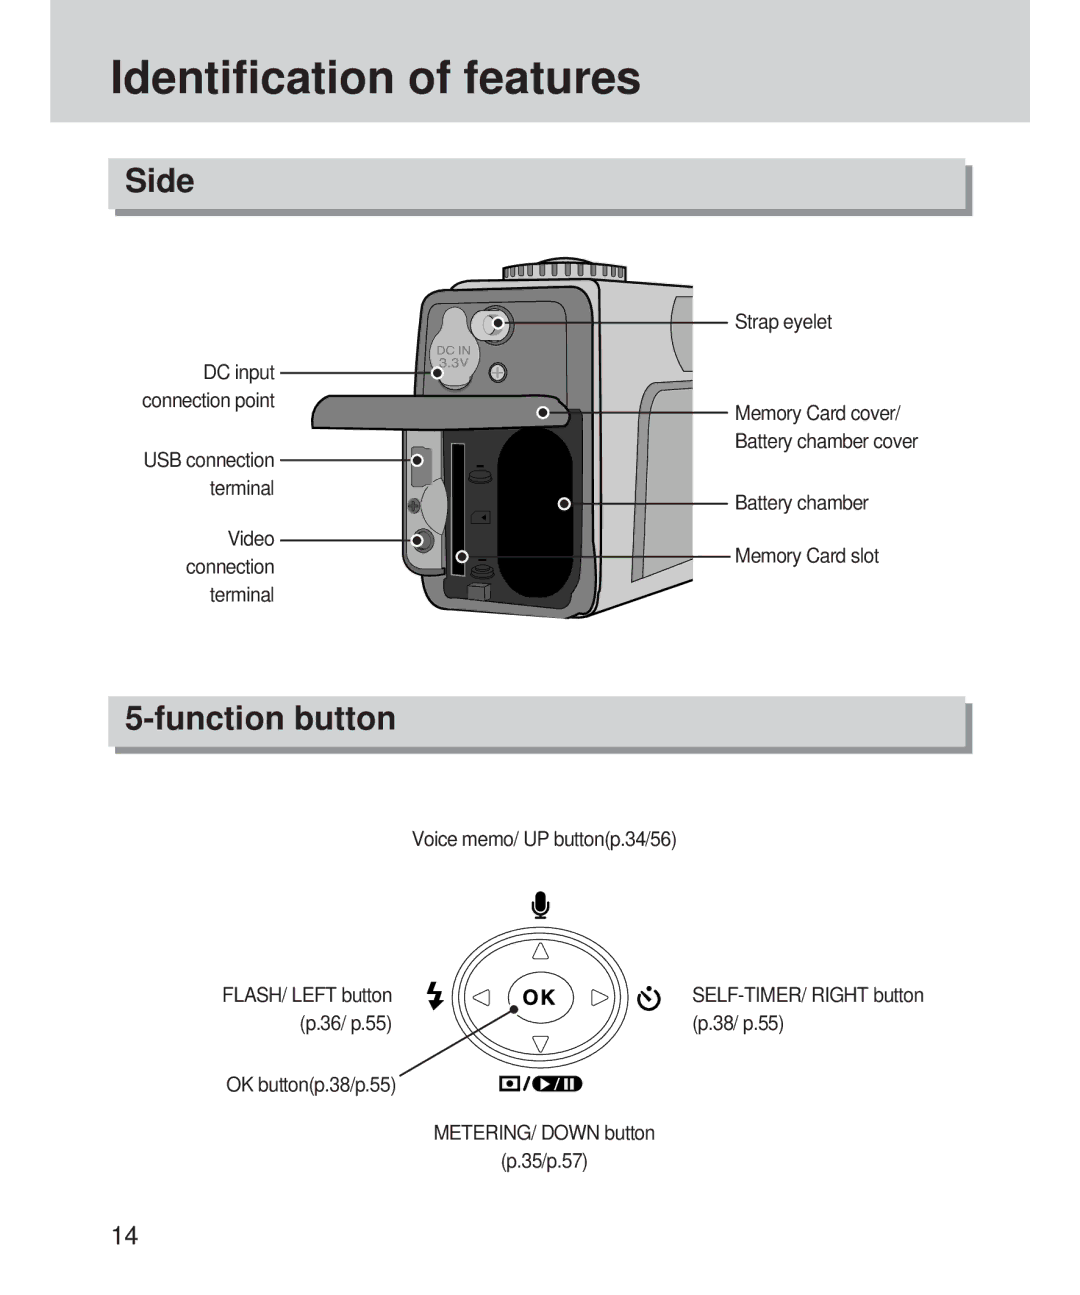
| Strap eyelet | |
DC input |
| |
connection point | Memory Card cover/ | |
| ||
USB connection | Battery chamber cover | |
| ||
terminal | Battery chamber | |
| ||
Video | Memory Card slot | |
connection | ||
| ||
terminal |
|
5-function button
Voice memo/ UP button(p.34/56)
FLASH/ LEFT button | |
(p.36/ p.55) | (p.38/ p.55) |
OK button(p.38/p.55)
METERING/ DOWN button
(p.35/p.57)
14