Chapter 3. Hardware Installation
Removing a Hard Disk Drive
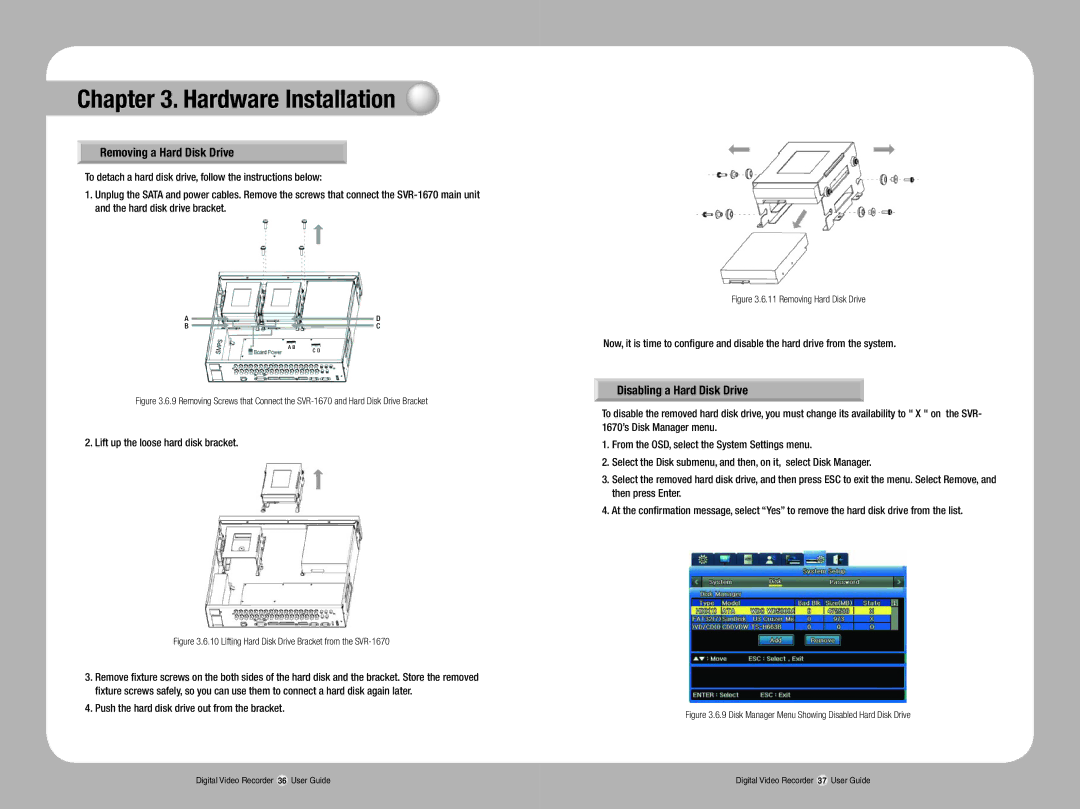
To detach a hard disk drive, follow the instructions below:
1.Unplug the SATA and power cables. Remove the screws that connect the
AD
BC
A B C D
Figure 3.6.9 Removing Screws that Connect the SVR-1670 and Hard Disk Drive Bracket
2. Lift up the loose hard disk bracket.
Figure 3.6.10 Lifting Hard Disk Drive Bracket from the SVR-1670
3.Remove fixture screws on the both sides of the hard disk and the bracket. Store the removed fixture screws safely, so you can use them to connect a hard disk again later.
4.Push the hard disk drive out from the bracket.
Figure 3.6.11 Removing Hard Disk Drive
Now, it is time to configure and disable the hard drive from the system.
Disabling a Hard Disk Drive
To disable the removed hard disk drive, you must change its availability to " X " on the SVR- 1670’s Disk Manager menu.
1.From the OSD, select the System Settings menu.
2.Select the Disk submenu, and then, on it, select Disk Manager.
3.Select the removed hard disk drive, and then press ESC to exit the menu. Select Remove, and then press Enter.
4.At the confirmation message, select “Yes” to remove the hard disk drive from the list.
Figure 3.6.9 Disk Manager Menu Showing Disabled Hard Disk Drive
Digital Video Recorder 36 User Guide | Digital Video Recorder 37 User Guide |
