ENGLISH

DEUTSCH

Advanced Shooting

Weiterführende Aufnahmefunktionen

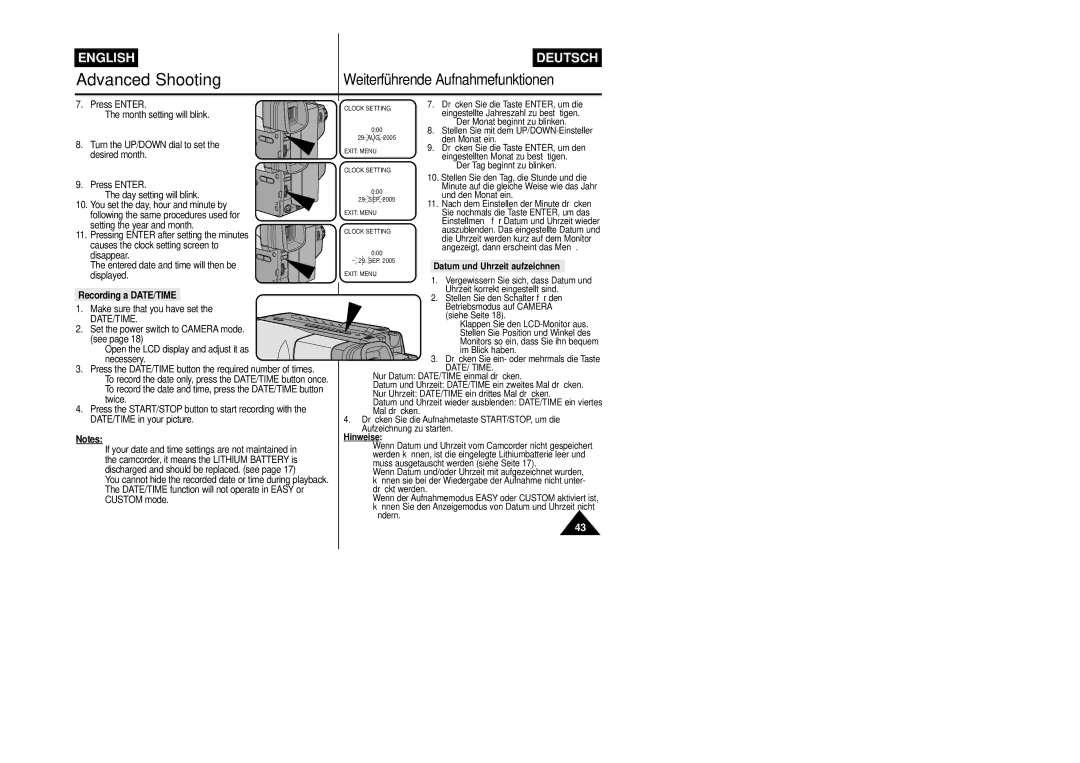
7. Press ENTER.

The month setting will blink.

8. Turn the UP/DOWN dial to set the desired month.

CLOCK SETTING

0:00

29.AUG. 2005

EXIT: MENU

CLOCK SETTING

7.Drücken Sie die Taste ENTER, um die eingestellte Jahreszahl zu bestätigen.

Der Monat beginnt zu blinken.

8.Stellen Sie mit dem UP/DOWN-Einsteller den Monat ein.

9.Drücken Sie die Taste ENTER, um den eingestellten Monat zu bestätigen.

Der Tag beginnt zu blinken.

9. Press ENTER.

The day setting will blink.

10. You set the day, hour and minute by following the same procedures used for setting the year and month.

11. Pressing ENTER after setting the minutes causes the clock setting screen to disappear.

The entered date and time will then be displayed.

0:00

29.SEP. 2005

EXIT: MENU

CLOCK SETTING

0:00

29.SEP. 2005

EXIT: MENU

10.Stellen Sie den Tag, die Stunde und die Minute auf die gleiche Weise wie das Jahr und den Monat ein.

11.Nach dem Einstellen der Minute drücken Sie nochmals die Taste ENTER, um das Einstellmenü für Datum und Uhrzeit wieder auszublenden. Das eingestellte Datum und die Uhrzeit werden kurz auf dem Monitor angezeigt, dann erscheint das Menü.

Datum und Uhrzeit aufzeichnen

Recording a DATE/TIME

1.Make sure that you have set the DATE/TIME.

2.Set the power switch to CAMERA mode. (see page 18)

Open the LCD display and adjust it as necessery.

3.Press the DATE/TIME button the required number of times.

To record the date only, press the DATE/TIME button once.

To record the date and time, press the DATE/TIME button twice.

4.Press the START/STOP button to start recording with the DATE/TIME in your picture.

Notes:

If your date and time settings are not maintained in the camcorder, it means the LITHIUM BATTERY is discharged and should be replaced. (see page 17)

You cannot hide the recorded date or time during playback.

The DATE/TIME function will not operate in EASY or CUSTOM mode.

1.Vergewissern Sie sich, dass Datum und Uhrzeit korrekt eingestellt sind.

2.Stellen Sie den Schalter für den Betriebsmodus auf CAMERA

(siehe Seite 18).

Klappen Sie den LCD-Monitor aus. Stellen Sie Position und Winkel des Monitors so ein, dass Sie ihn bequem im Blick haben.

3. Drücken Sie ein- oder mehrmals die Taste DATE/ TIME.

Nur Datum: DATE/TIME einmal drücken.

Datum und Uhrzeit: DATE/TIME ein zweites Mal drücken.

Nur Uhrzeit: DATE/TIME ein drittes Mal drücken.

Datum und Uhrzeit wieder ausblenden: DATE/TIME ein viertes Mal drücken.

4.Drücken Sie die Aufnahmetaste START/STOP, um die Aufzeichnung zu starten.

Hinweise:

Wenn Datum und Uhrzeit vom Camcorder nicht gespeichert werden können, ist die eingelegte Lithiumbatterie leer und muss ausgetauscht werden (siehe Seite 17).

Wenn Datum und/oder Uhrzeit mit aufgezeichnet wurden, können sie bei der Wiedergabe der Aufnahme nicht unter- drückt werden.

Wenn der Aufnahmemodus EASY oder CUSTOM aktiviert ist, können Sie den Anzeigemodus von Datum und Uhrzeit nicht ändern.

43

Page 43
Image 43
Samsung VP-L800/XEE manual Datum und Uhrzeit aufzeichnen Recording a DATE/TIME, Hinweise

VP-L800/XEE specifications

The Samsung VP-L800/XEE is a compact and versatile camcorder designed for both amateur and semi-professional video enthusiasts. This device seamlessly combines advanced features with user-friendly operation, making it an ideal choice for capturing special moments or creating content for various platforms.

One of the standout features of the VP-L800/XEE is its high-quality video recording capabilities. It boasts a 700x digital zoom and a 34x optical zoom, allowing users to capture stunning footage from great distances while maintaining clarity and detail. This is particularly useful for wildlife enthusiasts or anyone looking to shoot events where the action may be far from the camera.

The camcorder supports video recording in various formats, including MPEG-2 and MPEG-4, offering flexibility depending on user needs. Its built-in USB connectivity simplifies the process of transferring videos to computers or external storage devices, enabling quick and efficient editing and sharing. The inclusion of a SD/SDHC memory card slot provides users with the capability to expand storage as required, making it easier to take extended videos without worrying about space.

In terms of image stabilization, the VP-L800/XEE features advanced Digital Image Stabilization technology that helps reduce the effects of camera shake, producing smoother footage, especially during active shooting scenarios. Additionally, its 2.7-inch LCD screen allows for easy framing and playback, making it straightforward to review clips on the go.

Sound quality is equally important for video content, and the VP-L800/XEE includes a built-in microphone that captures clear audio, while an external mic input is available for those who require higher sound fidelity. This versatility accommodates various recording environments, from quiet indoor settings to bustling outdoor events.

The camcorder also integrates convenient automatic shooting modes, which adjust settings based on lighting conditions, allowing users to focus more on the content rather than technical adjustments. Its lightweight and ergonomic design make it comfortable to hold during extended shoots, while a variety of color options allow users to select a device that suits their personal style.

In conclusion, the Samsung VP-L800/XEE is a well-rounded camcorder, blending essential features with outstanding performance to meet the demands of users looking for a reliable video recording device. With its impressive zoom capabilities, user-friendly interface, and solid audio-visual features, it is a powerful tool for creating memorable content.