Assigning Pictures
Assign a picture as a screen saver or as a picture ID for a Contacts entry.
1.Take a picture. (See steps
2.With the picture displayed, press OPTIONS (right softkey) > Set as and select an option.
■Picture ID to assign the picture to a Contacts entry. Highlight an entry and press ![]() twice to assign the picture.
twice to assign the picture.
■Screensaver to assign the picture as a screen saver. Press ![]() to assign the picture.
to assign the picture.
Tip | You can also assign pictures from the My Albums menu. |
| See “In Phone Folder Options” on page 76 or |
| “Managing Online Pictures From Your Phone” on |
| page 80. |
|
|
Camera Mode Options
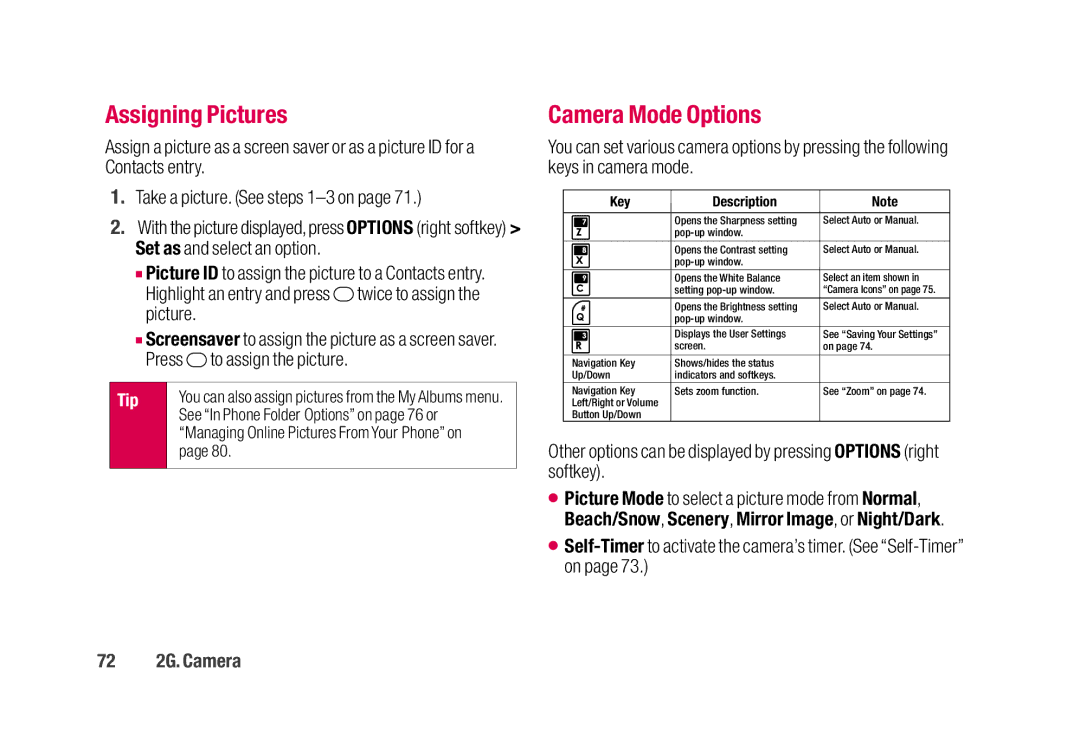
You can set various camera options by pressing the following keys in camera mode.
Key | Description | Note |
|
|
|
| Opens the Sharpness setting | Select Auto or Manual. |
|
| |
| Opens the Contrast setting | Select Auto or Manual. |
|
| |
| Opens the White Balance | Select an item shown in |
| setting | “Camera Icons” on page 75. |
| Opens the Brightness setting | Select Auto or Manual. |
|
| |
| Displays the User Settings | See “Saving Your Settings” |
| screen. | on page 74. |
Navigation Key | Shows/hides the status |
|
Up/Down | indicators and softkeys. |
|
Navigation Key | Sets zoom function. | See “Zoom” on page 74. |
Left/Right or Volume |
|
|
Button Up/Down |
|
|
Other options can be displayed by pressing OPTIONS (right softkey).
⬤Picture Mode to select a picture mode from Normal, Beach/Snow, Scenery, Mirror Image, or Night/Dark.