![]() 2
2
ADVANCED PRINTING (WINDOWS)
Printing using the print hold function (part 1)
Selecting print hold settings in the printer driver at the time of printing
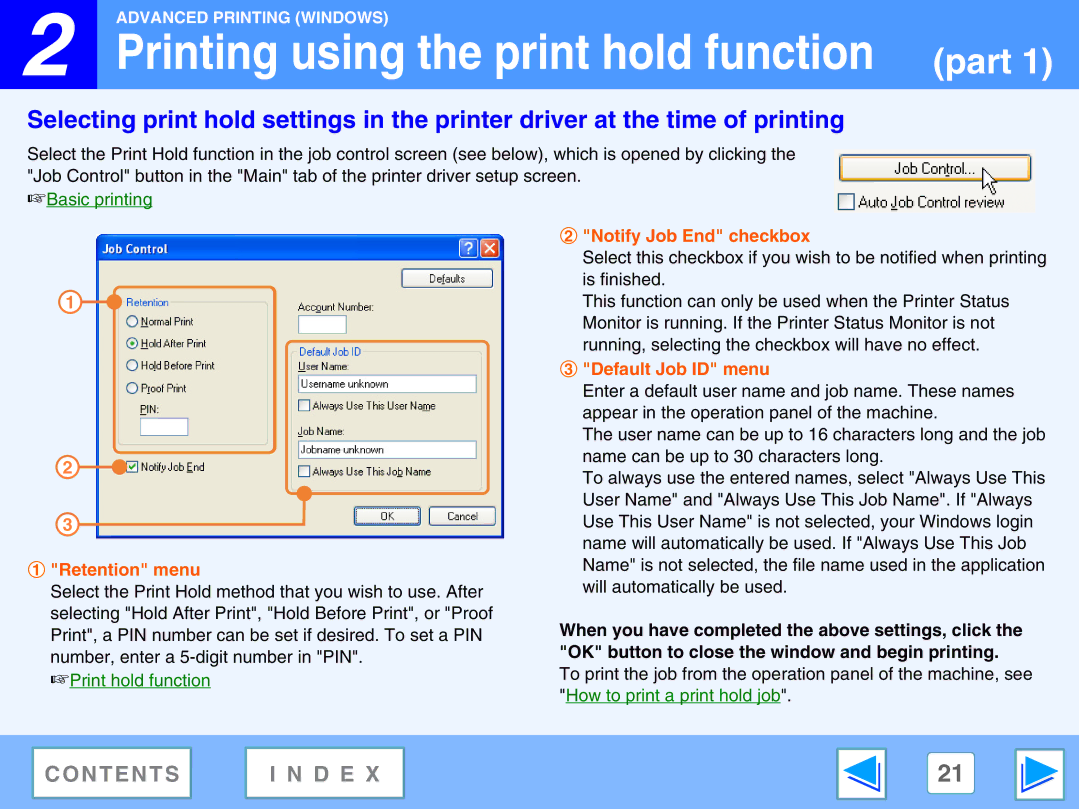
Select the Print Hold function in the job control screen (see below), which is opened by clicking the "Job Control" button in the "Main" tab of the printer driver setup screen.
☞Basic printing
1
2
3![]()
1"Retention" menu
Select the Print Hold method that you wish to use. After selecting "Hold After Print", "Hold Before Print", or "Proof Print", a PIN number can be set if desired. To set a PIN number, enter a
☞Print hold function
2"Notify Job End" checkbox
Select this checkbox if you wish to be notified when printing is finished.
This function can only be used when the Printer Status Monitor is running. If the Printer Status Monitor is not running, selecting the checkbox will have no effect.
3"Default Job ID" menu
Enter a default user name and job name. These names appear in the operation panel of the machine.
The user name can be up to 16 characters long and the job name can be up to 30 characters long.
To always use the entered names, select "Always Use This User Name" and "Always Use This Job Name". If "Always Use This User Name" is not selected, your Windows login name will automatically be used. If "Always Use This Job Name" is not selected, the file name used in the application will automatically be used.
When you have completed the above settings, click the "OK" button to close the window and begin printing.
To print the job from the operation panel of the machine, see
"How to print a print hold job".
CONTENTS | I N D E X | 21 |
|
|
|