P R E P A R A T I O N | For Machines Mfg. Since 3/11 |
Test Run
After all preparation steps have been completed, the machine and its safety features must be tested to ensure correct operation. If you discover a problem with the operation of the machine or its safety components, shut the machine down, disconnect it from power, and do not operate it further until you have resolved the problem.
A Troubleshooting section is provided, starting on Page 86, to assist you with solutions if a problem occurs or if the lathe does not function as described in this section.
If you need additional help after reviewing the troubleshooting section, or you are not confident troubleshooting the machine on your own, contact our tech support at (360)
To test run your machine:
1.Read and follow the safety instructions at the beginning of the manual, take all required safety precautions, and make sure all previous preparation steps discussed in this manual have been followed and completed.
2.Clear away all tools and objects used during assembly, lubrication, and preparation.
3.Make sure the master power switch shown in Figure 28 is turned OFF.
Master Power ![]()
Switch
Figure 28. Location of the master power switch.
4.DISCONNECT LATHE FROM POWER!
5.Make sure that the chuck and jaws, if installed, are secure (refer to Chuck Installation on Page 35), then lower the chuck guard.
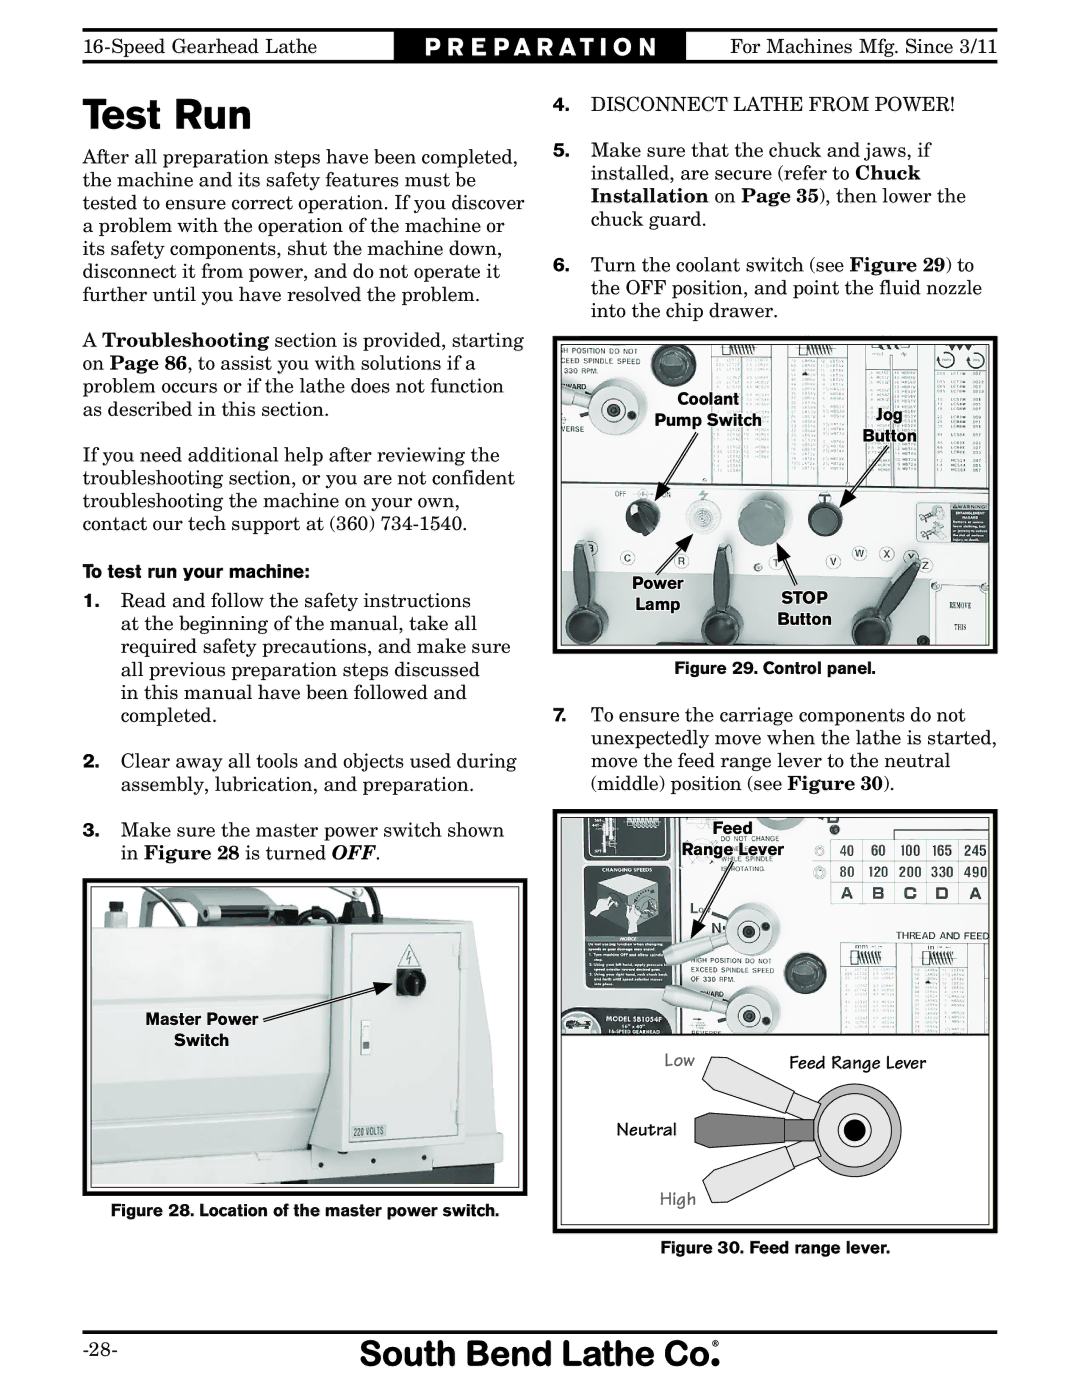
6.Turn the coolant switch (see Figure 29) to the OFF position, and point the fluid nozzle into the chip drawer.
Coolant
Pump SwitchJog
Button
Power
L![]()
![]() ampSTOP
ampSTOP
Button
Figure 29. Control panel.
7.To ensure the carriage components do not unexpectedly move when the lathe is started, move the feed range lever to the neutral (middle) position (see Figure 30).
Feed
Range Lever
Low | Feed Range Lever |
Neutral
High ![]()