For Machines Mfg. Since 3/11 | O P E R A T I O N |
Chuck Installation
To ensure accurate work, it is extremely important to make sure the spindle nose and chuck mating surfaces/tapers are clean. Even a small amount of lint or debris can affect accuracy.
The chuck is properly installed when all camlocks are tight, the spindle and chuck tapers firmly lock together, and the back of chuck is firmly seated against the face of the spindle all the way
To install the chuck:
1.DISCONNECT LATHE FROM POWER!
2.Use an appropriate lifting, support, or protective device to protect the ways and support the chuck.
3.Clean and lightly oil the camlock studs, then thoroughly clean the mating surfaces of the spindle and chuck.
4.Install the chuck by inserting the camlock studs straight into the spindle cam holes.
Important: Avoid inserting the studs by pivoting them in from an angle or rotating the spindle. This can damage studs or bores.
CORRECT | INCORRECT |
Figure 37. Inserting camlock studs into spindle bores.
5.Incrementally tighten the camlocks in a
6.When the chuck is fully seated and all the camlocks are tight, verify that the cam line is between the two "V" marks on the spindle nose, as shown in the following figure.
Camlock between “V”s
Figure 38. Cam line positioned between the "V" marks
after the camlocks are fully tightened.
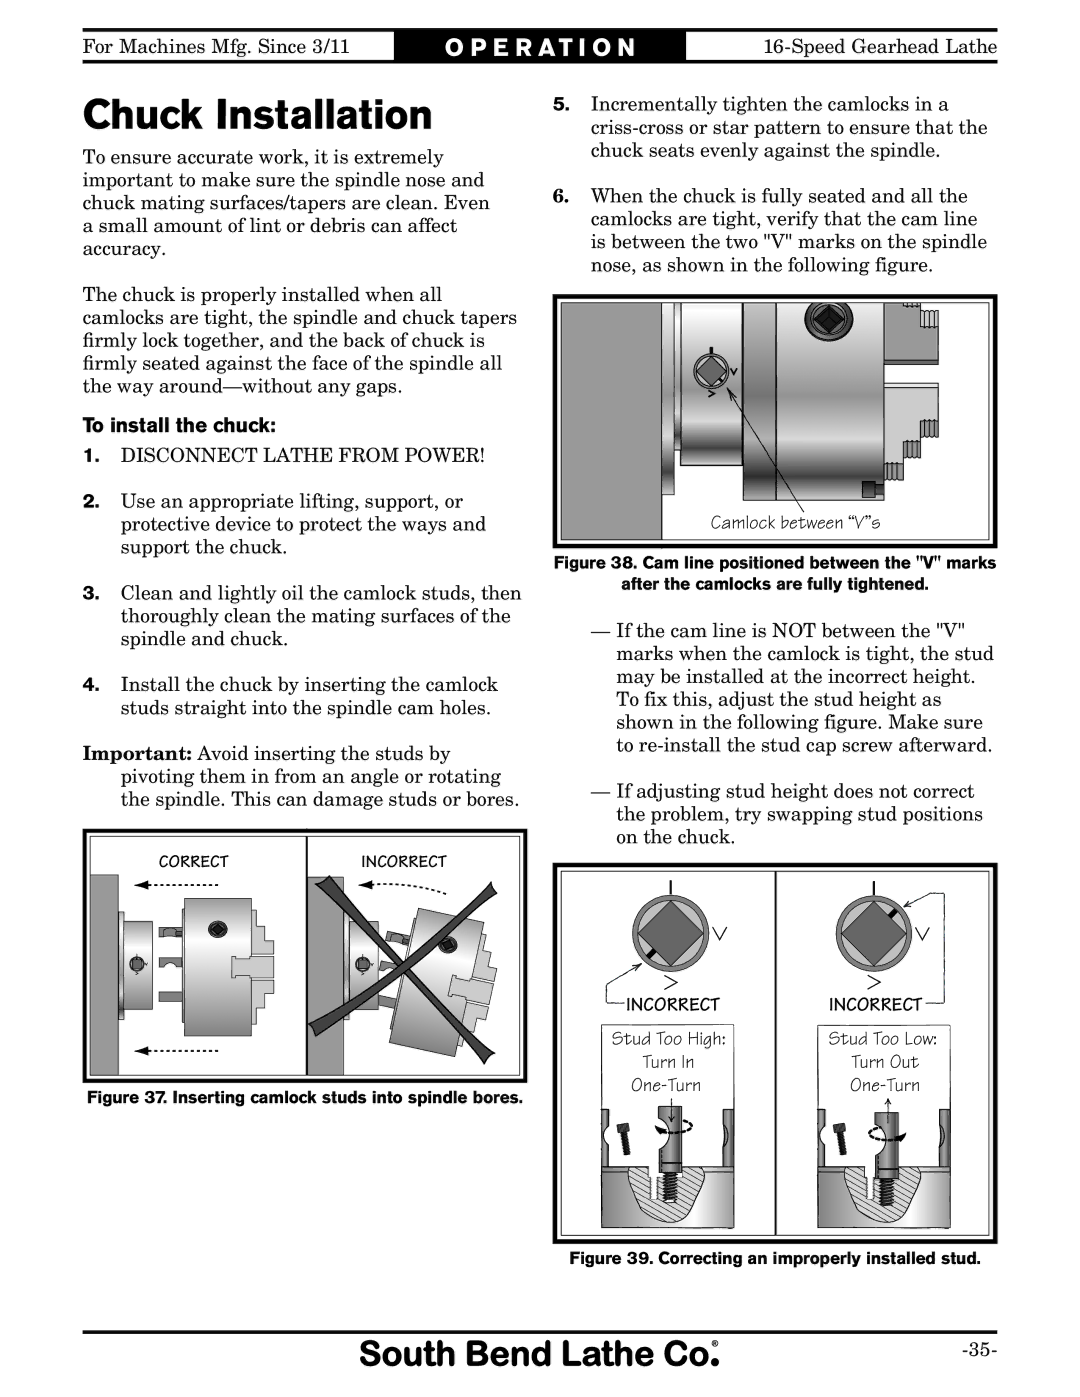
—If the cam line is NOT between the "V" marks when the camlock is tight, the stud may be installed at the incorrect height. To fix this, adjust the stud height as shown in the following figure. Make sure to
—If adjusting stud height does not correct the problem, try swapping stud positions on the chuck.
INCORRECT | INCORRECT |
Stud Too High: | Stud Too Low: |
Turn In | Turn Out |