For Machines Mfg. Since 3/11 | P R E P A R A T I O N |
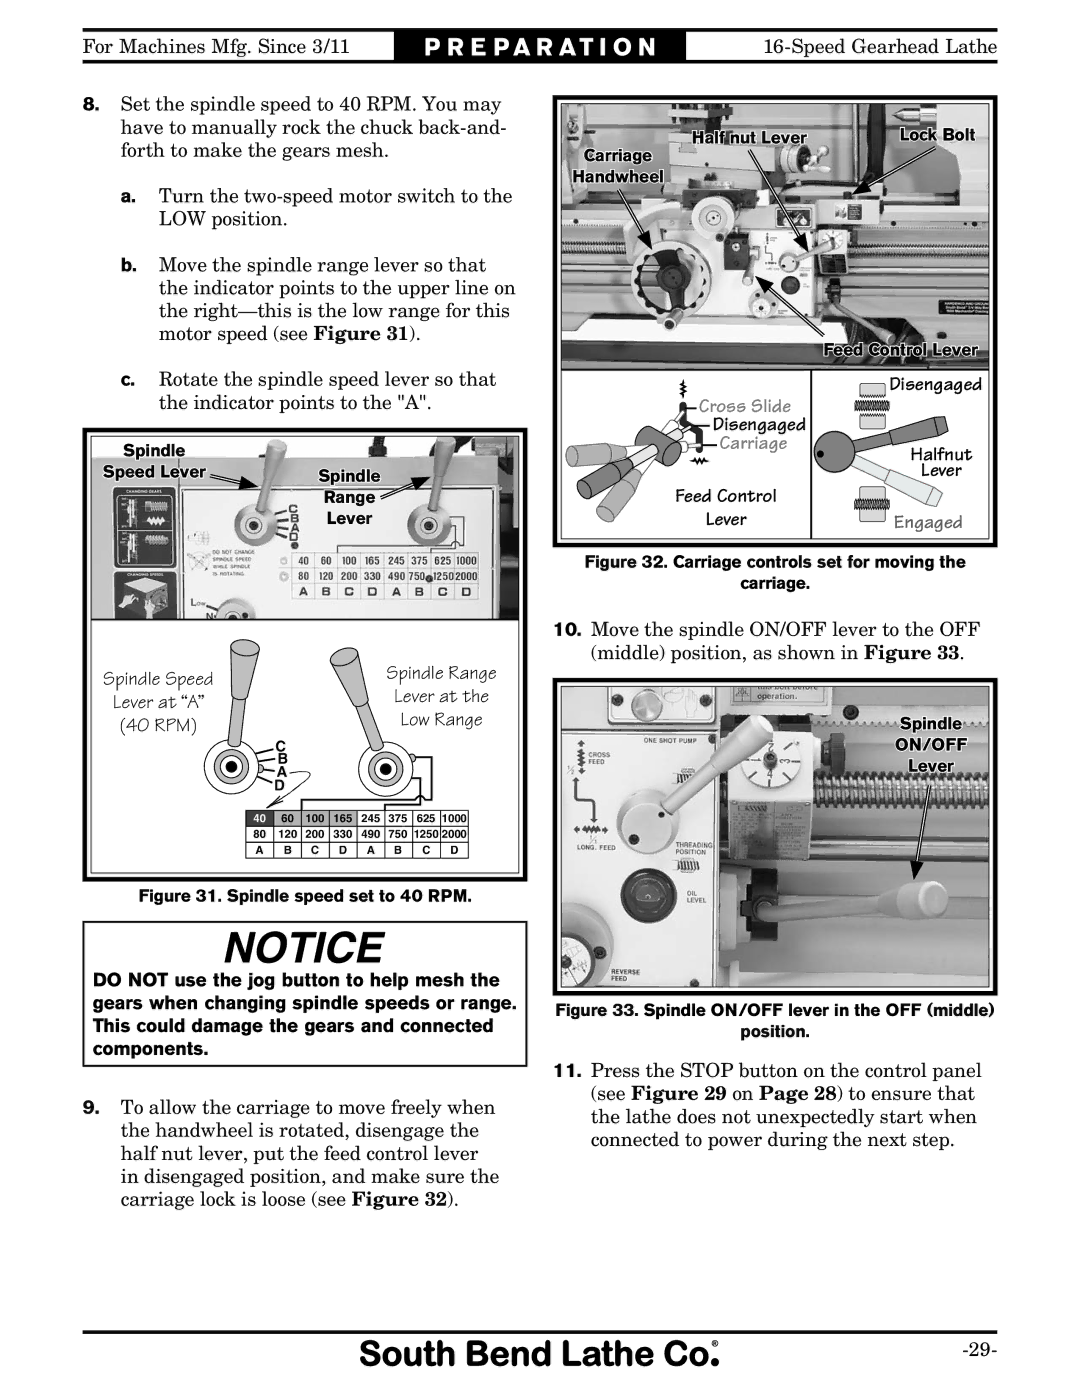
8.Set the spindle speed to 40 RPM. You may have to manually rock the chuck
a.Turn the
b.Move the spindle range lever so that the indicator points to the upper line on the
c.Rotate the spindle speed lever so that the indicator points to the "A".
Spindle |
|
|
|
|
|
|
|
Speed Lever |
| Spindle |
|
|
| ||
|
| Range |
|
|
| ||
|
|
| Lever |
|
|
| |
Spindle Speed |
|
|
|
| Spindle Range | ||
Lever at “A” |
|
|
|
| Lever at the | ||
(40 RPM) | C |
|
|
| Low Range | ||
|
|
|
|
|
|
| |
| B |
|
|
|
|
|
|
| A |
|
|
|
|
|
|
| D |
|
|
|
|
|
|
40 | 60 | 100 | 165 | 245 | 375 | 625 1000 | |
80 | 120 | 200 | 330 | 490 | 750 | 1250 2000 | |
A | B | C | D | A | B | C | D |
Figure 31. Spindle speed set to 40 RPM.
DO NOT use the jog button to help mesh the gears when changing spindle speeds or range. This could damage the gears and connected components.
9.To allow the carriage to move freely when the handwheel is rotated, disengage the half nut lever, put the feed control lever in disengaged position, and make sure the carriage lock is loose (see Figure 32).
Half nut Lever | Lock Bolt |
Carriage |
|
Handwheel |
|
| Feed Control Lever |
Cross Slide | Disengaged |
| |
Disengaged |
|
Carriage | Halfnut |
| |
| Lever |
Feed Control |
|
Lever | Engaged |
Figure 32. Carriage controls set for moving the
carriage.
10.Move the spindle ON/OFF lever to the OFF (middle) position, as shown in Figure 33.
Spindle
ON/OFF![]()
Lever
Figure 33. Spindle ON/OFF lever in the OFF (middle)
position.
11.Press the STOP button on the control panel (see Figure 29 on Page 28) to ensure that the lathe does not unexpectedly start when connected to power during the next step.
