Synchronization (Option) | The setup order for the different synchronization options |
|
|
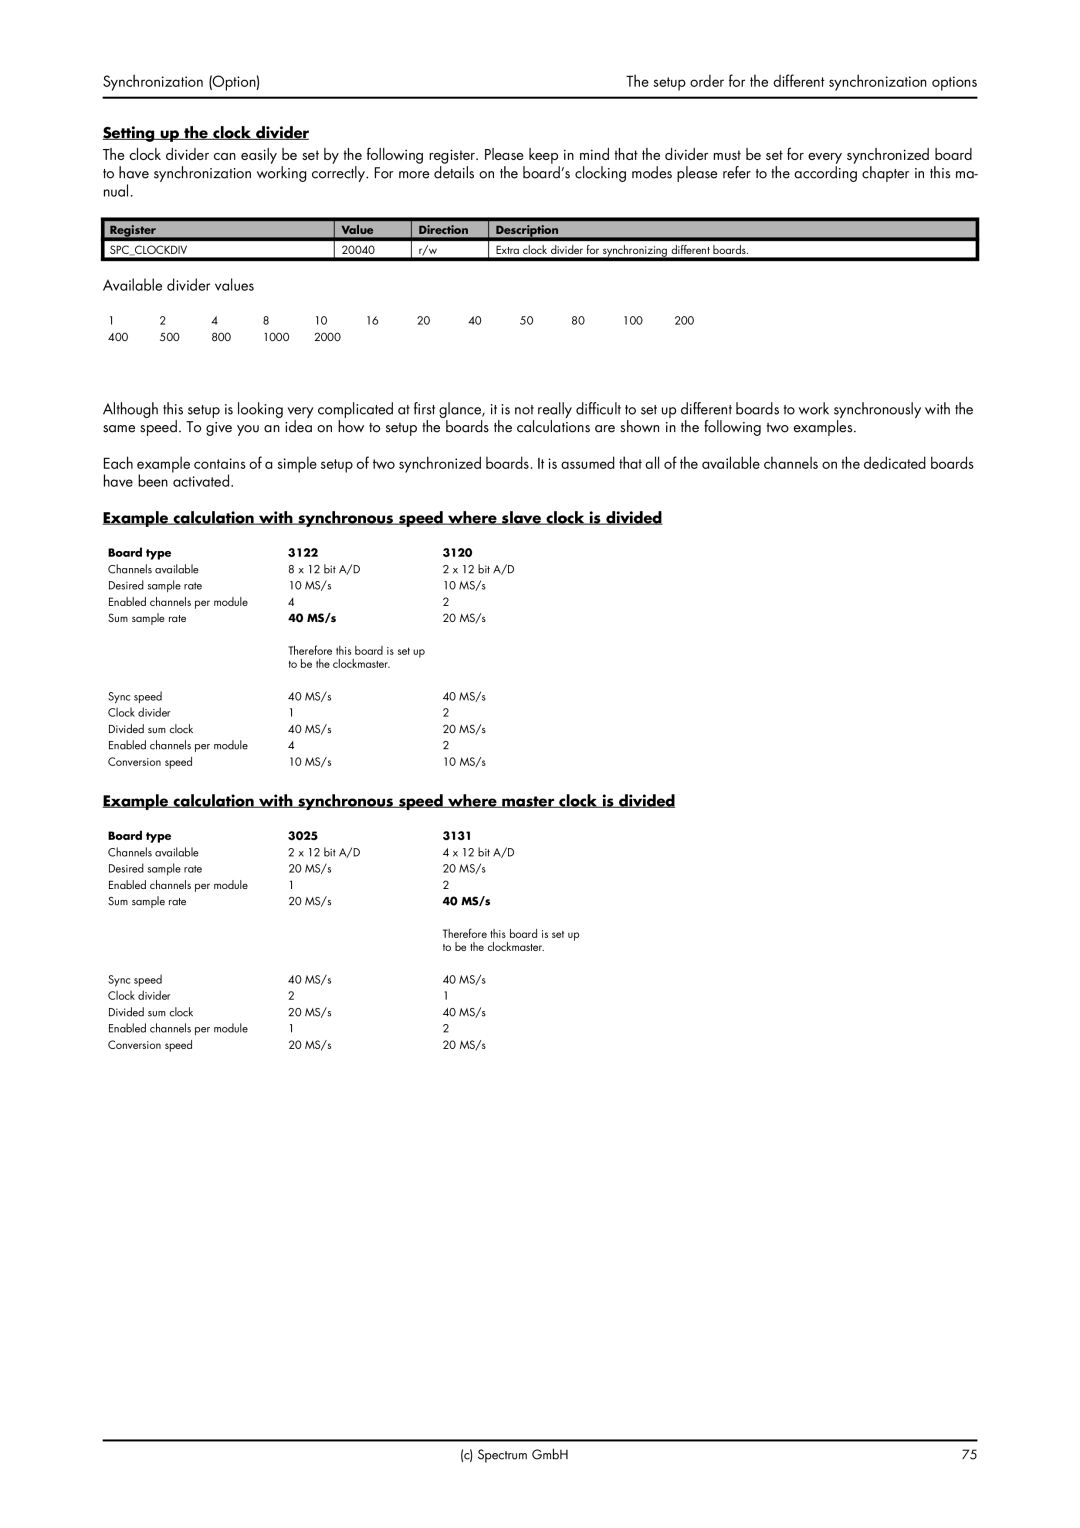
Setting up the clock divider
The clock divider can easily be set by the following register. Please keep in mind that the divider must be set for every synchronized board to have synchronization working correctly. For more details on the board’s clocking modes please refer to the according chapter in this ma- nual.
Register | Value | Direction | Description |
SPC_CLOCKDIV | 20040 | r/w | Extra clock divider for synchronizing different boards. |
Available divider values
1 | 2 | 4 | 8 | 10 | 16 | 20 | 40 | 50 | 80 | 100 | 200 |
400 | 500 | 800 | 1000 | 2000 |
|
|
|
|
|
|
|
Although this setup is looking very complicated at first glance, it is not really difficult to set up different boards to work synchronously with the same speed. To give you an idea on how to setup the boards the calculations are shown in the following two examples.
Each example contains of a simple setup of two synchronized boards. It is assumed that all of the available channels on the dedicated boards have been activated.
Example calculation with synchronous speed where slave clock is divided
Board type | 3122 | 3120 |
Channels available | 8 x 12 bit A/D | 2 x 12 bit A/D |
Desired sample rate | 10 MS/s | 10 MS/s |
Enabled channels per module | 4 | 2 |
Sum sample rate | 40 MS/s | 20 MS/s |
| Therefore this board is set up |
|
| to be the clockmaster. |
|
Sync speed | 40 MS/s | 40 MS/s |
Clock divider | 1 | 2 |
Divided sum clock | 40 MS/s | 20 MS/s |
Enabled channels per module | 4 | 2 |
Conversion speed | 10 MS/s | 10 MS/s |
Example calculation with synchronous speed where master clock is divided
Board type | 3025 | 3131 |
Channels available | 2 x 12 bit A/D | 4 x 12 bit A/D |
Desired sample rate | 20 MS/s | 20 MS/s |
Enabled channels per module | 1 | 2 |
Sum sample rate | 20 MS/s | 40 MS/s |
|
| Therefore this board is set up |
|
| to be the clockmaster. |
Sync speed | 40 MS/s | 40 MS/s |
Clock divider | 2 | 1 |
Divided sum clock | 20 MS/s | 40 MS/s |
Enabled channels per module | 1 | 2 |
Conversion speed | 20 MS/s | 20 MS/s |
(c) Spectrum GmbH | 75 |