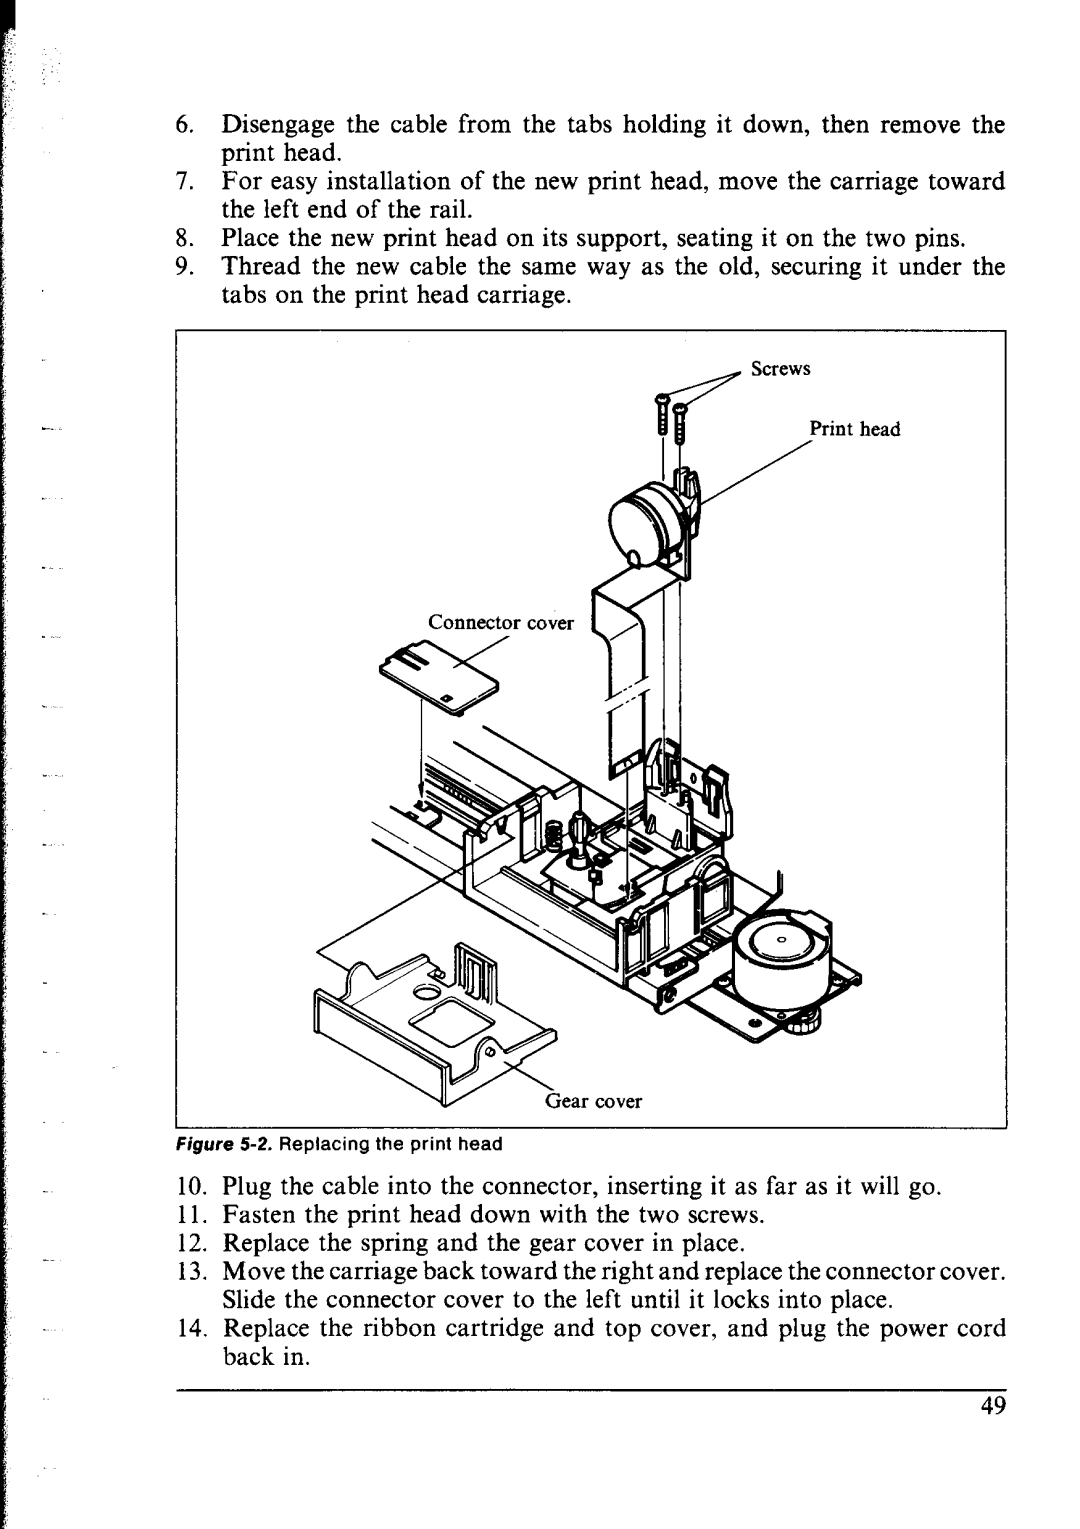
6.Disengage the cable from the tabs holding it down, then remove the print head.
7.For easy installation of the new print head, move the carriage toward the left end of the rail.
8.Place the new print head on its support, seating it on the two pins.
9.Thread the new cable the same way as the old, securing it under the tabs on the print head carriage.
Connector cover
Figure 5-2. Replacing the print head
10.Plug the cable into the connector, inserting it as far as it will go.
11.Fasten the print head down with the two screws.
12.Replace the spring and the gear cover in place.
13.Move the carriage back toward the right and replace the connector cover. Slide the connector cover to the left until it locks into place.
14.Replace the ribbon cartridge and top cover, and plug the power cord back in.
49
