SVAT ELECTRONICS
now you can see
3.The OPERATION option allows you to enable or disable the alarm out setting. Use the ![]() buttons to enable or disable this feature. If enabled, you will be able to edit settings for up to 8 alarms. If disabled, alarms will not function if there is an event.
buttons to enable or disable this feature. If enabled, you will be able to edit settings for up to 8 alarms. If disabled, alarms will not function if there is an event.
4.Use the mouse to check the alarm, video loss, or motion boxes accordingly. If you select VIDEO LOSS, your alarm will sound if the camera loses power. MOTION will sound the alarm if the camera detects motion. Checking the ALARM box will cause the DVR to send an alarm out if an alarm is detected.
5.The MODE can be set as LATCHED or TRANSPARENT. TRANSPARENT causes the alarm to sound for the duration of the event (for example, if motion is detected, the alarm will sound for the entire time that there is movement). The LATCHED setting means that the alarm will sound for a set duration of time, which you will decide in step 6.
6.If you have chosen LATCHED in step 5, you can use the ![]() buttons to set the duration of the alarm to be between 5 and 300 seconds or until a user logs on to the system (UNTIL
buttons to set the duration of the alarm to be between 5 and 300 seconds or until a user logs on to the system (UNTIL
7.The HDD EVENT can be turned on or off. This determines whether hard drive errors trigger the alarm output.
8.When you have made all the desired changes to the ALARM OUT menu, click APPLY. If you wish to exit without saving changes, click ![]() in the top right corner of the window.
in the top right corner of the window.
NOTE: The ALARM IN and ALARM OUT menus configure settings for an external alarm device (for example, a motion sensor) or an independent alarm which will sound when an event is detected. The setup and activation processes of these devices will very from model to model, so please refer to your sensor or alarm’s instruction manual for proper setup.
MAKING CHANGES TO THE BUZZER OUT MENU
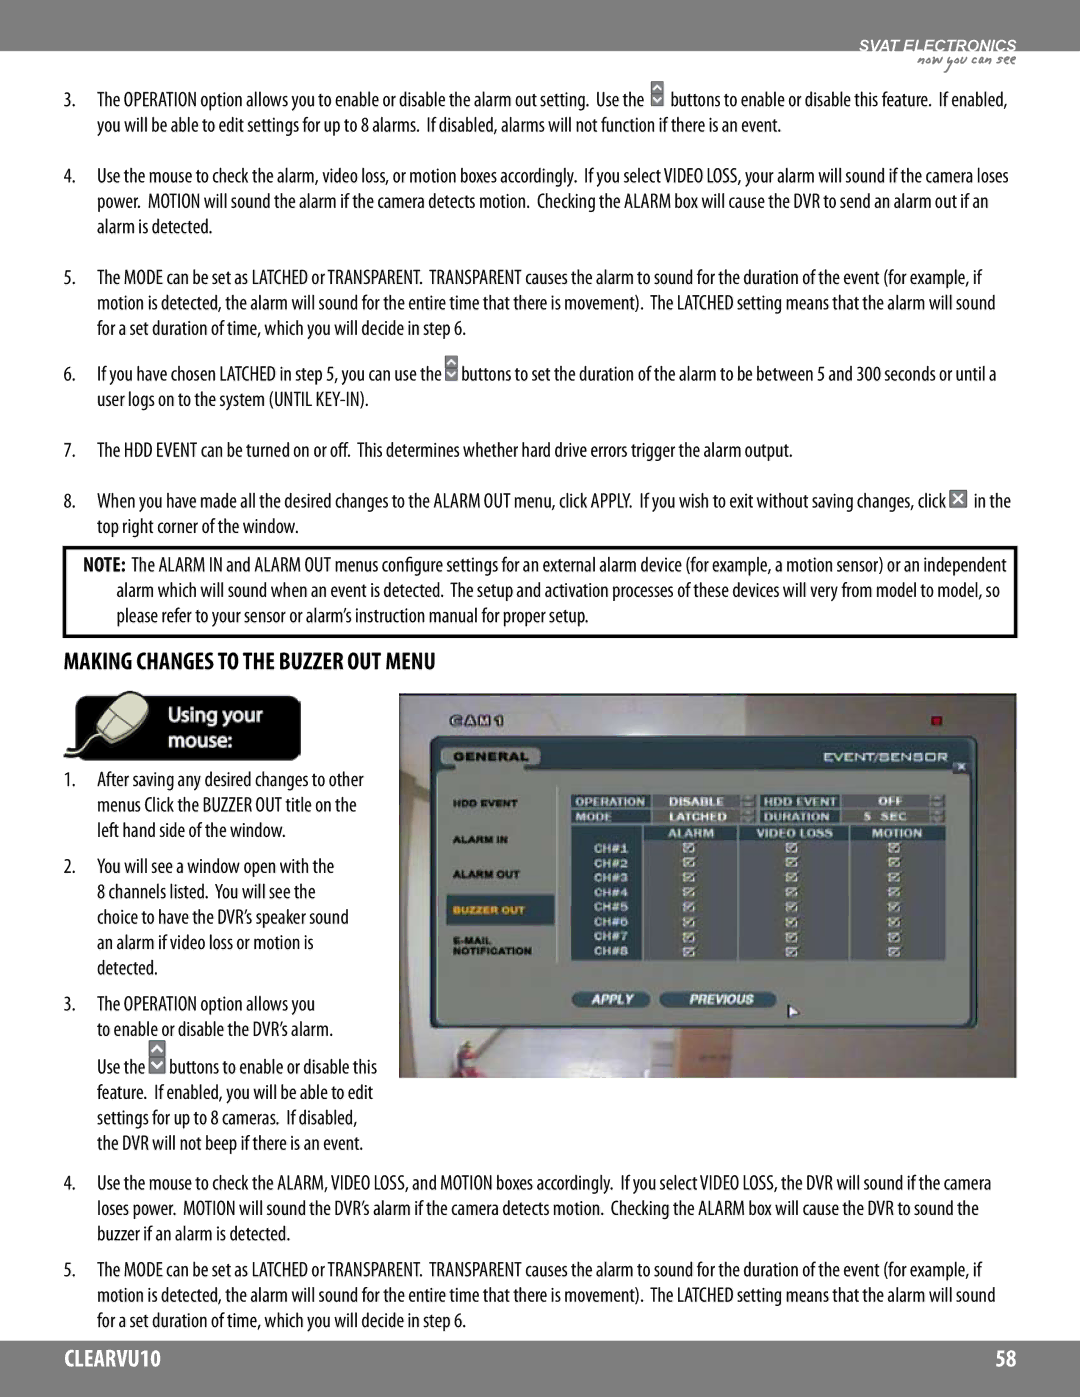
1.After saving any desired changes to other menus Click the BUZZER OUT title on the left hand side of the window.
2.You will see a window open with the 8 channels listed. You will see the choice to have the DVR’s speaker sound an alarm if video loss or motion is detected.
3.The OPERATION option allows you to enable or disable the DVR’s alarm.
Use the ![]() buttons to enable or disable this feature. If enabled, you will be able to edit settings for up to 8 cameras. If disabled, the DVR will not beep if there is an event.
buttons to enable or disable this feature. If enabled, you will be able to edit settings for up to 8 cameras. If disabled, the DVR will not beep if there is an event.
4.Use the mouse to check the ALARM, VIDEO LOSS, and MOTION boxes accordingly. If you select VIDEO LOSS, the DVR will sound if the camera loses power. MOTION will sound the DVR’s alarm if the camera detects motion. Checking the ALARM box will cause the DVR to sound the buzzer if an alarm is detected.
5.The MODE can be set as LATCHED or TRANSPARENT. TRANSPARENT causes the alarm to sound for the duration of the event (for example, if motion is detected, the alarm will sound for the entire time that there is movement). The LATCHED setting means that the alarm will sound for a set duration of time, which you will decide in step 6.
CLEARVU10 | 58 |
|
|