S Fill to at least the reference mark in specialized pans.
S For other pans, two fingers worth of liquid is fine.
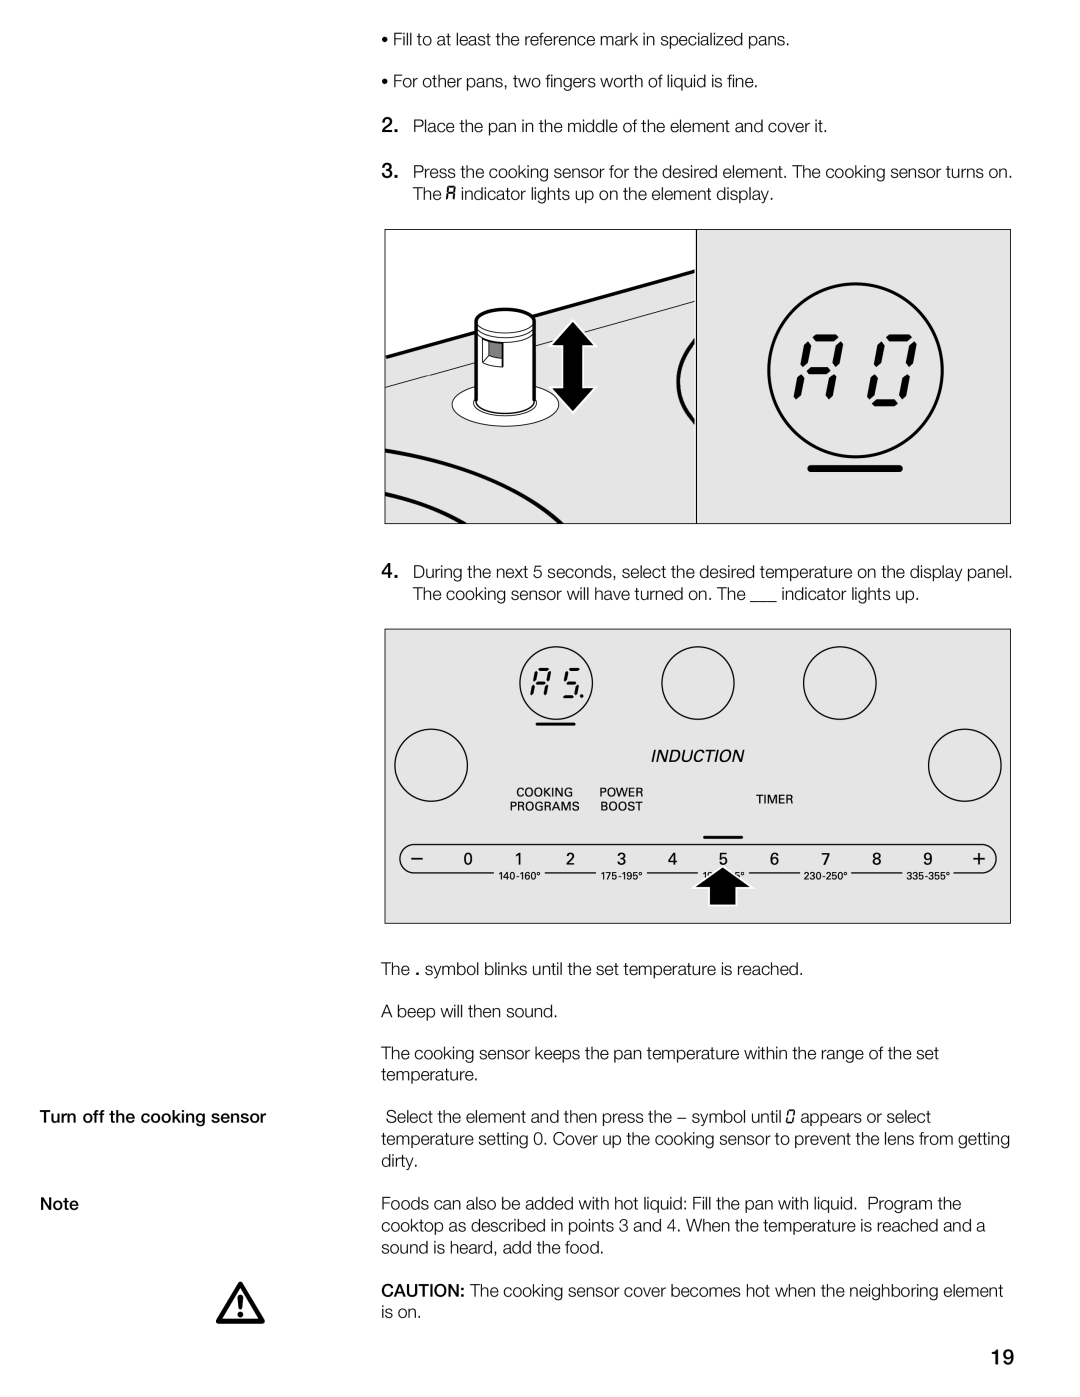
2. Place the pan in the middle of the element and cover it.
3.Press the cooking sensor for the desired element. The cooking sensor turns
The m indicator lights up on the element display.
4. During the next 5 seconds, | select the desired temperature on the display p |
The cooking sensor will have | turned on. The ___ indicator lights up. |
| The . symbol blinks until | the set temperature is reached. |
|
| |||||
| A beep will then sound. |
|
|
|
|
|
|
|
|
| The cooking sensor keeps the pan temperature within the range of the set |
| |||||||
| temperature. |
|
|
|
|
|
|
|
|
Turn off the cooking sensor | Select the element and then press the - symbol0 appearsuntil or select |
|
| ||||||
| temperature setting 0. Cover up | the | cooking sensor | to | prevent the | lens from | g | ||
| dirty. |
|
|
|
|
|
|
|
|
Note | Foods can also be added | with | hot | liquid: | Fill the | pan | with liquid. | Program | t |
| cooktop as described in points | 3 and 4. | When the temperature is | reached an | |||||
| sound is heard, add the food. |
|
|
|
|
|
|
| |
| CAUTION: The cooking sensor | cover | becomes hot | when the neighboring eleme | |||||
| is on. | d |
|
|
|
|
|
| |
19
