2. PRINTER SETUP
2.7 Loading the Media
2.7.3Loading Media into the Printer (Cont.)
WARNING!
∙The Print Head may become hot. Do not touch the Print Head.
∙Risk of injuries. Do not touch moving parts. Disconnect the mains before maintenance of ribbon and media.
CAUTION!
Be careful not touch the Print Head Element when raising the Print Head Block. Failure to do this may cause missing dots by static electricity or other print quality problems.
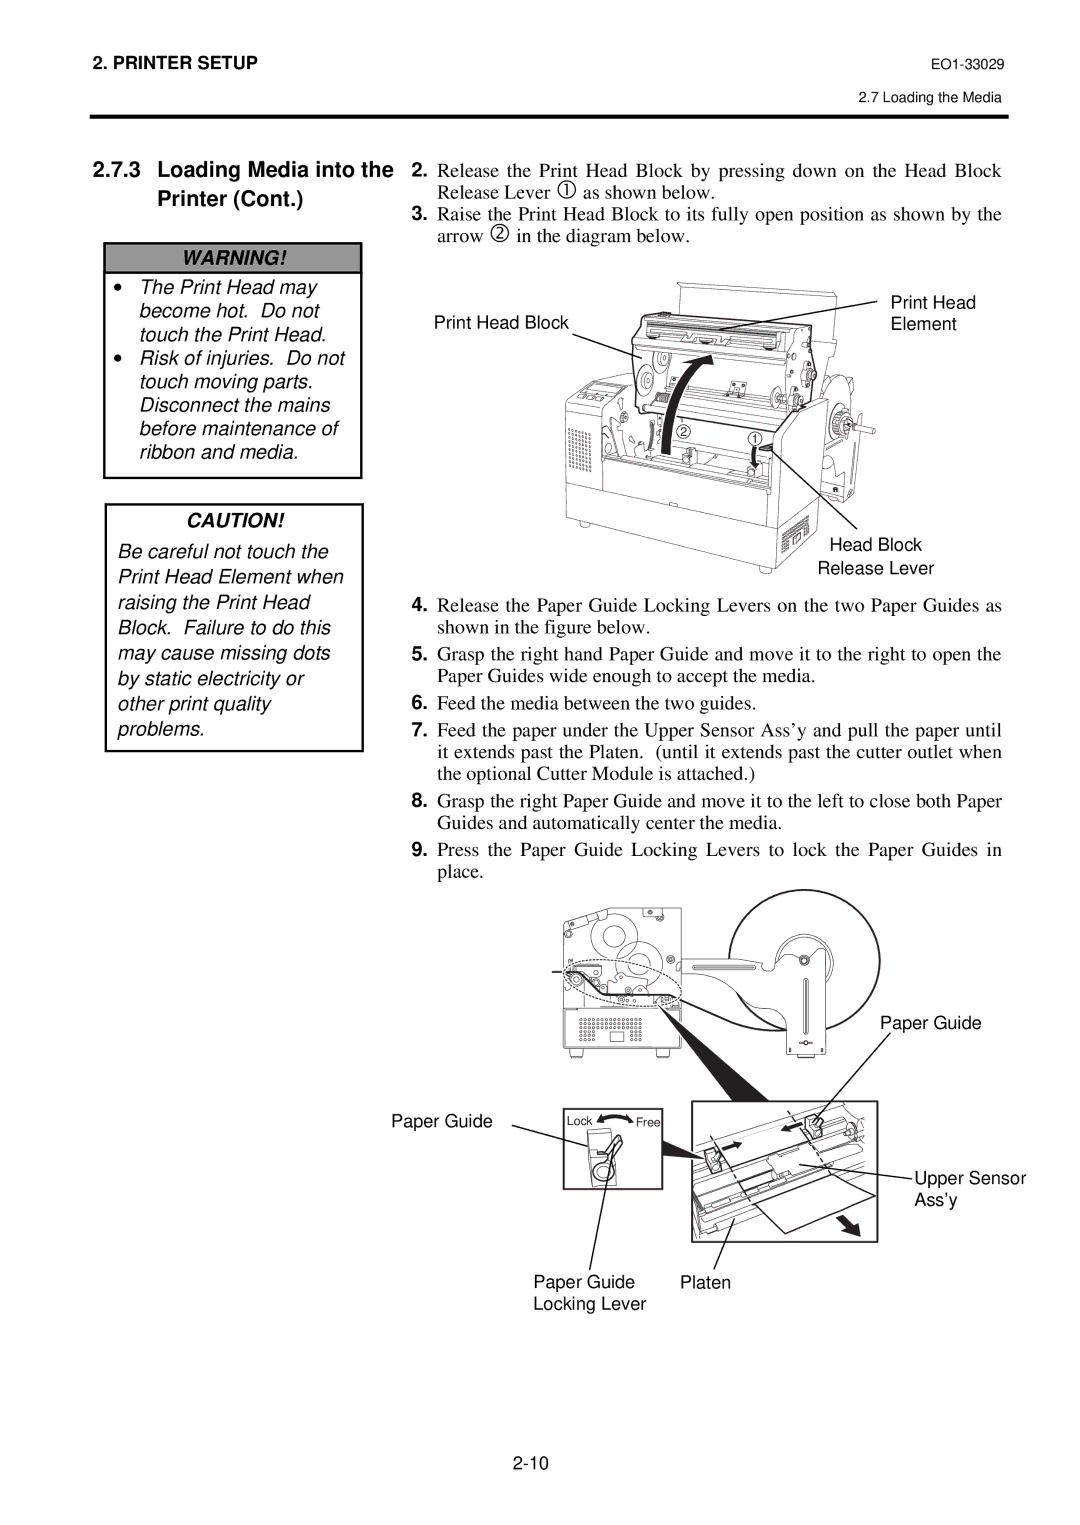
2.Release the Print Head Block by pressing down on the Head Block Release Lever c as shown below.
3.Raise the Print Head Block to its fully open position as shown by the arrow d in the diagram below.
Print Head Block | Print Head |
Element |
2
1
Head Block
Release Lever
4.Release the Paper Guide Locking Levers on the two Paper Guides as shown in the figure below.
5.Grasp the right hand Paper Guide and move it to the right to open the Paper Guides wide enough to accept the media.
6.Feed the media between the two guides.
7.Feed the paper under the Upper Sensor Ass’y and pull the paper until it extends past the Platen. (until it extends past the cutter outlet when the optional Cutter Module is attached.)
8.Grasp the right Paper Guide and move it to the left to close both Paper Guides and automatically center the media.
9.Press the Paper Guide Locking Levers to lock the Paper Guides in place.
Paper Guide
Paper Guide | Lock | Free |
Paper Guide
Locking Lever
Upper Sensor |
Ass’y |
Platen |