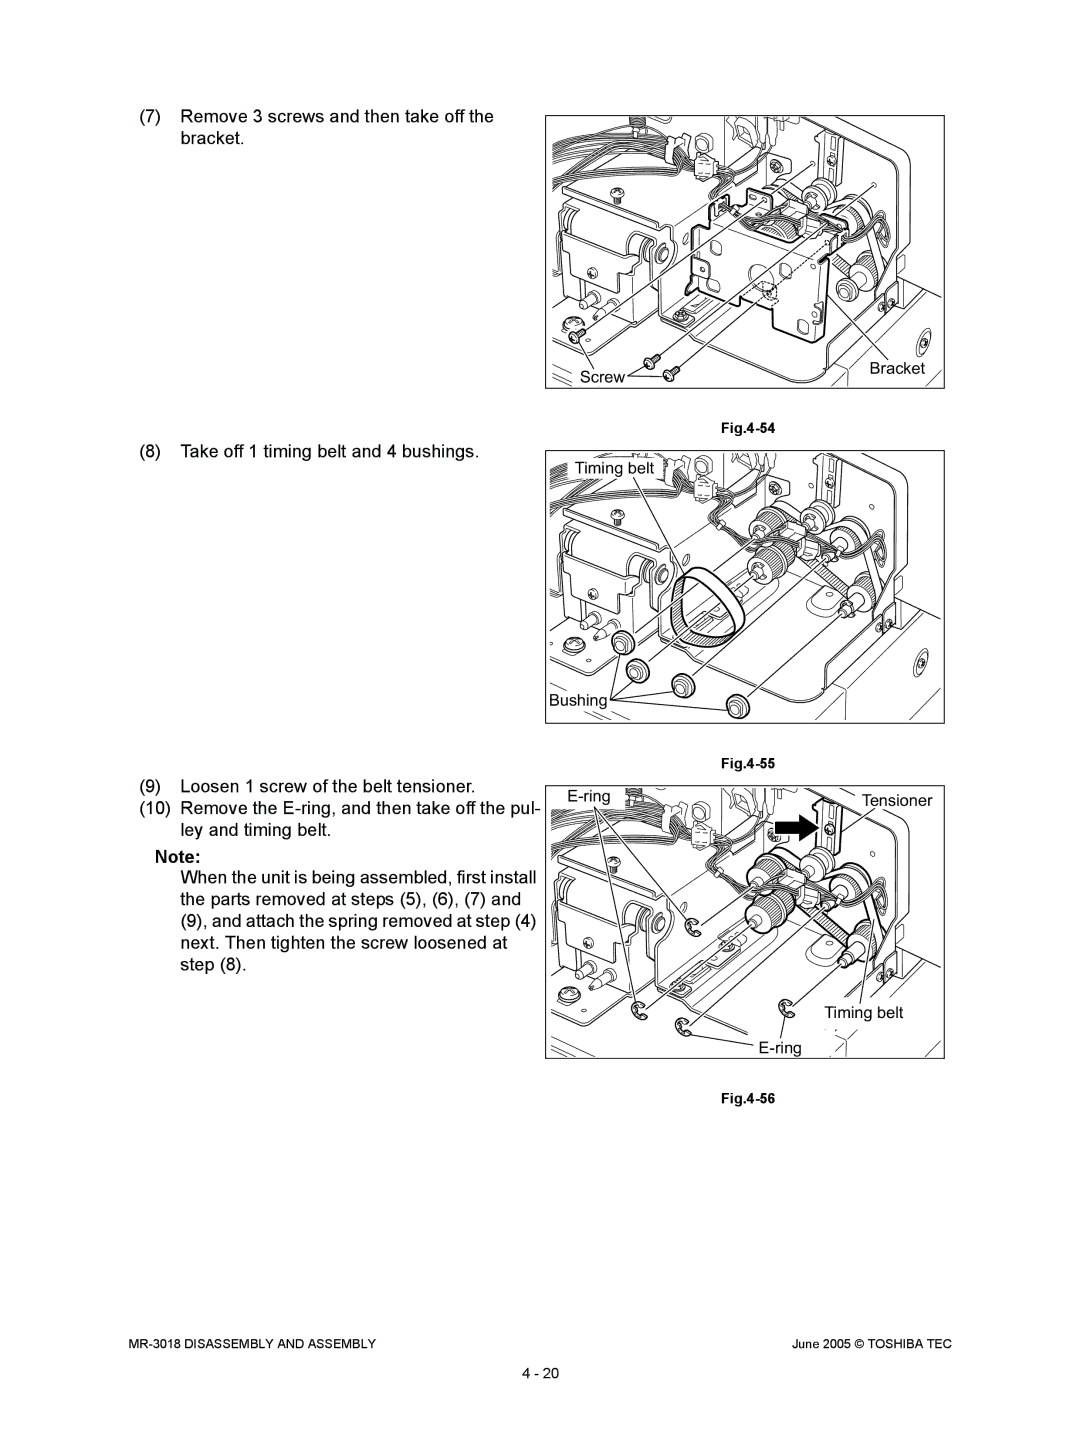
(7)Remove 3 screws and then take off the bracket.
Screw | Bracket |
| |
|
(8)Take off 1 timing belt and 4 bushings.
(9)Loosen 1 screw of the belt tensioner.
(10)Remove the
Note:
When the unit is being assembled, first install the parts removed at steps (5), (6), (7) and (9), and attach the spring removed at step (4) next. Then tighten the screw loosened at step (8).
Timing belt |
|
Bushing |
|
| |
Tensioner | |
|
Timing belt
June 2005 © TOSHIBA TEC |
4 - 20
