6.Basic Operation (continued)
6.2Closing the Console
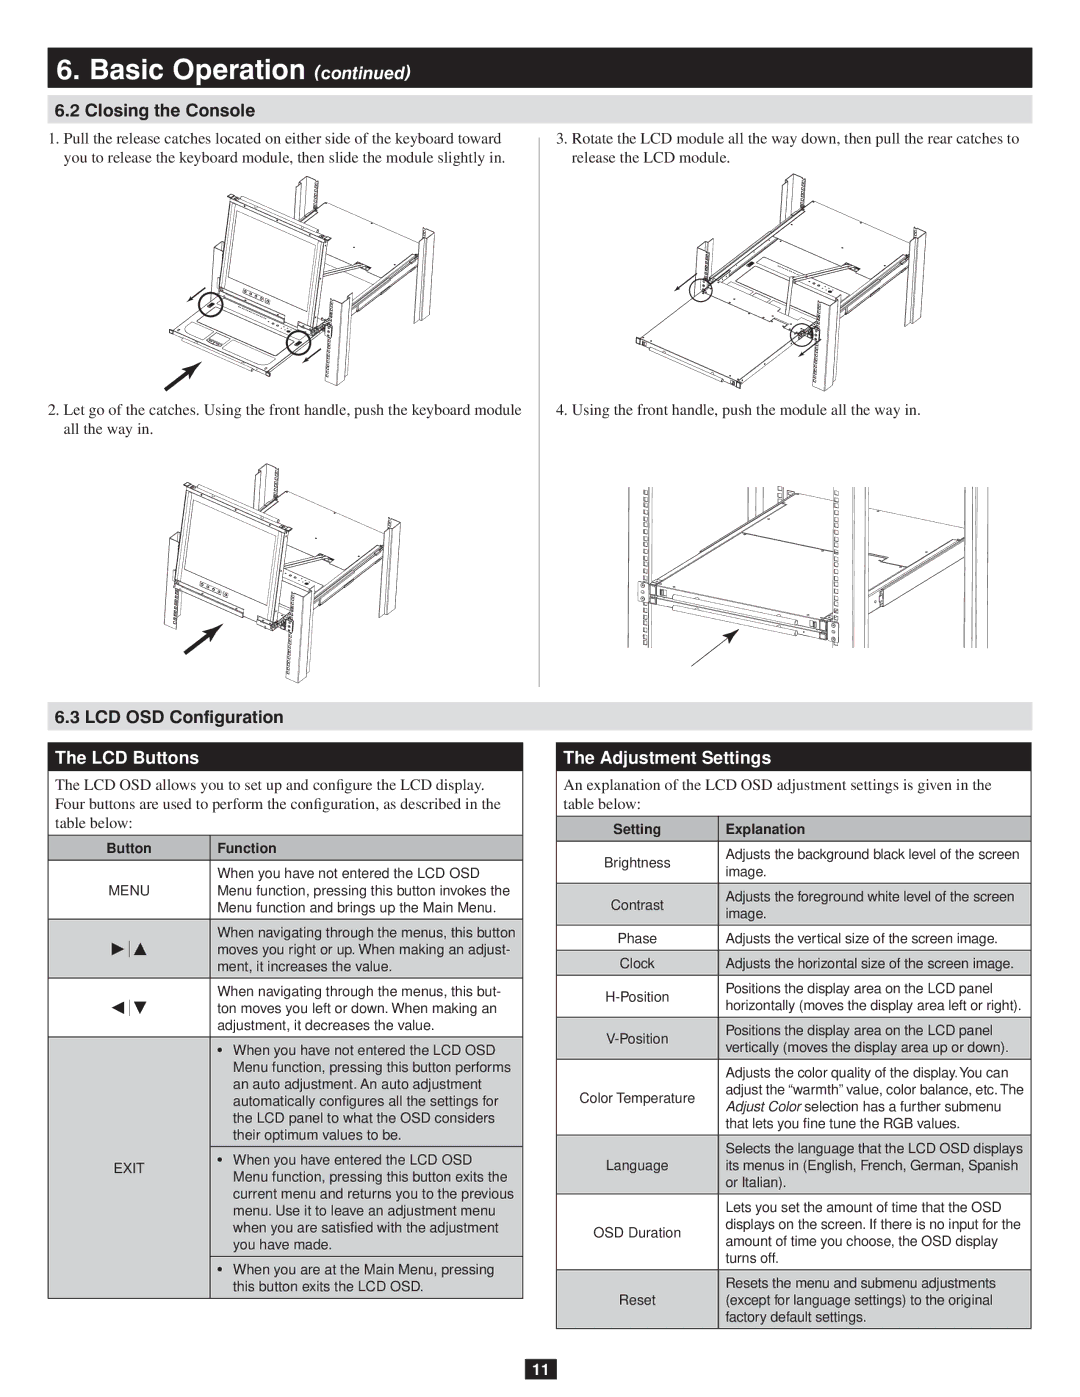
1.Pull the release catches located on either side of the keyboard toward you to release the keyboard module, then slide the module slightly in.
2.Let go of the catches. Using the front handle, push the keyboard module all the way in.
3.Rotate the LCD module all the way down, then pull the rear catches to release the LCD module.
4.Using the front handle, push the module all the way in.
6.3 LCD OSD Configuration
The LCD Buttons
The LCD OSD allows you to set up and configure the LCD display. Four buttons are used to perform the configuration, as described in the table below:
Button | Function | ||
|
|
| |
|
| When you have not entered the LCD OSD | |
MENU | Menu function, pressing this button invokes the | ||
|
| Menu function and brings up the Main Menu. | |
|
|
| |
|
| When navigating through the menus, this button | |
|
| moves you right or up. When making an adjust- | |
|
| ment, it increases the value. | |
|
|
| |
|
| When navigating through the menus, this but- | |
|
| ton moves you left or down. When making an | |
|
| adjustment, it decreases the value. | |
|
|
| |
|
| • When you have not entered the LCD OSD | |
|
| Menu function, pressing this button performs | |
|
| an auto adjustment. An auto adjustment | |
|
| automatically configures all the settings for | |
|
| the LCD panel to what the OSD considers | |
|
| their optimum values to be. | |
|
|
| |
EXIT | • When you have entered the LCD OSD | ||
Menu function, pressing this button exits the | |||
|
| ||
|
| current menu and returns you to the previous | |
|
| menu. Use it to leave an adjustment menu | |
|
| when you are satisfied with the adjustment | |
|
| you have made. | |
|
|
| |
|
| • When you are at the Main Menu, pressing | |
|
| this button exits the LCD OSD. | |
|
|
| |
The Adjustment Settings
An explanation of the LCD OSD adjustment settings is given in the table below:
Setting | Explanation | |
|
| |
Brightness | Adjusts the background black level of the screen | |
image. | ||
| ||
|
| |
Contrast | Adjusts the foreground white level of the screen | |
image. | ||
| ||
|
| |
Phase | Adjusts the vertical size of the screen image. | |
|
| |
Clock | Adjusts the horizontal size of the screen image. | |
|
| |
Positions the display area on the LCD panel | ||
horizontally (moves the display area left or right). | ||
| ||
|
| |
Positions the display area on the LCD panel | ||
vertically (moves the display area up or down). | ||
| ||
|
| |
| Adjusts the color quality of the display. You can | |
Color Temperature | adjust the “warmth” value, color balance, etc. The | |
Adjust Color selection has a further submenu | ||
| ||
| that lets you fine tune the RGB values. | |
|
| |
| Selects the language that the LCD OSD displays | |
Language | its menus in (English, French, German, Spanish | |
| or Italian). | |
|
| |
| Lets you set the amount of time that the OSD | |
OSD Duration | displays on the screen. If there is no input for the | |
amount of time you choose, the OSD display | ||
| ||
| turns off. | |
|
| |
| Resets the menu and submenu adjustments | |
Reset | (except for language settings) to the original | |
| factory default settings. | |
|
|
11