110 – Display and Configuration (continued)
2
3
4
5
6
7
8
9
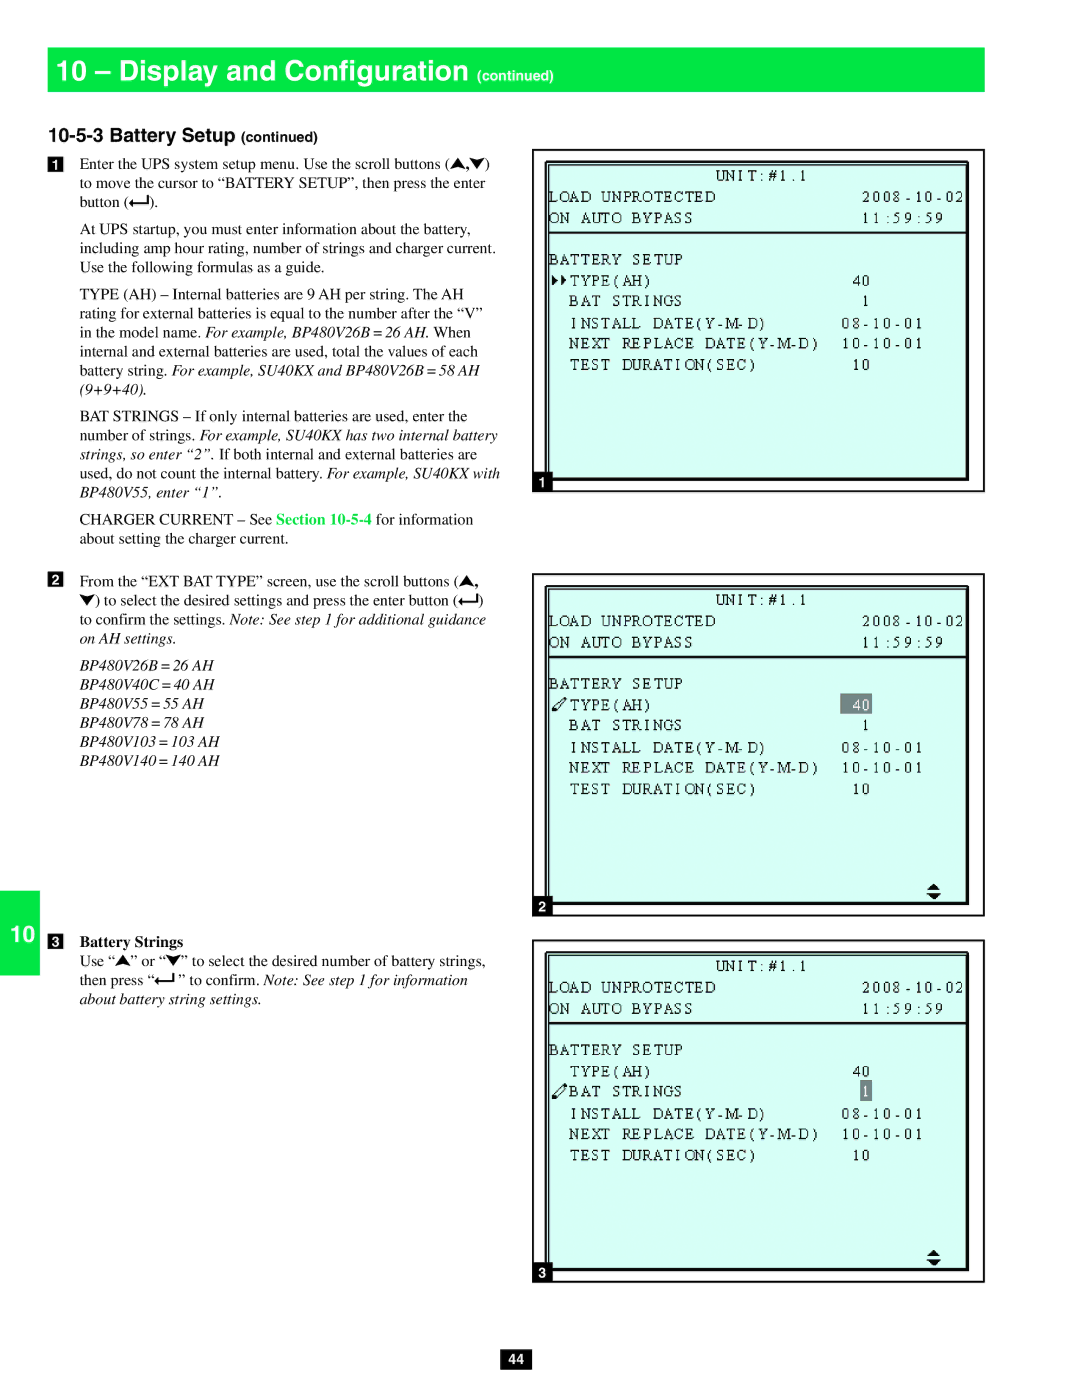
1Enter the UPS system setup menu. Use the scroll buttons (![]() ,
,![]() ) to move the cursor to “BATTERY SETUP”, then press the enter button (
) to move the cursor to “BATTERY SETUP”, then press the enter button (![]() ).
).
At UPS startup, you must enter information about the battery, including amp hour rating, number of strings and charger current. Use the following formulas as a guide.
TYPE (AH) – Internal batteries are 9 AH per string. The AH rating for external batteries is equal to the number after the “V” in the model name. For example, BP480V26B = 26 AH. When internal and external batteries are used, total the values of each battery string. For example, SU40KX and BP480V26B = 58 AH (9+9+40).
BAT STRINGS – If only internal batteries are used, enter the number of strings. For example, SU40KX has two internal battery strings, so enter “2”. If both internal and external batteries are
used, do not count the internal battery. For example, SU40KX with 1 BP480V55, enter “1”.
CHARGER CURRENT – See Section
2From the “EXT BAT TYPE” screen, use the scroll buttons (![]() ,
, ![]() ) to select the desired settings and press the enter button (
) to select the desired settings and press the enter button (![]() ) to confirm the settings. Note: See step 1 for additional guidance on AH settings.
) to confirm the settings. Note: See step 1 for additional guidance on AH settings.
BP480V26B = 26 AH BP480V40C = 40 AH BP480V55 = 55 AH BP480V78 = 78 AH BP480V103 = 103 AH BP480V140 = 140 AH
2
10 3 Battery Strings
Use “![]() ” or “
” or “![]() ” to select the desired number of battery strings, then press “
” to select the desired number of battery strings, then press “![]() ” to confirm. Note: See step 1 for information about battery string settings.
” to confirm. Note: See step 1 for information about battery string settings.
11
12
13
3
14
44