5 – Cabinet Installation
Read Section 2 – Important Safety Instructions Before Installation
5-1 Preparation
The UPS system must be installed in a structurally sound area with a level floor that is able to bear the weight of the UPS system, any external battery cabinet and other equipment that will be installed nearby. The installation site should also have a dedicated AC circuit available that is compatible with the UPS system’s input requirements. (See Section 12 – Specifications for details on input requirements and floor loading requirements.) Before unpacking the unit, you should transport the shipping container closer to the final installation site to minimize the distance you will need to move the unit after the protective shipping container has been removed. If you plan to store the UPS system for an extended period before installation, follow the instructions in Section 13 – Storage and Service. (Unpacking and storage instructions are also printed on the “Unpacking and Storage Instructions” sheet secured to the shipping container.) Warning: Do not attempt to unpack or move the UPS system without assistance.
1
2
3
4
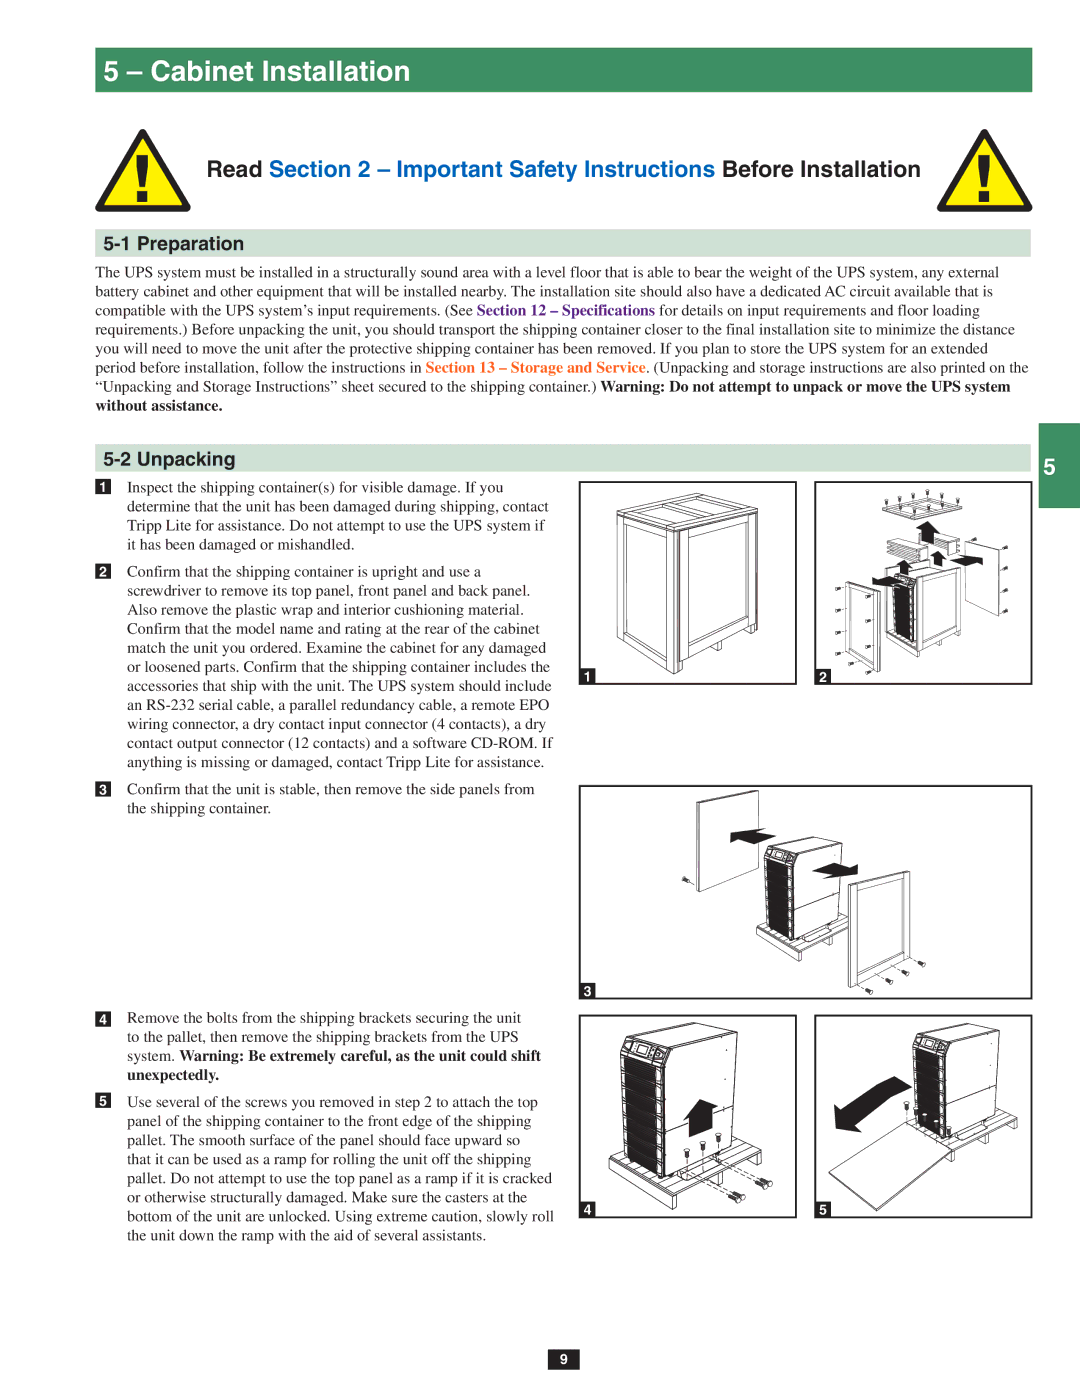
5-2 Unpacking
•1 Inspect the shipping container(s) for visible damage. If you determine that the unit has been damaged during shipping, contact Tripp Lite for assistance. Do not attempt to use the UPS system if it has been damaged or mishandled.
•2 Confirm that the shipping container is upright and use a screwdriver to remove its top panel, front panel and back panel. Also remove the plastic wrap and interior cushioning material. Confirm that the model name and rating at the rear of the cabinet match the unit you ordered. Examine the cabinet for any damaged or loosened parts. Confirm that the shipping container includes the accessories that ship with the unit. The UPS system should include an
•3 Confirm that the unit is stable, then remove the side panels from the shipping container.
•4 Remove the bolts from the shipping brackets securing the unit to the pallet, then remove the shipping brackets from the UPS system. Warning: Be extremely careful, as the unit could shift unexpectedly.
•5 Use several of the screws you removed in step 2 to attach the top panel of the shipping container to the front edge of the shipping pallet. The smooth surface of the panel should face upward so that it can be used as a ramp for rolling the unit off the shipping pallet. Do not attempt to use the top panel as a ramp if it is cracked or otherwise structurally damaged. Make sure the casters at the bottom of the unit are unlocked. Using extreme caution, slowly roll the unit down the ramp with the aid of several assistants.
| 5 |
| 6 |
| 7 |
1 | 2 |
| 8 |
9
10
3 |
|
|
|
| 11 |
|
| 12 |
4 | 5 | 13 |
|
|
14
9