Maintenance and Troubleshooting
4.Grasp the lamp by its housing only and pull it straight out (lamp slides along guides) until it’s free; see Figure
Figure 5-3. Removing the Lamp
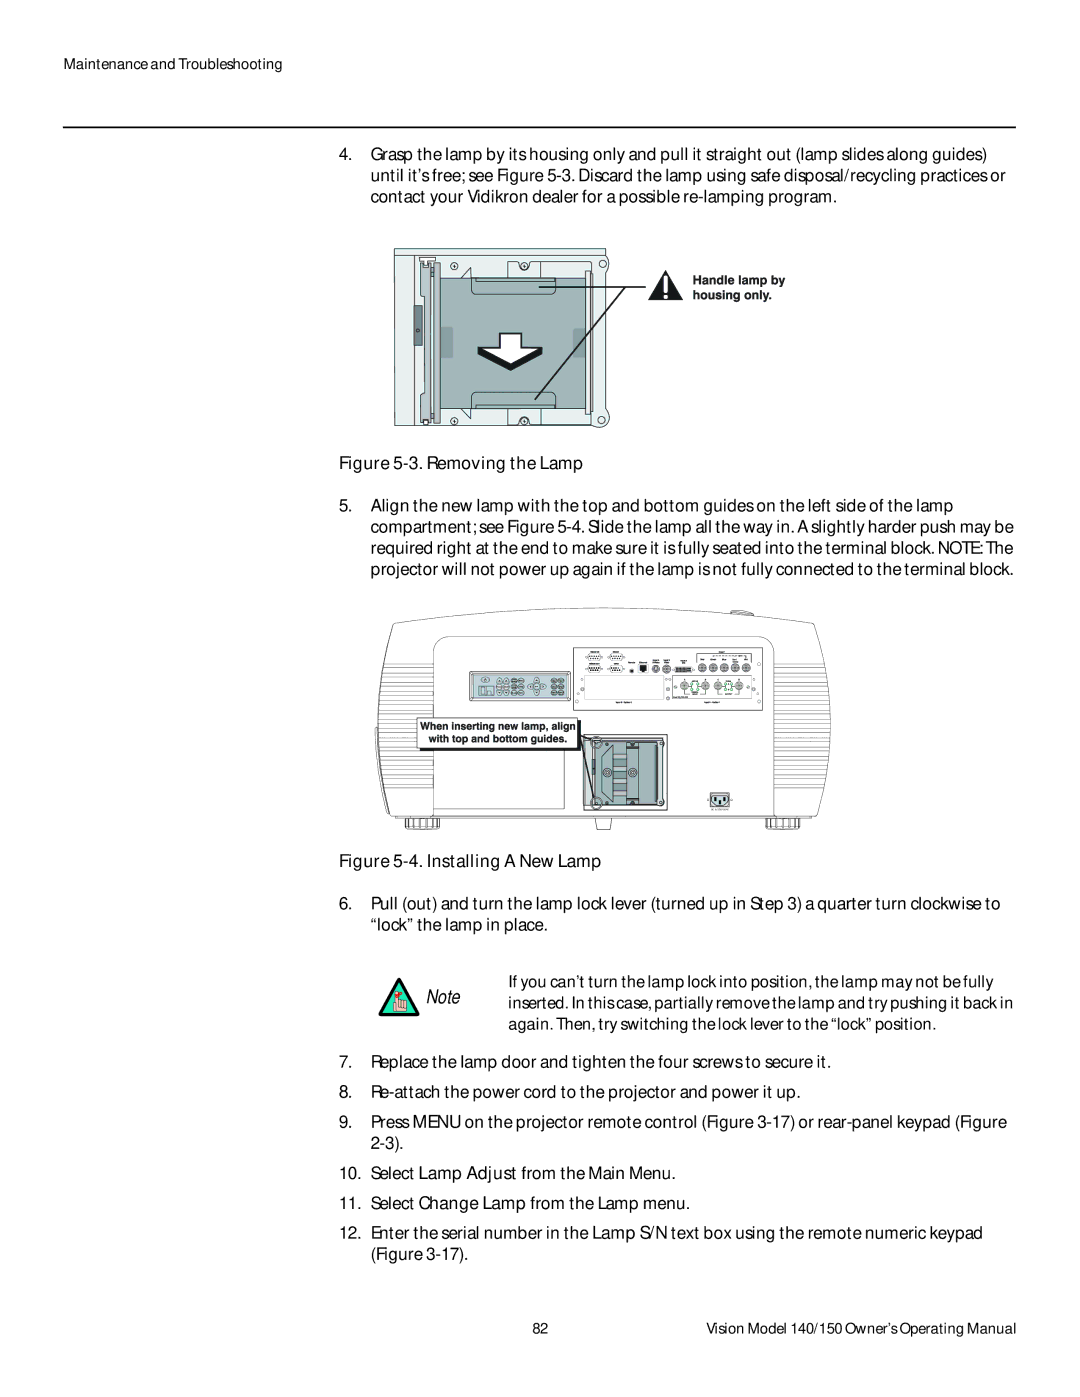
5.Align the new lamp with the top and bottom guides on the left side of the lamp compartment; see Figure
AC IN 220V 50HZ
Figure 5-4. Installing A New Lamp
6.Pull (out) and turn the lamp lock lever (turned up in Step 3) a quarter turn clockwise to “lock” the lamp in place.
If you can’t turn the lamp lock into position, the lamp may not be fully
Note inserted. In this case, partially remove the lamp and try pushing it back in again. Then, try switching the lock lever to the “lock” position.
7.Replace the lamp door and tighten the four screws to secure it.
8.
9.Press MENU on the projector remote control (Figure
10.Select Lamp Adjust from the Main Menu.
11.Select Change Lamp from the Lamp menu.
12.Enter the serial number in the Lamp S/N text box using the remote numeric keypad (Figure
82 | Vision Model 140/150 Owner’s Operating Manual |