Operation
Input Position ➤
Input Position
Left/Right
Up/Down
Width
Height
Overscan
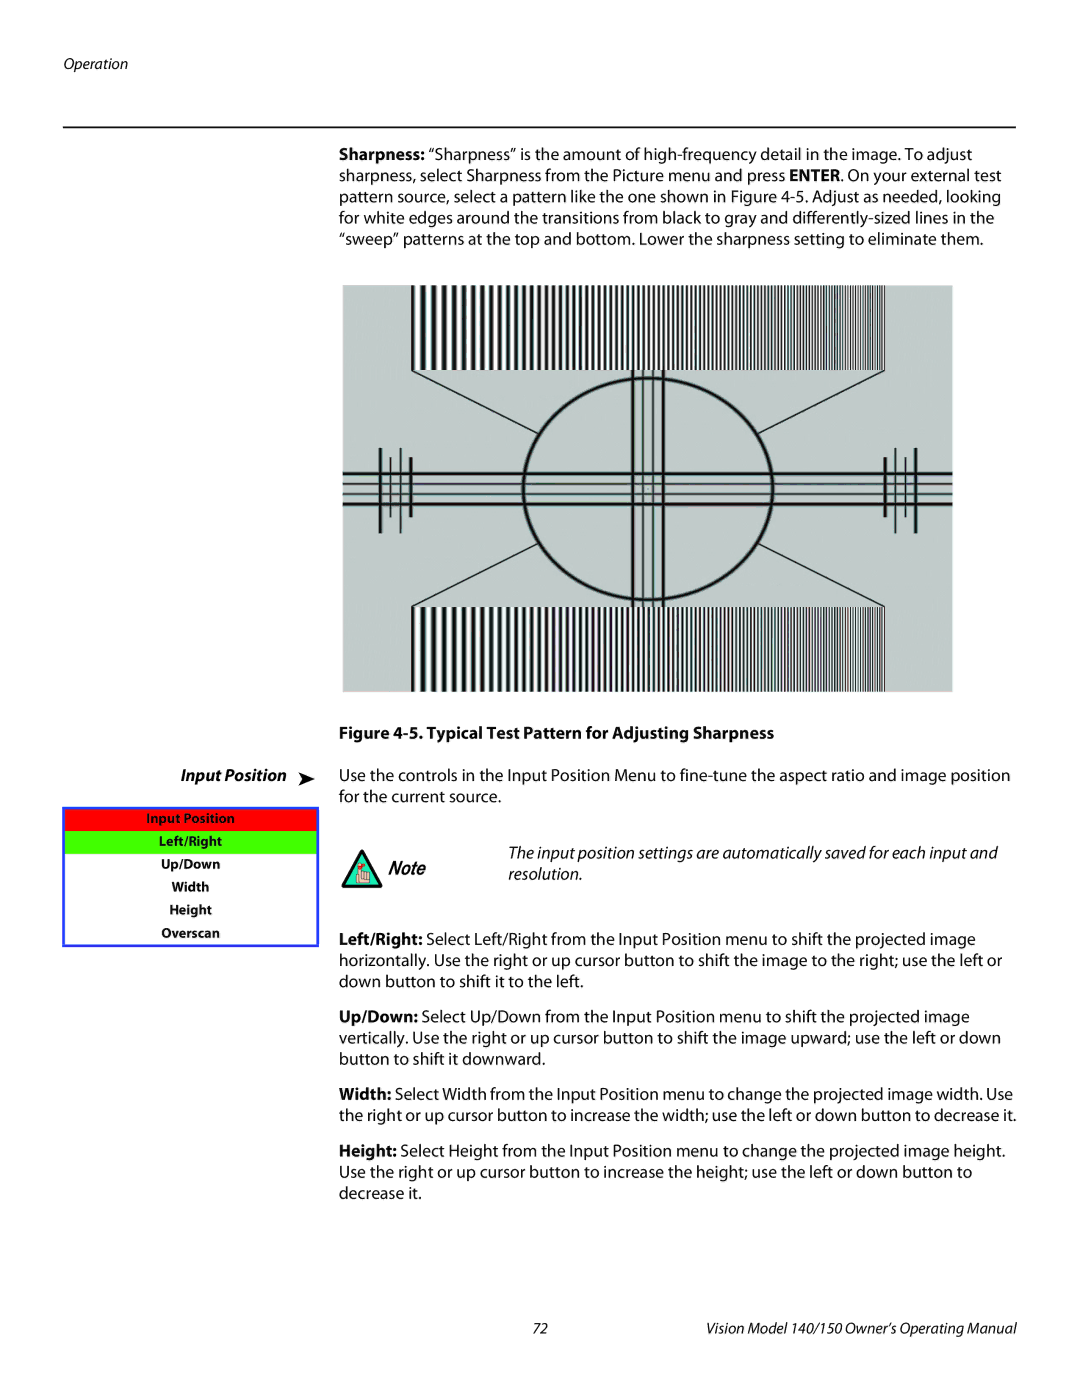
Sharpness: “Sharpness” is the amount of
Figure 4-5. Typical Test Pattern for Adjusting Sharpness
Use the controls in the Input Position Menu to
The input position settings are automatically saved for each input and
Note resolution.
Left/Right: Select Left/Right from the Input Position menu to shift the projected image horizontally. Use the right or up cursor button to shift the image to the right; use the left or down button to shift it to the left.
Up/Down: Select Up/Down from the Input Position menu to shift the projected image vertically. Use the right or up cursor button to shift the image upward; use the left or down button to shift it downward.
Width: Select Width from the Input Position menu to change the projected image width. Use the right or up cursor button to increase the width; use the left or down button to decrease it.
Height: Select Height from the Input Position menu to change the projected image height. Use the right or up cursor button to increase the height; use the left or down button to decrease it.
72 | Vision Model 140/150 Owner’s Operating Manual |