|
|
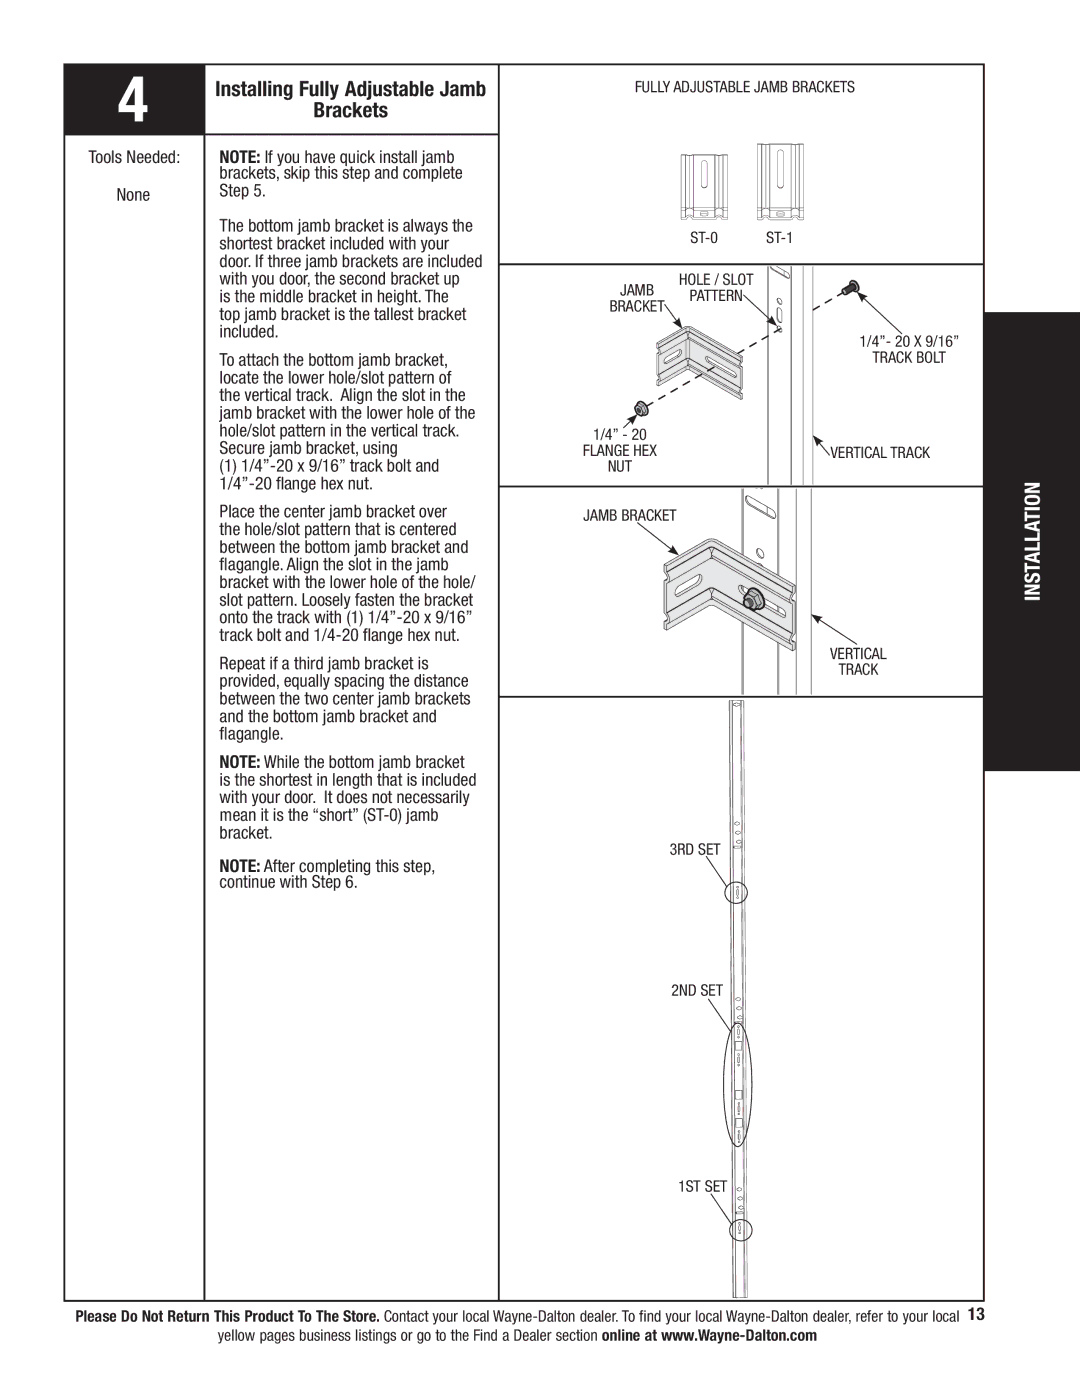
4 | Installing Fully Adjustable Jamb |
| Brackets |
|
|
Tools Needed: | NOTE: If you have quick install jamb |
| brackets, skip this step and complete |
None | Step 5. |
| The bottom jamb bracket is always the |
| shortest bracket included with your |
| door. If three jamb brackets are included |
| with you door, the second bracket up |
| is the middle bracket in height. The |
| top jamb bracket is the tallest bracket |
| included. |
To attach the bottom jamb bracket, locate the lower hole/slot pattern of the vertical track. Align the slot in the jamb bracket with the lower hole of the hole/slot pattern in the vertical track. Secure jamb bracket, using
(1)1/4”-20 x 9/16” track bolt and 1/4”-20 flange hex nut.
Place the center jamb bracket over the hole/slot pattern that is centered between the bottom jamb bracket and flagangle. Align the slot in the jamb bracket with the lower hole of the hole/ slot pattern. Loosely fasten the bracket onto the track with (1)
Repeat if a third jamb bracket is provided, equally spacing the distance between the two center jamb brackets and the bottom jamb bracket and flagangle.
NOTE: While the bottom jamb bracket is the shortest in length that is included with your door. It does not necessarily mean it is the “short”
NOTE: After completing this step, continue with Step 6.
Fully adjustable jamb brackets
Hole / slot
Jamb pattern bracket![]()
1/4”- 20 x 9/16”
Track bolt
1/4” - 20
flange hex![]() Vertical track nut
Vertical track nut
Jamb bracket
Vertical
track
3rd Set
2nd Set
1st Set
INSTALLATION
Please Do Not Return This Product To The Store. Contact your local