
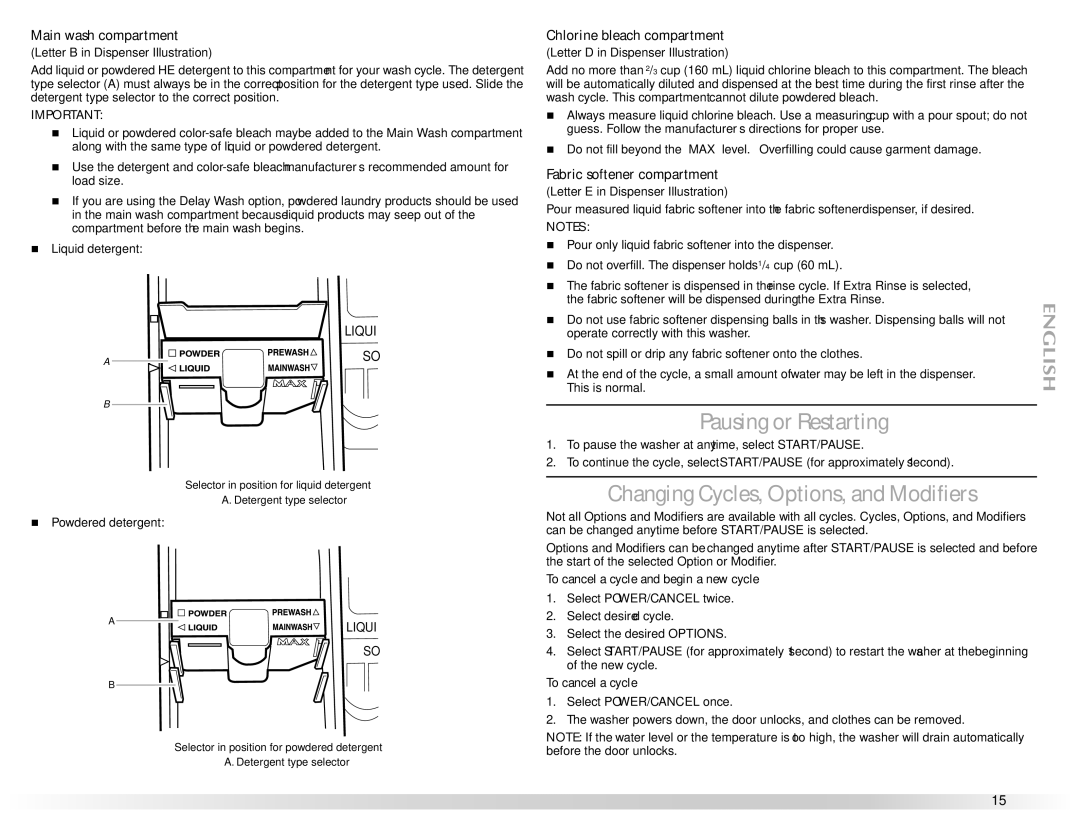

Main wash compartment
(Letter B in Dispenser Illustration)
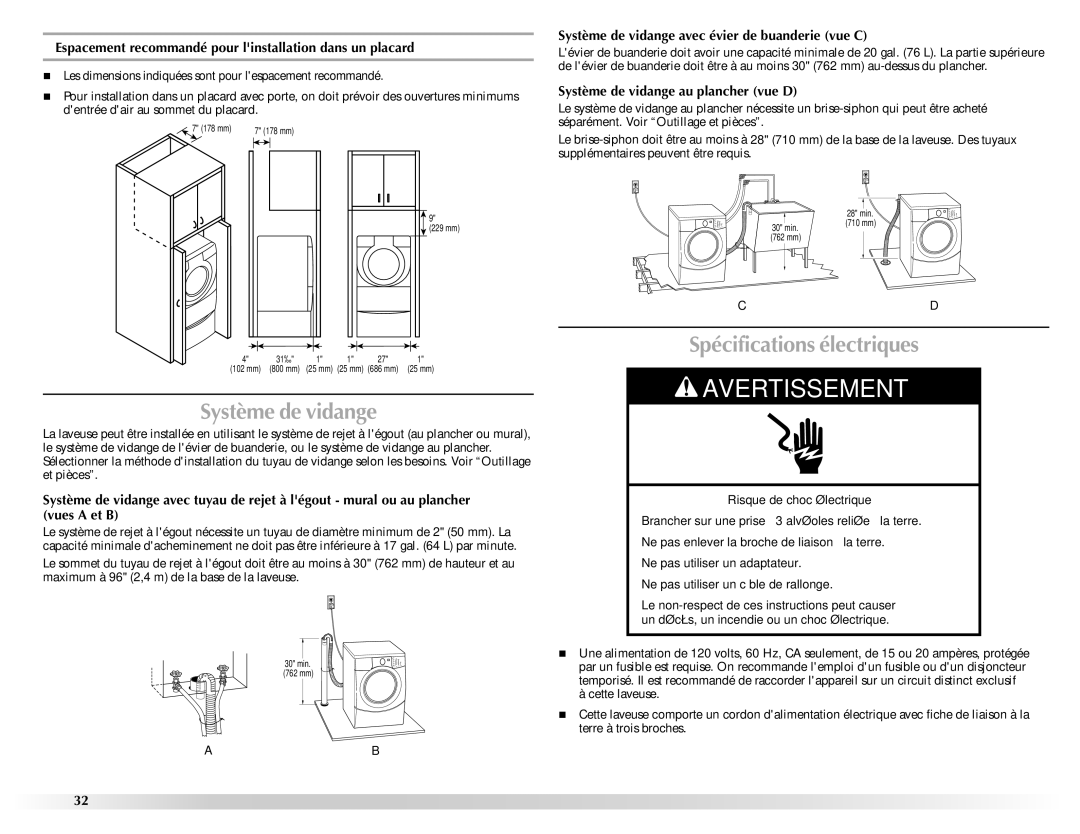
Add liquid or powdered HE detergent to this compartment for your wash cycle. The detergent type selector (A) must always be in the correct position for the detergent type used. Slide the detergent type selector to the correct position.
IMPORTANT:
Liquid or powdered
Use the detergent and
If you are using the Delay Wash option, powdered laundry products should be used in the main wash compartment because liquid products may seep out of the compartment before the main wash begins.
Liquid detergent:
LIQUI
A![]()
![]() SO
SO
B![]()
Selector in position for liquid detergent
A. Detergent type selector
Chlorine bleach compartment
(Letter D in Dispenser Illustration)
Add no more than 2/3 cup (160 mL) liquid chlorine bleach to this compartment. The bleach will be automatically diluted and dispensed at the best time during the first rinse after the wash cycle. This compartment cannot dilute powdered bleach.
Always measure liquid chlorine bleach. Use a measuring cup with a pour spout; do not guess. Follow the manufacturer’s directions for proper use.
Do not fill beyond the “MAX” level. Overfilling could cause garment damage.
Fabric softener compartment
(Letter E in Dispenser Illustration)
Pour measured liquid fabric softener into the fabric softener dispenser, if desired.
NOTES:
Pour only liquid fabric softener into the dispenser.
Do not overfill. The dispenser holds 1/4 cup (60 mL).
The fabric softener is dispensed in the rinse cycle. If Extra Rinse is selected, the fabric softener will be dispensed during the Extra Rinse.
Do not use fabric softener dispensing balls in this washer. Dispensing balls will not operate correctly with this washer.
Do not spill or drip any fabric softener onto the clothes.
At the end of the cycle, a small amount of water may be left in the dispenser. This is normal.
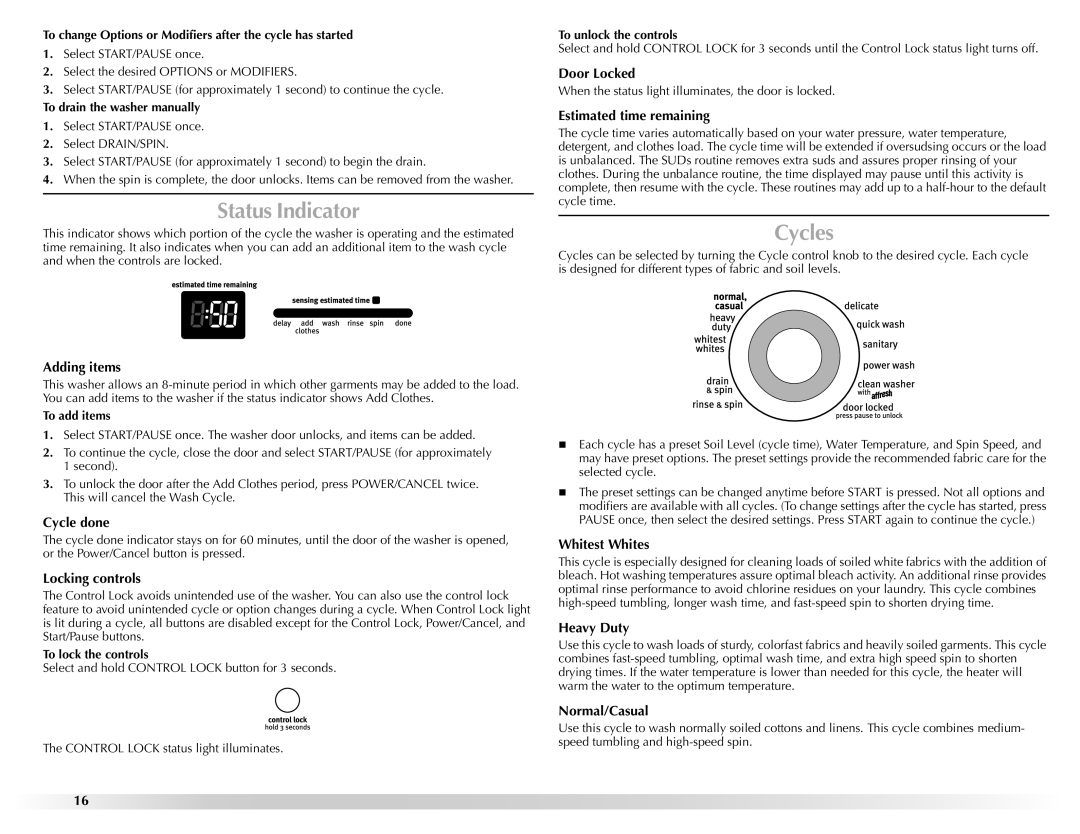
Pausing or Restarting
1.To pause the washer at any time, select START/PAUSE.
2.To continue the cycle, select START/PAUSE (for approximately 1 second).
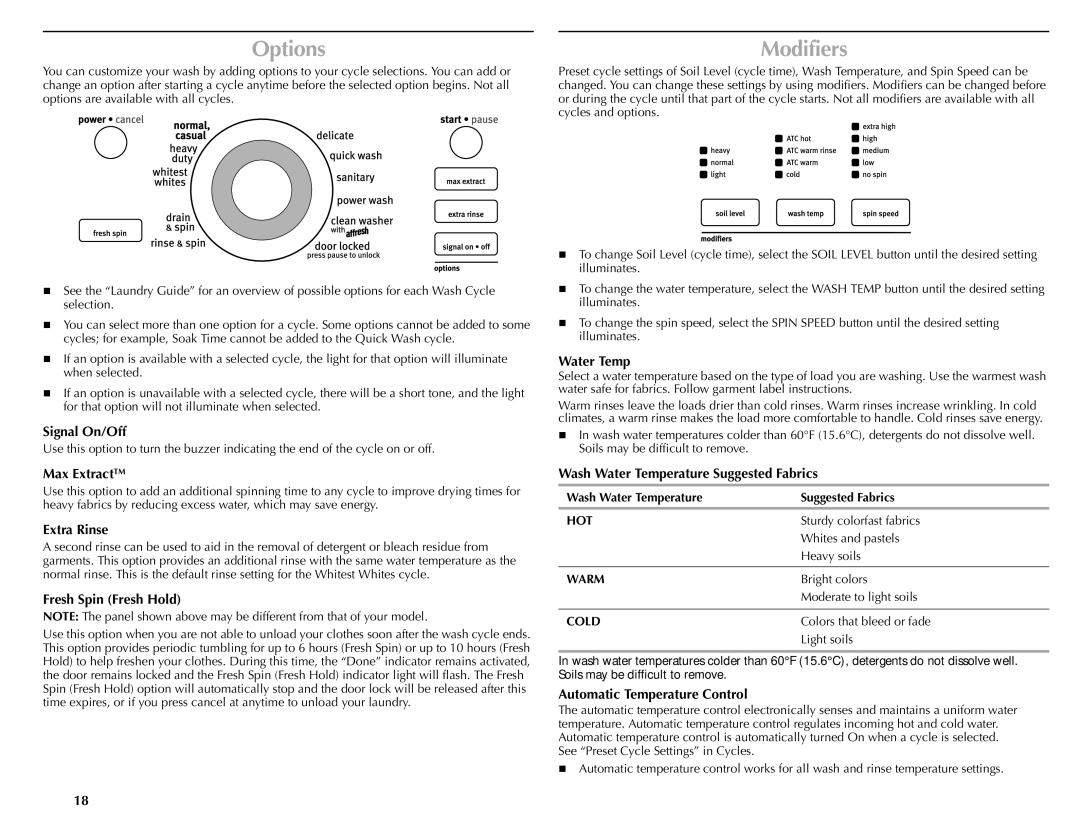
Changing Cycles, Options, and Modifiers
Powdered detergent:
A ![]()
B
LIQUI
SO
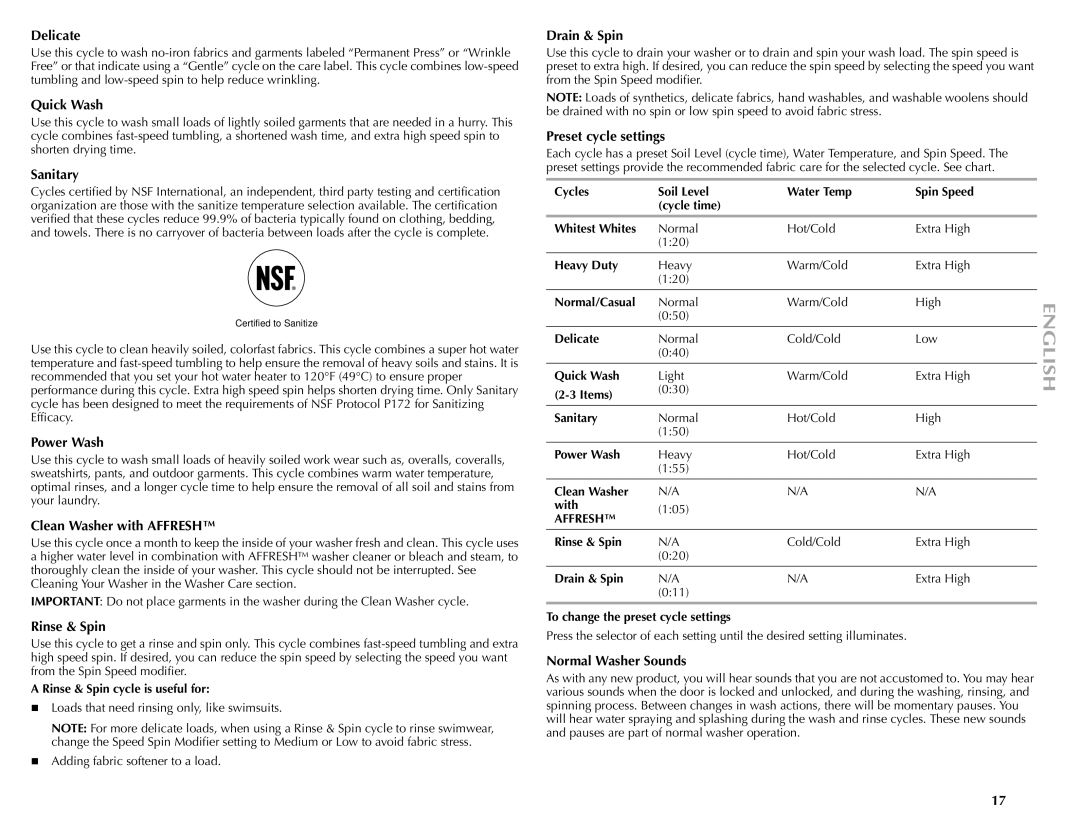
Not all Options and Modifiers are available with all cycles. Cycles, Options, and Modifiers can be changed anytime before START/PAUSE is selected.
Options and Modifiers can be changed anytime after START/PAUSE is selected and before the start of the selected Option or Modifier.
To cancel a cycle and begin a new cycle
1.Select POWER/CANCEL twice.
2.Select desired cycle.
3.Select the desired OPTIONS.
4.Select START/PAUSE (for approximately 1 second) to restart the washer at the beginning of the new cycle.
To cancel a cycle
1.Select POWER/CANCEL once.
2.The washer powers down, the door unlocks, and clothes can be removed.
Selector in position for powdered detergent A. Detergent type selector
NOTE: If the water level or the temperature is too high, the washer will drain automatically before the door unlocks.
15