DCS BFG-30G, BFG-308S, BFG-308GD manual Using the Griddle, Thermocouple, USE of the Griddle

Page 32

USING THE GRIDDLE

The griddle is made from stainless steel, highly polished to provide


a smooth cooking surface. It is normal for it to darken with use as


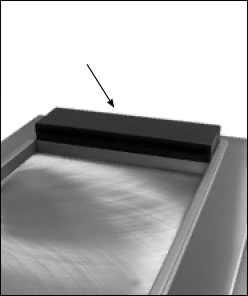
oils cook onto the surface to provide a nonstick base or “season-

GRIDDLE FLUE

ing”. Since the griddle is made from stainless steel, the surface will

COVER

not rust. However, after use it may have a rust stain or rust color.


The griddle burner is controlled by the gas burner underneath the


griddle plate and cycles on and off to maintain the set temperature.


The griddle assembly is not to be removed for cleaning and is held in


place by one front screw and two rear screws. These are mainly there


to keep the griddle from shifting in transit, thus avoiding breakage of


any ignition components.


THERMOCOUPLE


The griddle burner is equipped with a thermocouple and safety


valve system which monitors the burner. This will turn the gas off if


the burner isn’t lit or the knob is not held in. The burner will ignite


within 4 seconds after the gas reaches the burner.


BEFORE USING THE GRIDDLE FOR THE FIRST TIME OR


TO RE-SEASON

Fig. 56

1.Clean the griddle thoroughly with hot, soapy water to remove any protective coating.

2.Rinse with a mixture of 1/2 cup water and 1/4 cup white vinegar. Dry thoroughly.

3.Pour 1 teaspoon vegetable oil into the center of the griddle (do not use corn oil as it gets sticky). Rub the oil over the entire surface of the griddle using a heavy soft cloth.

4.Turn the control knob to a Medium setting (350º F). Turn the heat “off” when the oil begins to smoke. Allow the griddle to cool.

5.Repeat Step 3. Be sure to cover the entire surface with the oil.

6.Repeat Step 4. Allow the griddle to cool. Wipe the entire surface of the griddle using a heavy soft cloth. Apply a very thin layer of vegetable oil. The griddle is now ready to use. If the griddle is not used for a period of time, re-season it occasionally.

NOTE:

It is normal for the griddle to darken with use.

USE OF THE GRIDDLE

Before starting to cook on the griddle, be sure the flue cover (Fig. 56), grease cup and drip tray are in place. Preheat griddle for 15 minutes with the control knob set to “HI”. When the griddle is preheated, turn the knob to “MEDIUM” or “LOW” depending on the temperature desired. Place the food on the griddle and cook to desired doneness.

NOTE:

When the griddle is properly seasoned it can be used without any additional oil. However, oil can be used for flavor. A light mist of non-stick vegetable spray, applied before cooking to a cool griddle, makes delicate foods easier to turn.

FOOD

TEMPERATURE*


Eggs

225ºF to 250ºF


Bacon, Ham, Pork Chops

300ºF to 325ºF


Sausage, Grill Cheese Sandwiches

325ºF to 350ºF


Pancakes, French Toast

350ºF to 375ºF


Hash Brown Potatoes

400ºF to 425ºF


*Griddle temperatures will vary do to air flow and ambi- ent temperatures.

30

Image 32
Contents Professional Liberty Collection Page Message to OUR Customers Please Retain this Manual for Future ReferenceContents Safety Practices & Precautions Important Safety NoticeOutdoor Appliance Placement Safety Practices & Precautions Outdoor Appliance Models Before Using Your Appliance BFG-30G All-GrillLocation InstallationLocating Outdoor APPLIANCE/BUILT-IN Clearances Insulated Jacket Locating BUILT-IN ClearancesGeneral BUILT-IN Construction Details Standard layout for non-combustible enclosureCart Assembly Instructions Locating the CartStep Outdoor Appliance Head Preparation Pinch Point Gas Hookup LP Cover HangerGAS HOOK-UP GAS RequirementLP GAS Hook UP Type 1 or QCC1 Regulator LP Tank RequirementsLP Tank Restraint for BUILT-IN Installation 18 maxStep Leak Testing GRILL/GRIDDLE Unit Before TestingLeak Testing Side Burner Burner Adjustment Side BurnerBurner Efficiency and Flame Characteristics Flame HeightOutdoor Appliance Burner Flame Height Burner Adjustment GRILL/GRIDDLE UnitLOW Setting Adjustment Radiant Assembly Radiant Assembly InstallationSink Faucet InstallationSink Installation Side Shelf Optional accessory Check List These InstructionsUSE of the Grill Using the GrillLighting Instructions Important Using the Grill Grilling HintsUsing the Side Burner Match LightingUsing the Griddle Before Using the Griddle for the First Time or To RE-SEASONThermocouple USE of the GriddleUsing the Griddle Using the Sink Care and Maintenance Battery ReplacementRegulator and Hose Replacement Cleaning Grill GratesGrill Burner Cleaning Ceramic RodsStainless Steel Grill BurnerSide Burners Orifice CleaningSide Burner Grate Sink Side Burner ElectrodesControl Knobs Problem What to do Troubleshooting Outdoor ApplianceBefore Calling for Service Troubleshooting Side Burner Service HOW to Obtain ServiceWarranty Limited WarrantyHOW Long does the Limited Warranty LAST? This Warranty does not CoverNo Other Warranties HOW to GET ServiceCommercial USE Page LA Collection Professionnelle Liberty ’INTENTION DE NOS Clients Veuillez Conserver CE Manuel À Titre DE RéférenceTable DES Matières Utilisation DE LA Plaque ChauffantePage Mesures DE Sécurité ET DE Précaution Emplacement ’APPAREIL D’EXTÉRIEUR Hauteur deRemaque Modèles D’APPAREILS D’EXTÉRIEUR Avant D’UTILISER L’APPAREIL BFG-30G Tout grilEmplacement DE L’APPAREIL D’EXTÉRIEUR ET DES Dégagements EmplacementEnveloppe Isolée Emplacement DES DégagementsGénéralités Détails D’UNE Construction Intégrée Disposition standard pour une enceinte non combustiblePlacement DE LA Desserte Instructions DE Montage DE ChariotÉtape Préparation de la tête de l’appareil d’extérieur Points DE Pincement Branchement du gaz Propane AccrochezPour Connecter LES Raccords Fournis Avec LE Gril Branchement DU GAZExigences Concernant LE GAZ Branchement DU Propane Régulateur DE Type 1 OU QCC1 Exigences Concernant LA Bouteille DE Propane45,7 cm 18 po Max Placez le dispositif de retenue de bouteille dans l’îlot Fig Avant la vérification Test DE Détection DES Fuites Brûleur Latéraux Réglage DES Brûleur Brûleur LatérauxBrûleurs Efficacité DES Brûleurs ET Caractéristiques DE LA FlammeHauteur DES Flammes DU Brûleur DU Gril Réglages Pour Niveau BASInstallation DE L’ENSEMBLE DU Radiant Installation DE L’ENSEMBLE DU RadiantÉvier Installation DES RobinetsInstallation DE L’ÉVIER Tablette Latérale accessoire en option Liste DE Contrôle DE L’INSTALLATEUR Veuillez LaisInstructions D’ALLUMAGE Utilisation DU GrilUtilisation DU Gril Important Utilisation du gril Conseils AU Sujet DU GrilUtilisation DU Drûleur Latéral Allumage À L’ALLUMETTETableau DE Cuisson DE LA Plaque Chauffante Utilisation DE LA Plaque ChauffanteUtilisation DE LA Plaque Chauffante Utilisation DE LA Plaque Chauffante Utilisation DE L’ÉVIER Remplacement DE LA Pile Remplacement DU Régulateur ET DU TuyauEntretien ET Nettoyage Nettoyage DES Grilles DU GrilEntretien ET Maintenance Tiges EN CéramiqueAcier Inoxydable Brûleur DU GrilNettoyage DE L’ORIFICE Grille DU Brûleur LatéralÉlectrodes DE Brûleurs Latéraux Plaque ChauffanteBoutons DE Réglage ÉvierDépannage Appareil D’EXTÉRIEUR Avant D’APPELER LE Service TechniqueProblème Solution Dépannage Brûleur Latéral Pour L’OBTENTION DU Service DE Garantie Garantie Garantie LimitéeFisher & Paykel S’ENGAGE À Quelle EST LA Durée DE LA Garantie LIMITÉE?Aucune Autre Garantie Pour Obtenir DES RéparationsUtilisation Commerciale Remarque Remarque Remarque Page Litho in USA 09/2001