DeWalt DC9360, DC9280, DC9000, DC310 instruction manual Workpiece Support, Cutting, Ripping FIG

Page 16

English

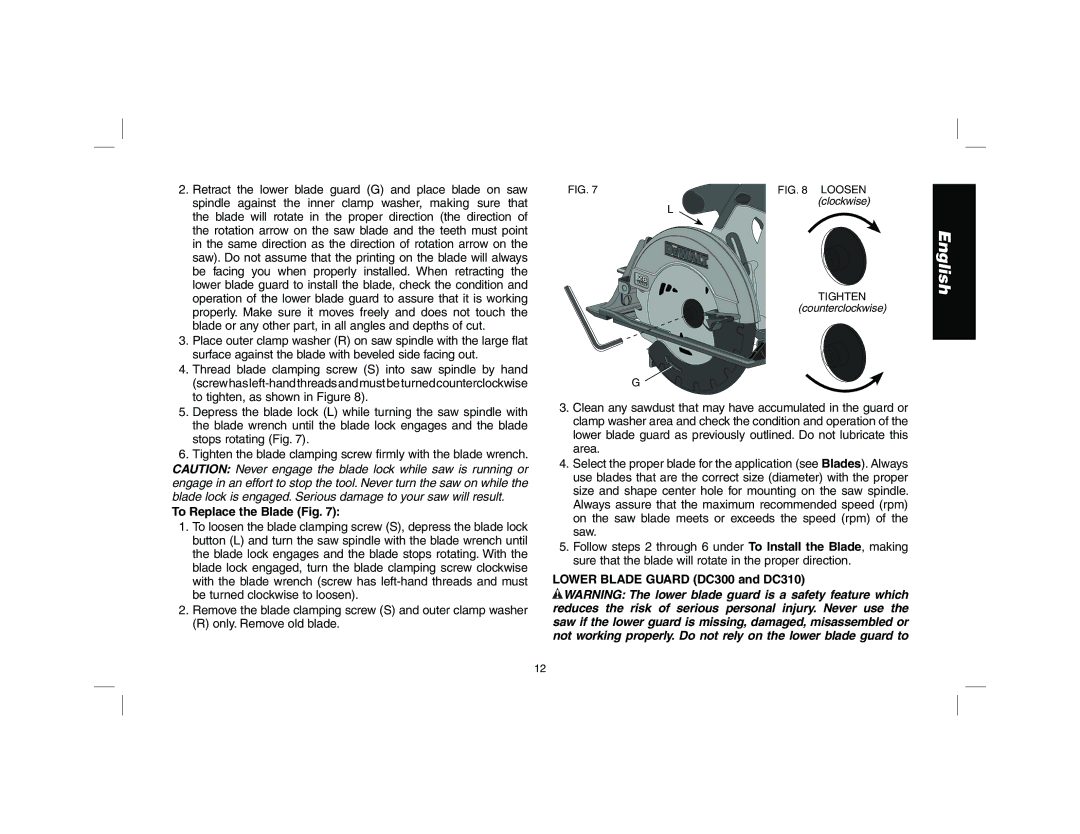
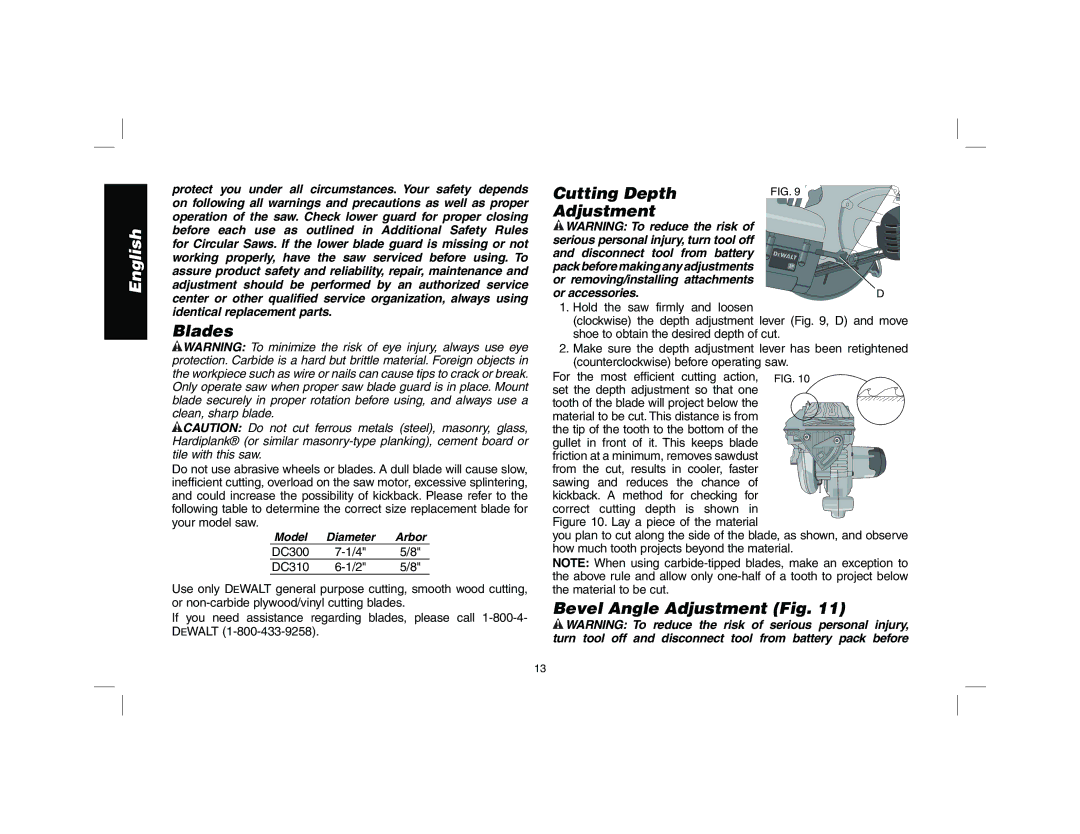
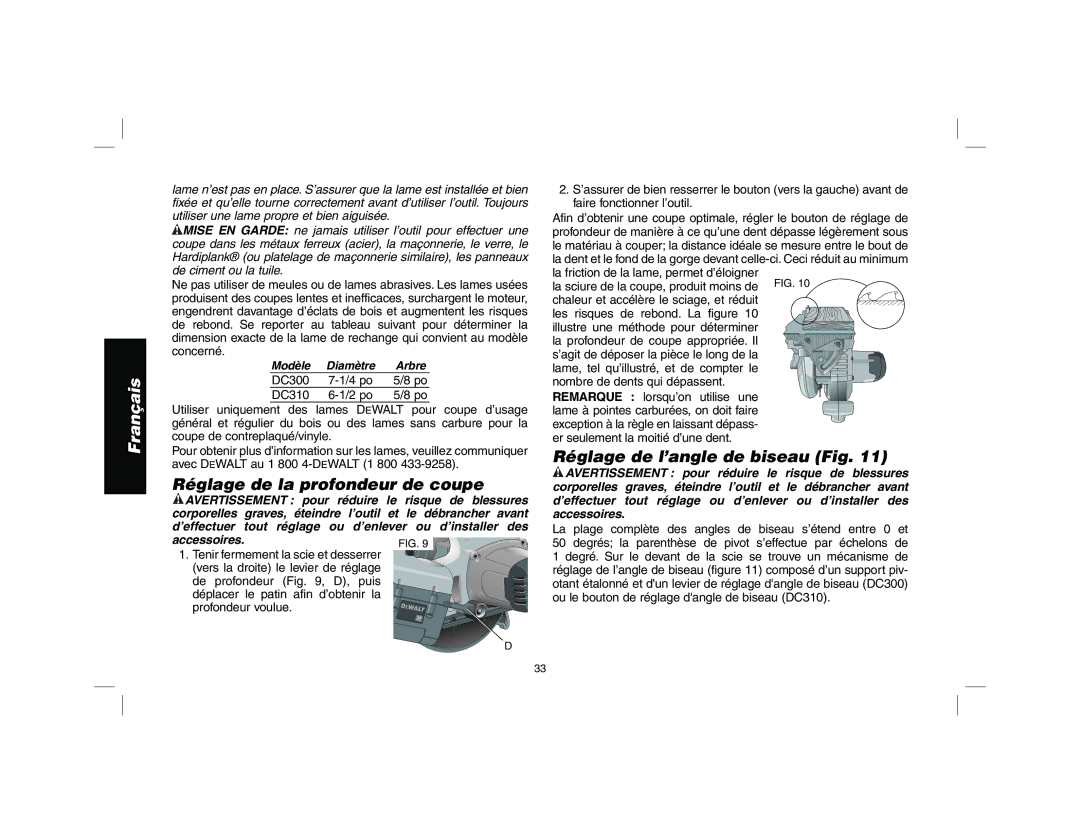
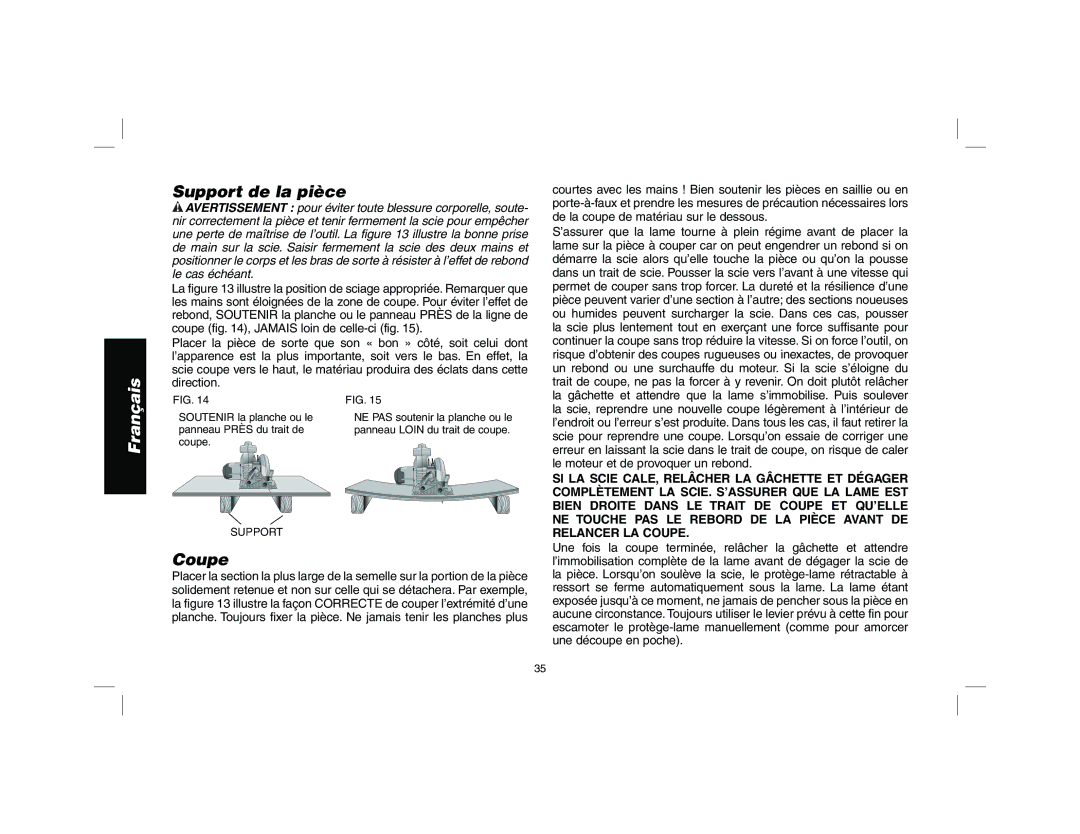
FIG. 14

FIG. 15

DO support board or

DON’T support board or

panel NEAR the cut.

panel AWAY from the cut.


SUPPORT

Workpiece Support

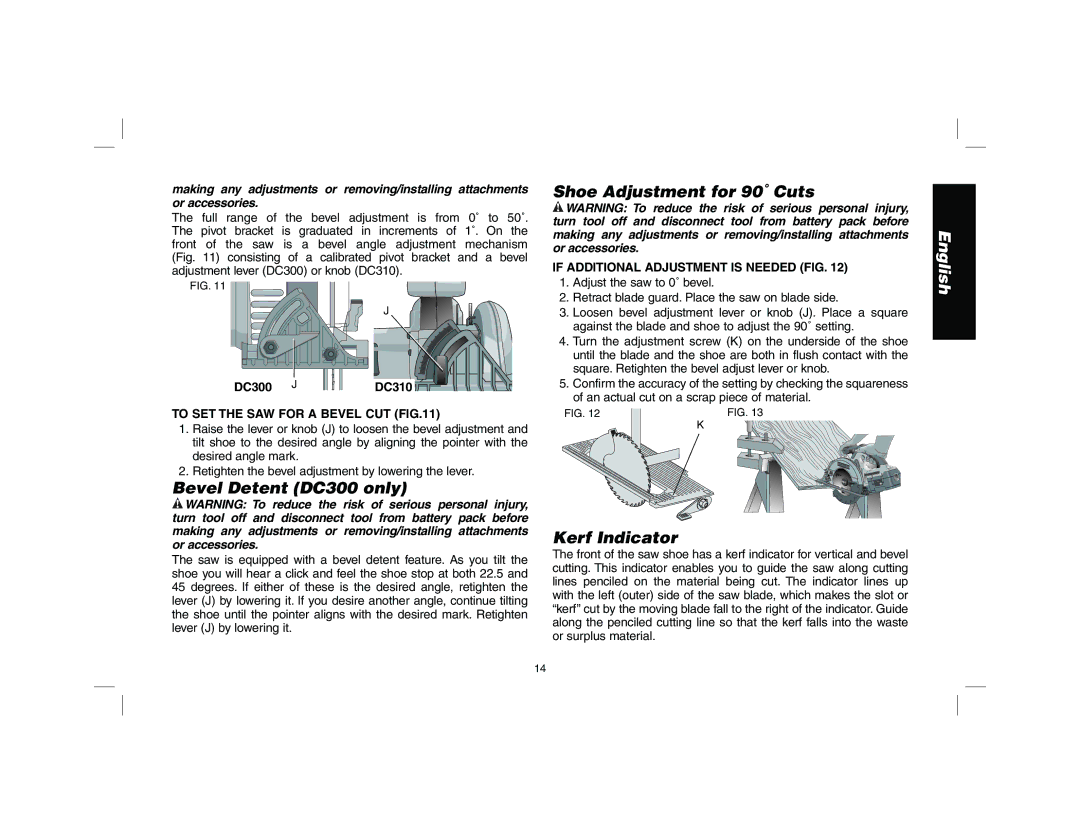
WARNING: It is important to support the work properly and to hold the saw firmly to prevent loss of control which could cause personal injury. Figure 13 illustrates proper hand support of the saw. Maintain a firm grip with both hands on the saw and position your body and arm to allow you to resist kickback if it occurs.

Figure 13 shows proper sawing position. Note that hands are kept away from cutting area. To avoid kickback, DO support board or panel NEAR the cut (Fig. 14). DON’T support board or panel away from the cut (Fig. 15).

Place the work with its “good” side – the one on which appearance is most important – down. The saw cuts upward, so any splintering will be on the work face that is up when you cut it.

Cutting

Place the wider portion of the saw shoe on that part of the workpiece which is solidly supported, not on the section that will fall off when the cut is made. As examples, Figure 13 illustrates the RIGHT way to cut off the end of a board. Always clamp work. Don’t try to hold short pieces by hand! Remember to support cantilevered and overhanging material. Use caution when sawing material from below.

Be sure saw is up to full speed before blade contacts material to be cut. Starting saw with blade against material to be cut or pushed forward into kerf can result in kickback. Push the saw forward at a speed which allows the blade to cut without laboring. Hardness and toughness can vary even in the same piece of material, and knotty or damp sections can put a heavy load on the saw. When this happens, push the saw more slowly, but hard enough to keep working without much decrease in speed. Forcing the saw can cause rough cuts, inaccuracy, kickback, and over-heating of the motor. Should your cut begin to go off the line, don’t try to force it back on. Release the switch and allow blade to come to a complete stop. Then you can withdraw the saw, sight anew, and start a new cut slightly inside the wrong one. In any event, withdraw the saw if you must shift the cut. Forcing a correction inside the cut can stall the saw and lead to kickback.

IF SAW STALLS, RELEASE THE TRIGGER AND BACK THE SAW UNTIL IT IS LOOSE. BE SURE BLADE IS STRAIGHT IN THE CUT AND CLEAR OF THE CUTTING EDGE BEFORE RESTARTING.

As you finish a cut, release the trigger and allow the blade to stop before lifting the saw from the work. As you lift the saw, the spring-tensioned telescoping guard will automatically close under the blade. Remember the blade is exposed until this occurs. Never reach under the work for any reason. When you have to retract the telescoping guard manually (as is necessary for starting pocket cuts) always use the retracting lever.

NOTE: When cutting thin strips, be careful to ensure that small cutoff pieces don’t hang up on inside of lower guard.

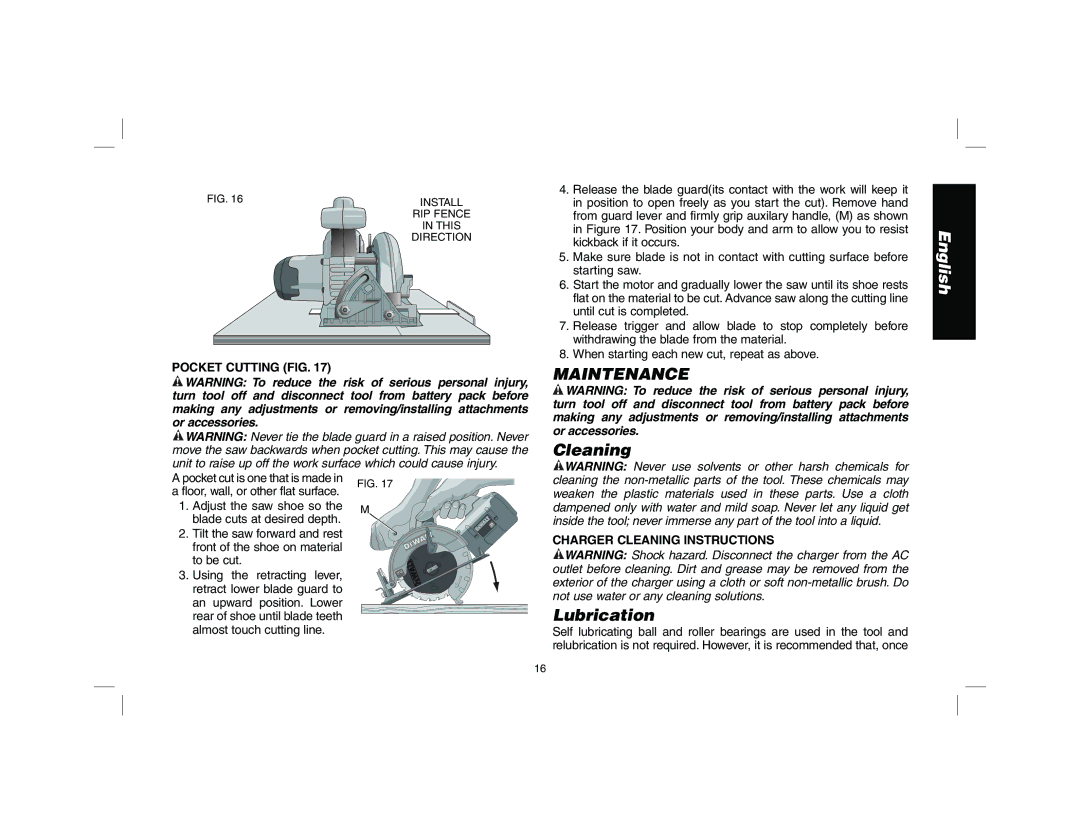
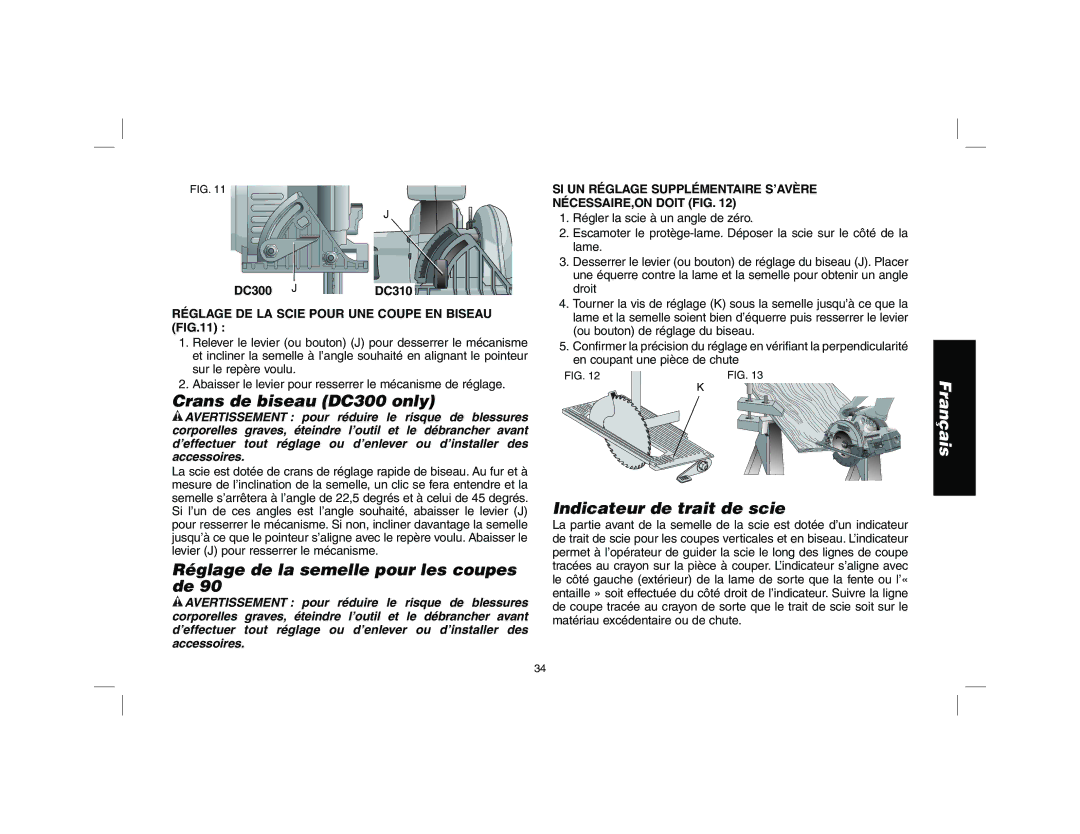
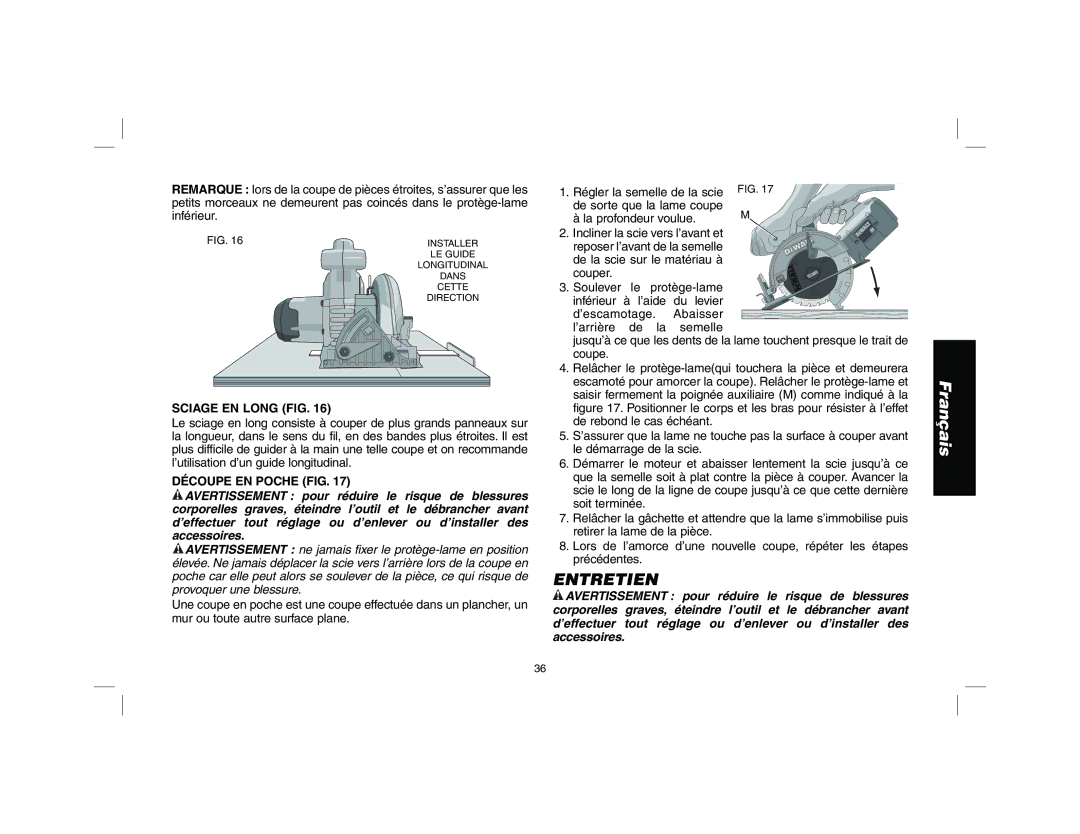
RIPPING (FIG. 16)

Ripping is the process of cutting wider boards into narrower strips

cutting grain lengthwise. Hand guiding is more difficult for this type of sawing and the use of a rip fence is recommended.

15
Image 16
Contents Guide Dutilisation Manual DE Instrucciones DC300, 36 Volt 4000 RPM DC310, 28 Volt 3800 RPMGeneral Safety Rules Work Area SafetyElectrical Safety Personal SafetyPower Tool USE and Care Battery Tool USE and CareService Additional Safety Rules for Circular SawsCauses and Operator Prevention of Kickback English Important Safety Instructions for Battery Chargers Introduction Important Safety Instruction for Battery PacksRead ALL Instructions Charging Procedure Rbrc SealStorage Recommendations ChargerCharger Diagnostics Important Charging NotesInstalling and Removing Battery Pack SwitchOperation Changing BladesDC310 only To Install the Blade To Install the BladeTo Replace the Blade Fig Lower Blade Guard DC300 and DC310 LoosenBevel Angle Adjustment Fig Cutting Depth AdjustmentBlades Shoe Adjustment for 90˚ Cuts Kerf IndicatorIf Additional Adjustment is Needed FIG Bevel Detent DC300 onlyCutting Workpiece SupportRipping FIG Maintenance CleaningCharger Cleaning Instructions LubricationAccessories Three Year Limited Warranty Year Free ServiceYears Free Service on Dewalt Battery Packs DAY Money Back GuaranteePatent Notification DC300, 36 Volt 4000 tr/min DC310, 28 VoltRègles de sécurité Généralités Conserver CES DirectivesSécurité Aire DE Travail Sécurité ÉlectricitéUtilisation ET Entretien DES Outils Électriques Règles de sécurité supplémentaires pour scies circulaires Utilisation ET Entretien DE Loutil Alimenté PAR PileCauses DU Rebond ET Mesures Préventives Avertissement Toujours porter des lunettes de sécurité Minutes Directives de sécurité importantes pour les blocs-piles Lire Toutes LES DirectivesRecommandations de rangement Le sceau SrprctmChargeur Procédure de chargeDiagnostique de chargeur Remarques de chargement importantesInstallation et retrait du bloc-piles FonctionnementGâchette Changement de lamesRemplacement de la lame Fig Installation de la lameDC300 Seulement DC310 Seulement Lames PROTÈGE-LAME Inférieur DC300 ET DC310Réglage de la profondeur de coupe Réglage de l’angle de biseau FigCrans de biseau DC300 only Réglage de la semelle pour les coupes deIndicateur de trait de scie Réglage DE LA Scie Pour UNE Coupe EN BiseauSupport de la pièce CoupeSciage EN Long FIG EntretienDécoupe EN Poche FIG Accessories NettoyageLubrification Garantie limitée de trois ansAvis de brevet Español Reglas de seguridad generales Guarde Estas InstruccionesSeguridad EN EL Área DE Trabajo Seguridad EléctricaUSO Y Cuidado DE LA Máquina Herramienta USO Y Cuidado DE LA Herramienta a Batería Normas de seguridad adicionales para las sierra circularesServicio Causas Y Prevención DE Rebote POR Parte DEL Operador VoltiosA............. amperios Hertz Vatios Por minuto Conserve Estas Instrucciones Introducción LEA Todas LAS InstruccionesEl sello Rbrc Recomendaciones para el almacenamientoCargador Procedimiento de cargaDiagnósticos del cargador Notas importantes sobre la cargaInstalación y extracción del paquete de baterías FuncionamientoInterruptor Cambio de las hojasDC300 Solamente Para instalar la hojaPara reemplazar la hoja Fig DC310 SolamentePara cambiar la hoja Fig Protector Inferior DE LA Hoja DC300 y DC310Hojas Ajuste de la profundidad de cortePara Configurar LA Sierra Para UN Corte Biselad Ajuste del ángulo del bisel FigRetén del bisel DC300 solamente Ajuste de la zapata para cortes a 90˚Apoyo de las piezas de trabajo Indicador de corteCorte Corte Longitudinal FIG Corte Interno FIGMantenimiento LimpiezaLubricación ReparacionesPóliza de Garantía Garantía limitada por tres añosExcepciones AÑO DE Servicio GratuitoCULIACAN, SIN Notificación de patente EspecificacionesPage Page Cat Number Voltage