Samsung AF0AKV3SAEENSG manual Unpacking the indoor unit, Packing the indoor unit

Page 77

Unpacking the indoor unit

Perform the following steps as described below:

1Remove the upper packing case.

2Detach the cushions from the indoor unit.

3Remove the lower packing case from the indoor unit.

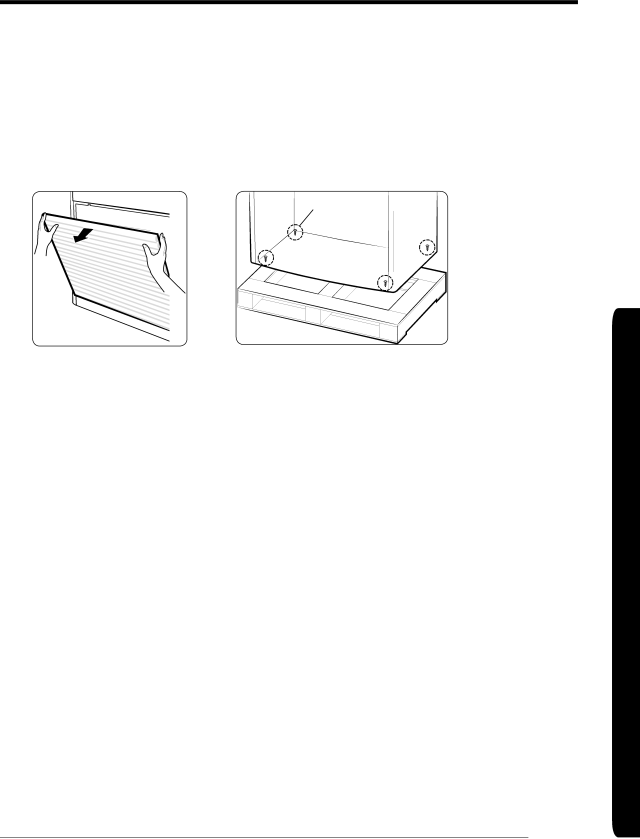
4Open the panel and remove the 4 screws placed at the corner of the pallet.

5Remove the pallet and close the panel.

Packing the indoor unit

Perform the following steps as described below:

1Open the panel and place the indoor unit on the pallet.

2Fasten the 4 screws into the unit and close the panel.

3Cover the unit with the lower packing case.

4Attach the cushions on both side of the unit.

5Cover the unit with the upper packing case.

INSTALLATION PARTS

English 77

Image 77
Contents Air conditioner Contents Safety precautions For Installation Using Parts For Power Supply Using Parts Safety precautions Using Parts For Cleaning Checking the auxiliary power switch Using outdoor unitOperational temperature and humidity range Checking before useTo open the panel Viewing the partsMain parts Control panel and the display Locking the control panelUsing the air conditioner with the control panel Remote controller button Checking the remote controllerInserting the batteries Remote controller displayStoring the remote controller Battery changing timeCool Basic operationAuto DryAdjusting the air flow direction Using the Turbo function Setting the On timer Timer functionSetting the Off timer Cleaning the outdoor unit heat exchanger Cleaning and maintaining the air conditionerCleaning the indoor unit Cleaning the air filter Maintaining the air conditioner Periodical checks Problem Solution TroubleshootingTroubleshooting General information Power supply line, fuse or circuit breaker Installing the unitInstallation Parts Accessory parts list Moving the outdoor unit Preparation for installationIndoor  outdoor unit type and combination Indoor unit Deciding on where to install the productOutdoor unit Deciding on where to install the product Space requirements Installation location 2000 Or more 300 or More 1500 or Or 600 or more more Or more Drilling a hole in the wall Pipe length between the indoor and the outdoor unitLess than 30m Installing Outdoor unit Installing indoor unitBase ground contruction Installation Parts Installation Parts Refrigerant piping work Connecting the pipesFix the pipe on Indoor Temper grade and minimum thickness of the refrigerant pipe Pipe connectionSelecting refrigerant pipe Storing refrigerant pipe Cutting or flaring the pipes Direction of the pipe when brazingTightening flare connection part Pipe bending Connecting the drain hoseInsulating refrigerant pipe Selecting the insulator of the refrigerant pipeAllowable refrigerant pipe length Refrigerant chargingHow to add refrigerant Electrical work Wiring workPower supply and wire specification Phase 4 wires Power wiring diagramEarth Connecting power and communication cableSelecting solderless ring terminal Connecting the power terminal Connect the ring terminal Fixing the power cableGrounding work Installing grounding wire Wiring work Gas leak test and vacuum drying Check lists after completing the installation Testing operations SEG2 SEG3 SEG4 On on Check electrical connection and setting E441 IPM Installationparts How to connect your extended power cables Installation Parts Packing and unpacking guide Packing the indoor unit Unpacking the indoor unitPacking the outdoor unit Unpacking the outdoor unitCooling Questions or COMMENTS?