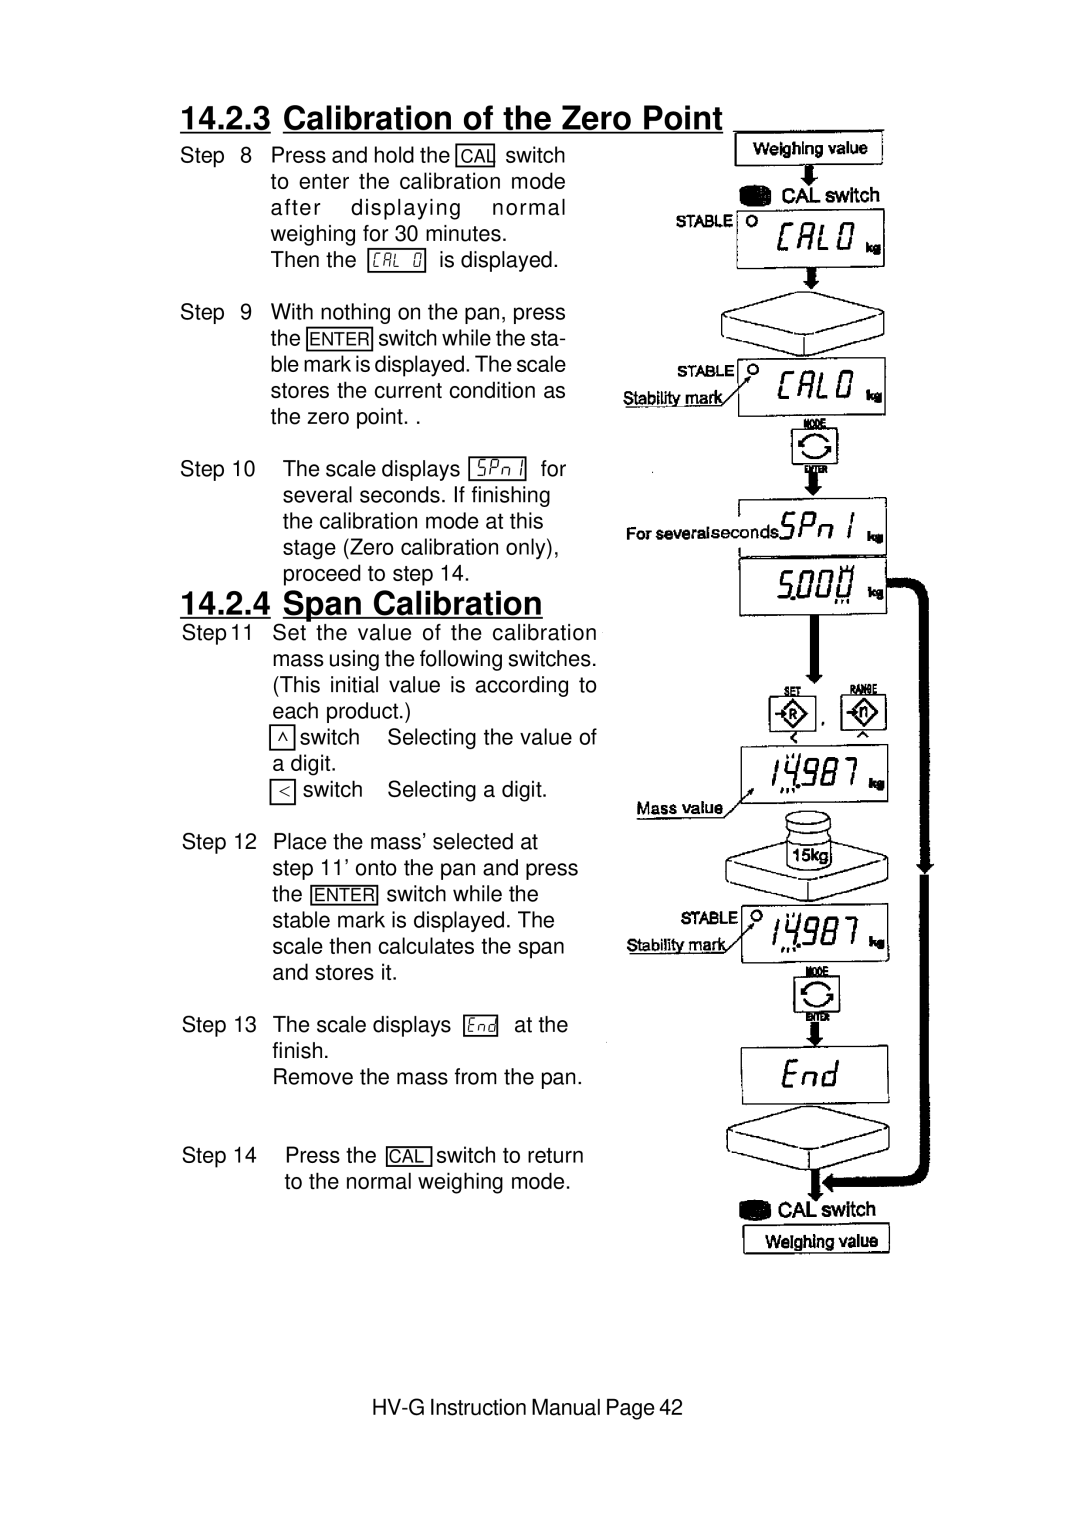
14.2.3 Calibration of the Zero Point
Step 8 Press and hold the CAL switch to enter the calibration mode after displaying normal weighing for 30 minutes.
Then the Cal 0 is displayed.
Step 9 With nothing on the pan, press the ENTER switch while the sta- ble mark is displayed. The scale stores the current condition as the zero point. .
Step 10 The scale displays 5pn1 for several seconds. If finishing the calibration mode at this stage (Zero calibration only), proceed to step 14.
14.2.4 Span Calibration
Step 11 Set the value of the calibration mass using the following switches. (This initial value is according to
each product.)
^ | switch | Selecting the value of |
a | digit. |
|
| switch | Selecting a digit. |
< |
Step 12 Place the mass’ selected at step 11’ onto the pan and press the ENTER switch while the stable mark is displayed. The scale then calculates the span and stores it.
Step 13 The scale displays end at the finish.
Remove the mass from the pan.
Step 14 Press the CAL switch to return to the normal weighing mode.
