74 | 3 System upgrade |
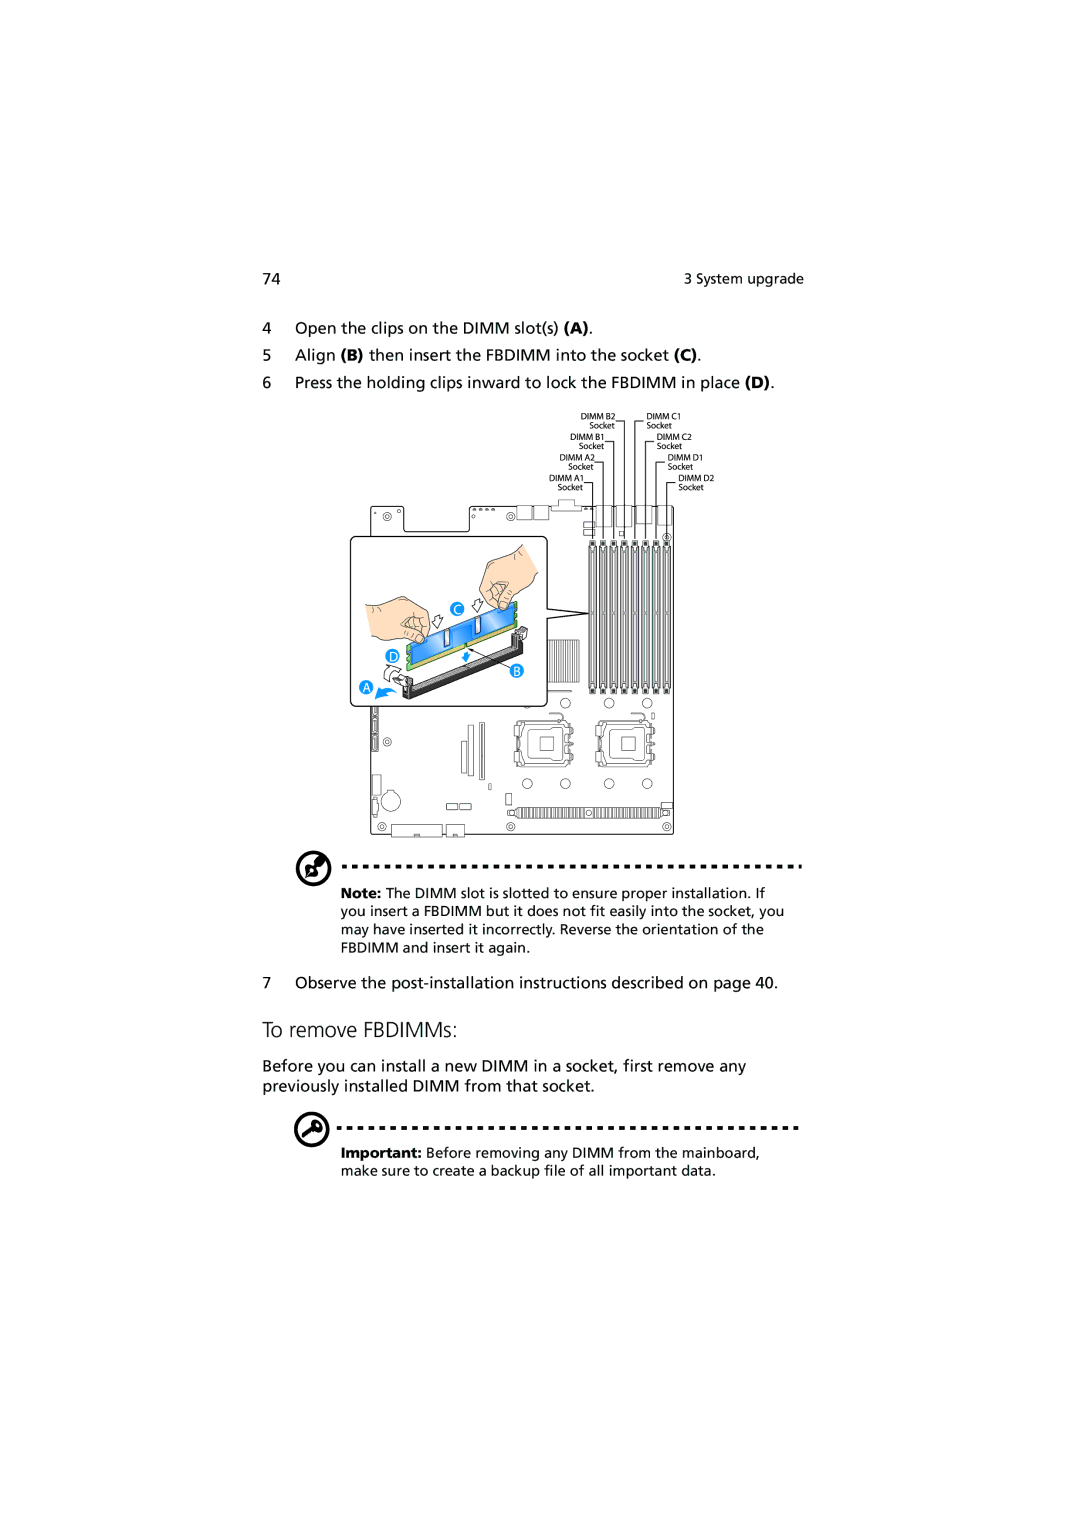
4Open the clips on the DIMM slot(s) (A).
5Align (B) then insert the FBDIMM into the socket (C).
6Press the holding clips inward to lock the FBDIMM in place (D).
Note: The DIMM slot is slotted to ensure proper installation. If you insert a FBDIMM but it does not fit easily into the socket, you may have inserted it incorrectly. Reverse the orientation of the FBDIMM and insert it again.
7 Observe the
To remove FBDIMMs:
Before you can install a new DIMM in a socket, first remove any previously installed DIMM from that socket.
Important: Before removing any DIMM from the mainboard, make sure to create a backup file of all important data.
