Installing the Replacement Hard Drive
Warning: To avoid potential injury or damage, avoid touching the thin strip of metal that extends up from the rib frame at the battery well.
Important: Avoid touching the optical drive as you perform this procedure.
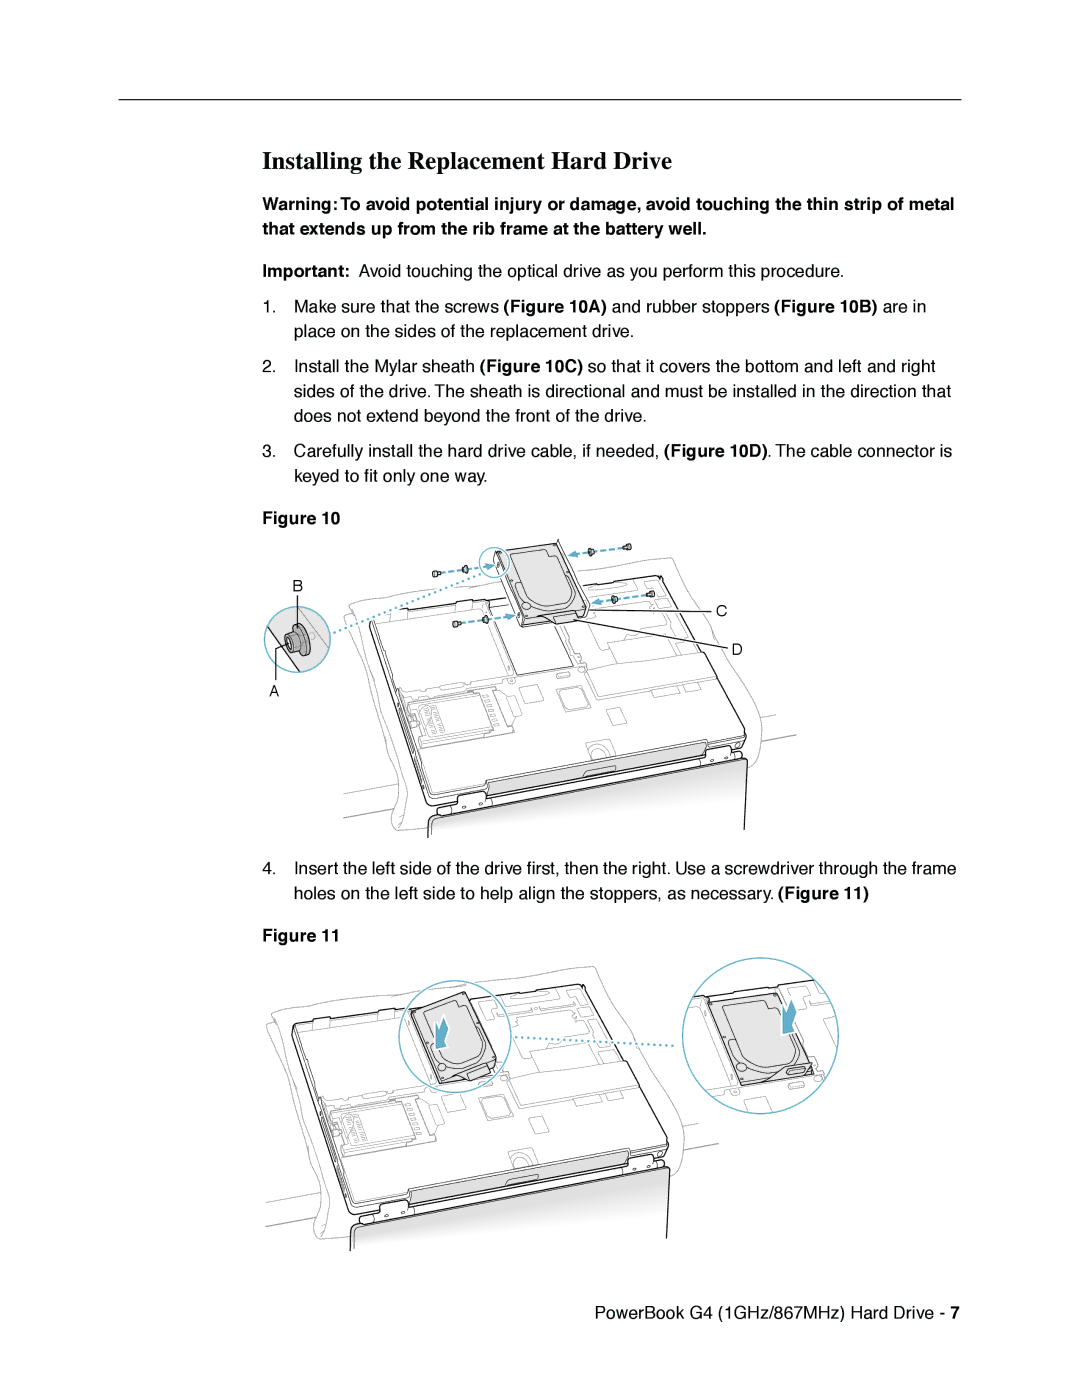
1.Make sure that the screws (Figure 10A) and rubber stoppers (Figure 10B) are in place on the sides of the replacement drive.
2.Install the Mylar sheath (Figure 10C) so that it covers the bottom and left and right sides of the drive. The sheath is directional and must be installed in the direction that does not extend beyond the front of the drive.
3.Carefully install the hard drive cable, if needed, (Figure 10D). The cable connector is keyed to fit only one way.
Figure 10
B
![]()
![]()
![]()
![]()
![]() C
C
D
A
4.Insert the left side of the drive first, then the right. Use a screwdriver through the frame holes on the left side to help align the stoppers, as necessary. (Figure 11)
Figure 11
PowerBook G4 (1GHz/867MHz) Hard Drive - 7
