KL9108 / KL9116 User Manual
Gamma Adjustment
If it is necessary to correct the gamma level for the remote video display, use the Gamma function of the Video Adjustment dialog box.
Under Basic configuration, there are ten preset and four
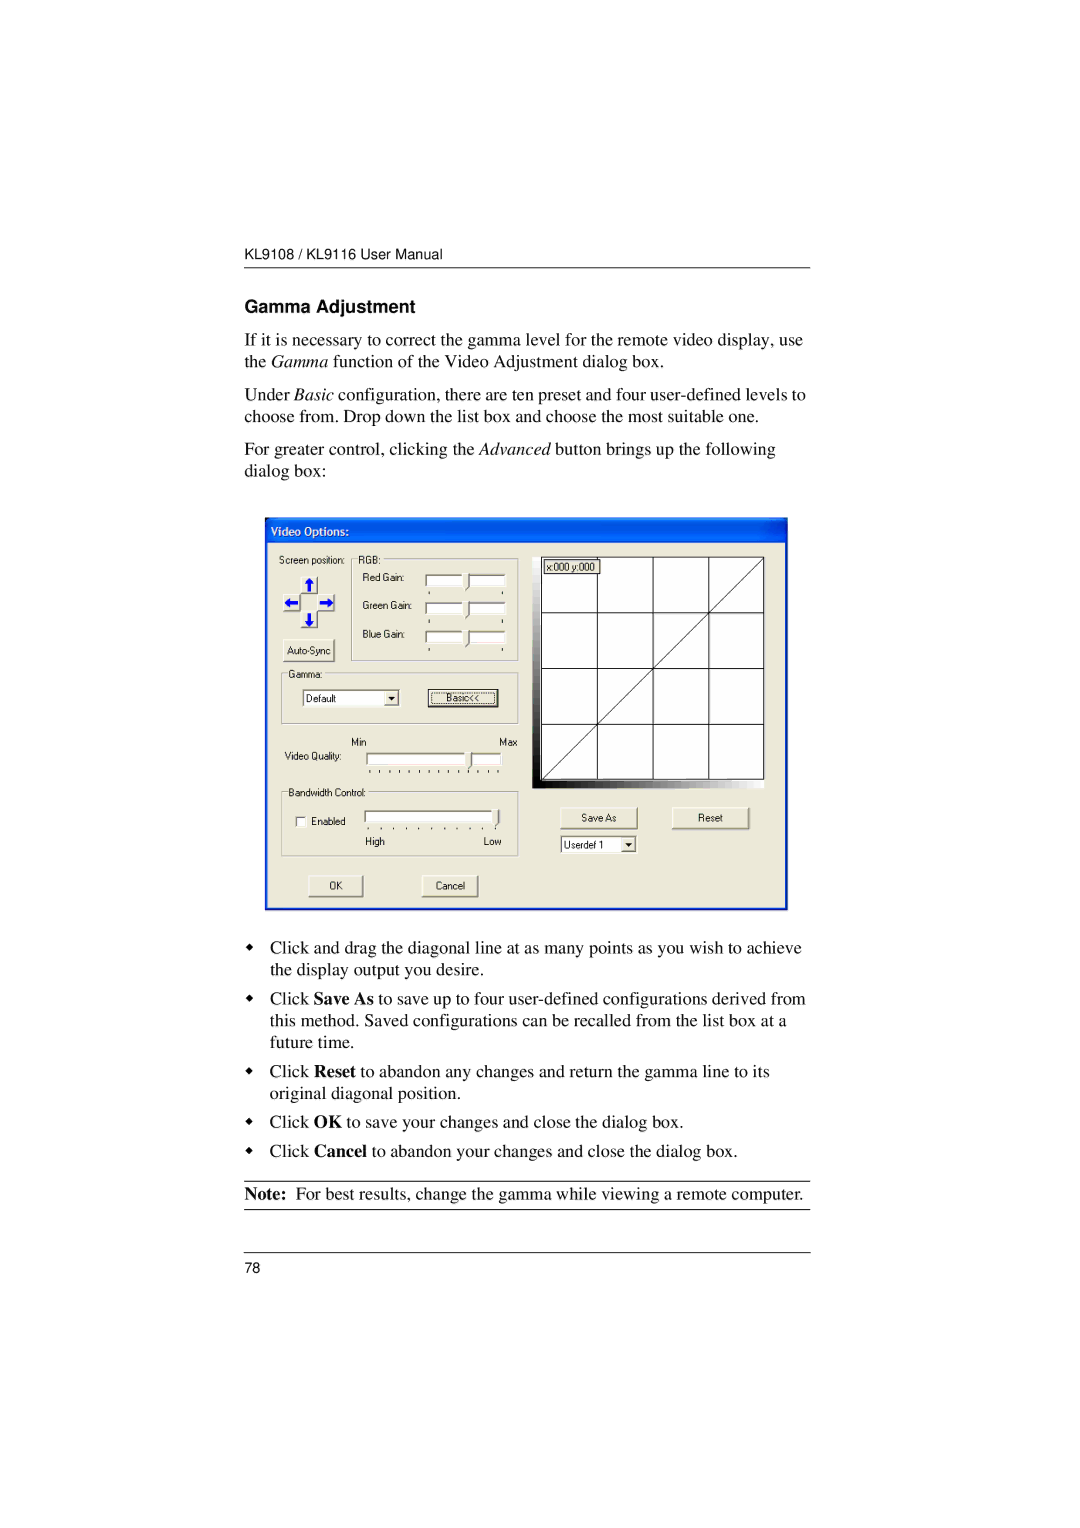
For greater control, clicking the Advanced button brings up the following dialog box:
Click and drag the diagonal line at as many points as you wish to achieve the display output you desire.
Click Save As to save up to four
Click Reset to abandon any changes and return the gamma line to its original diagonal position.
Click OK to save your changes and close the dialog box.
Click Cancel to abandon your changes and close the dialog box.
Note: For best results, change the gamma while viewing a remote computer.
78