KL9108 / KL9116 User Manual
HideawayTM LCD KVM Switch
RoHS
FCC Information
User Notice
General
Safety Instructions
Unplug the power cable before removing the power supply
Rack Mounting
Package Contents
Installation
Contents
Introduction
Basic Operation
Browser Operation
Administration
The Windows Client
Chapter
The Log File
The Java Client
The Log Server
Chapter
Appendix
AP Operation
Index
Chapter
Overview
About This Manual
This manual uses the following conventions
Conventions
Getting Help
ALTUSEN Information
Technical Support
In Canada and South America, call In all other locations, call
Product Information
In the United States of America, call 866-ALTUSEN
KL9108 / KL9116 User Manual
This Page Intentionally Left Blank
Overview
Introduction
Chapter
Your KL9108 / KL9116 investment is protected by an included Firmware Upgrade Utility. You can stay current with the latest functionality improvements by downloading firmware update files from our Website as they become available, and using the utility to quickly and conveniently perform the upgrade
Chapter 1. Introduction
Features
Supports RADIUS server authentication
External Console
System Requirements
Computers
Remote Computers
Operating Systems
Cables
Description
Front View
Component
Operation, page 19, for more details on sliding the console in
Component
Description
Description
Component
Description
Rear View
Component
KL9108 / KL9116 User Manual
This Page Intentionally Left Blank
Before You Begin
Installation
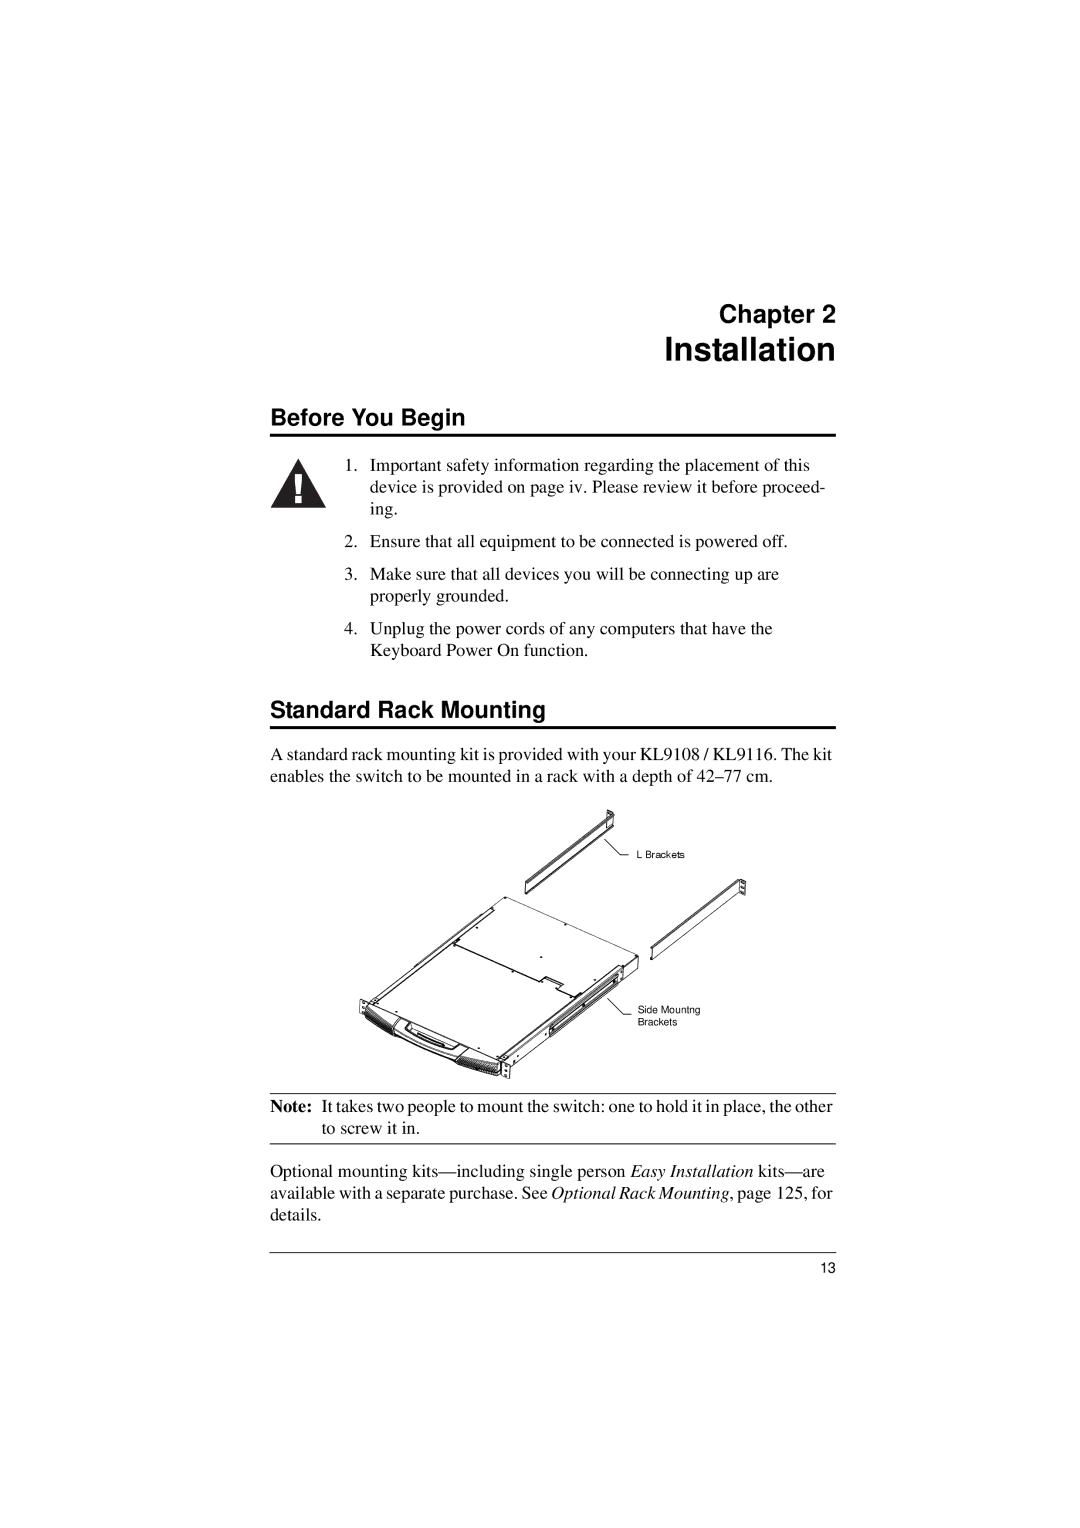
Standard Rack Mounting
Chapter
To rack mount the switch, do the following
continues on next page
Note 1. Cage nuts are provided for racks that are not prethreaded
Installation
Chapter 2. Installation
Single Stage Installation Diagram
KL9108 / KL9116 User Manual
This Page Intentionally Left Blank
Opening the Console
Basic Operation
Opening Separately
Chapter
continues on next page
2. Pull the top panel all the way out until it clicks into place
3. Rotate the top panel all the way back to expose the LCD screen
Opening Together
Operating Precautions
continues on next page
Closing the Console
KL9108 / KL9116 User Manual
4. Using the front handle, push the module all the way in
The LCD Buttons
LCD OSD Configuration
Button
Function
Explanation
The Adjustment Settings
Setting
Manual Port Switching
Powering Off and Restarting
Port Selection
Hot Plugging
KL9108 / KL9116 User Manual
This Page Intentionally Left Blank
The Local Console
Administration
Chapter
Overview
After you successfully log in, the Local Console OSD appears
Quick View Ports
The Main Page
The List Function
To dismiss the List function, click the arrow or press F3
Port Names
continues on next page
2. Key in the new Port Name, or modify/delete the old one
Port Operation
The Configuration Page
The Log Page
General
The Administration Page
This item displays the current firmware version number. You can
addresses, this item is a convenient way of ascertaining what its
User Management
Checking Windows Client allows the user to access the
Checking Administration assigns administrative privileges
allows the user to access attached Power over the Net
continues on next page
Description
KL9108 / KL9116 User Manual continued from previous page
Heading
Access Port
Service Configuration
Log Server
DNS Server
Network
IP Address
continues on next page
RADIUS
Character
continues on next page
Meaning
UOL0 All
2. Characters are comma delimited
Examples
Security
To delete a filter, select it and Click Remove
Customization
Login Failures
Working Mode
continues on next page
I/O Attributes
3. Select a Share Mode attribute for the port see the table below
Miscellaneous
Timeout
Date/Time
Upgrading the Firmware
Logging In
Browser Operation
Chapter
Overview
4. Provide a valid Username and Password set up by the KL9108 / KL9116 administrator, then Click Login to continue
Webpage Icons
Webpage Layout
Icon
Function
implement new settings when you log out. Following a reset, wait
The General Dialog Box
Purpose
Webpage Buttons
Icon
KL9108 / KL9116 User Manual
This Page Intentionally Left Blank
Activating the OSD
The Windows Client
Chapter
continues on next page
5. Click on Switch to bring up the OSD
The OSD comes up with the Main page displayed
The Main Page
Port Operation
The OSD Toolbar
Recalling the OSD
The Toolbar Icons
OSD Hotkey Summary Table
Pausing Auto Scan
Setting the Scan Interval
Hotkey Operation
Auto Scanning
Exiting Auto Scan
Skip Mode
Panel Array Mode
You can access a computer connected to a port by moving the mouse pointer over its panel and clicking. You switch to the computer exactly as if you had selected it from the OSD Main screen
Rule
Multiuser Operation
Operation
Space
Windows Client Control Panel
Hotkeys
1. Highlight the Action, and then Click Start
3. When you have finished keying in your sequence, Click Stop
continues on next page
Action
Video Adjustment
Gamma Adjustment
The meanings of the adjustment options are given in the table below
Option
Usage
Gamma Adjustment
The Message Board
Compose Panel
The Button Bar
Message Display Panel
User List Panel
Keystrokes
Keyboard and Mouse Considerations
Mouse Synchronization
The Configuration Page
Setting
The Configuration page settings are explained in the following table
Selects which computers will be accessed under Auto Scan Mode
VIEW - Only those Ports which have been set Accessible and have
KL9108 / KL9116 User Manual
This Page Intentionally Left Blank
Activating the OSD
The Java Client
Chapter
The Java Client Control Panel
Keypad
Set Video Parameters
At times the local mouse movement may lose sync with the remote mouse movement. The Mouse Synchronization function gets them back into sync. There are two methods available to bring the pointers into sync
Message Board
Mouse Synchronization
Action
The Button Bar
Button
The names of all the logged in users appear in the User List panel
Switch Screen Mode
Resolution
Lock Key LEDs
About
The Configuration Page
Hotkey Operation
Panel Array Mode
Port Operation
Chapter
The Log File
The Main Screen
KL9108 / KL9116 User Manual
This Page Intentionally Left Blank
Chapter
The Log Server
Installation
Starting Up
The Menu Bar
Configure
Search
Events
Explanation
A description of the items is given in the table below
This is one of three radio buttons that define the scope of the
This is a secondary search performed on all the events in the
Help
Maintenance
Options
Overview
The Log Server Main Screen
The Event Panel
The List Panel
Administrator Utility see page
Field
The Windows Client
AP Operation
Installation
Chapter
Starting Up
can control the switch and the computers connected to it just
When the IP address and Port number for the unit you wish to
connection. When you have finished with your session, Click
Keyboard
The File Menu
The Tools Menu
Config
Connecting
Operation
Installation
The Java Client
Starting Up
continues on next page
The Address Input dialog box appears
Operation
Appendix
Troubleshooting
General Operation
Administration
Resolution
Problem
Problem
Resolution
Problem
Panel Array Mode
Resolution
Problem
Resolution
Sun Systems
Problem
Windows
Additional Mouse Synchronization Procedures
Windows ME / Windows
Windows XP / Windows Server
Windows NT / Windows
Sun / Linux
Function
Specifications
KL9108
KL9116
KL9116
Function
KL9108
The factory default settings are as follows
OSD Factory Default Settings
Setting
Default
Administrator Login Failure
Optional Rack Mounting
RAIL
LEFT
RIGHT RAIL
Rear Flange Slide Bar Front Flange Rear Attachment Sliding Bracket
a Screw the front flanges to the rack first
5. Slide the rear attachment sliding brackets along the slide bars until they contact the rear of the switch, then use the screws supplied with this package to attach the bars to the rear of the switch tighten the screws all the way
Dedicated Invocation Keys
Supported KVM Switches
Limited Warranty
Index
Page
Index
Panel Array Mode Windows