![]() BM 2610012089
BM 2610012089
Transporting, placement and Mounting
Mounting the Saw
portable Mounting Using Clamps
•If necessary, clamp the miter saw to a workbench or table top.
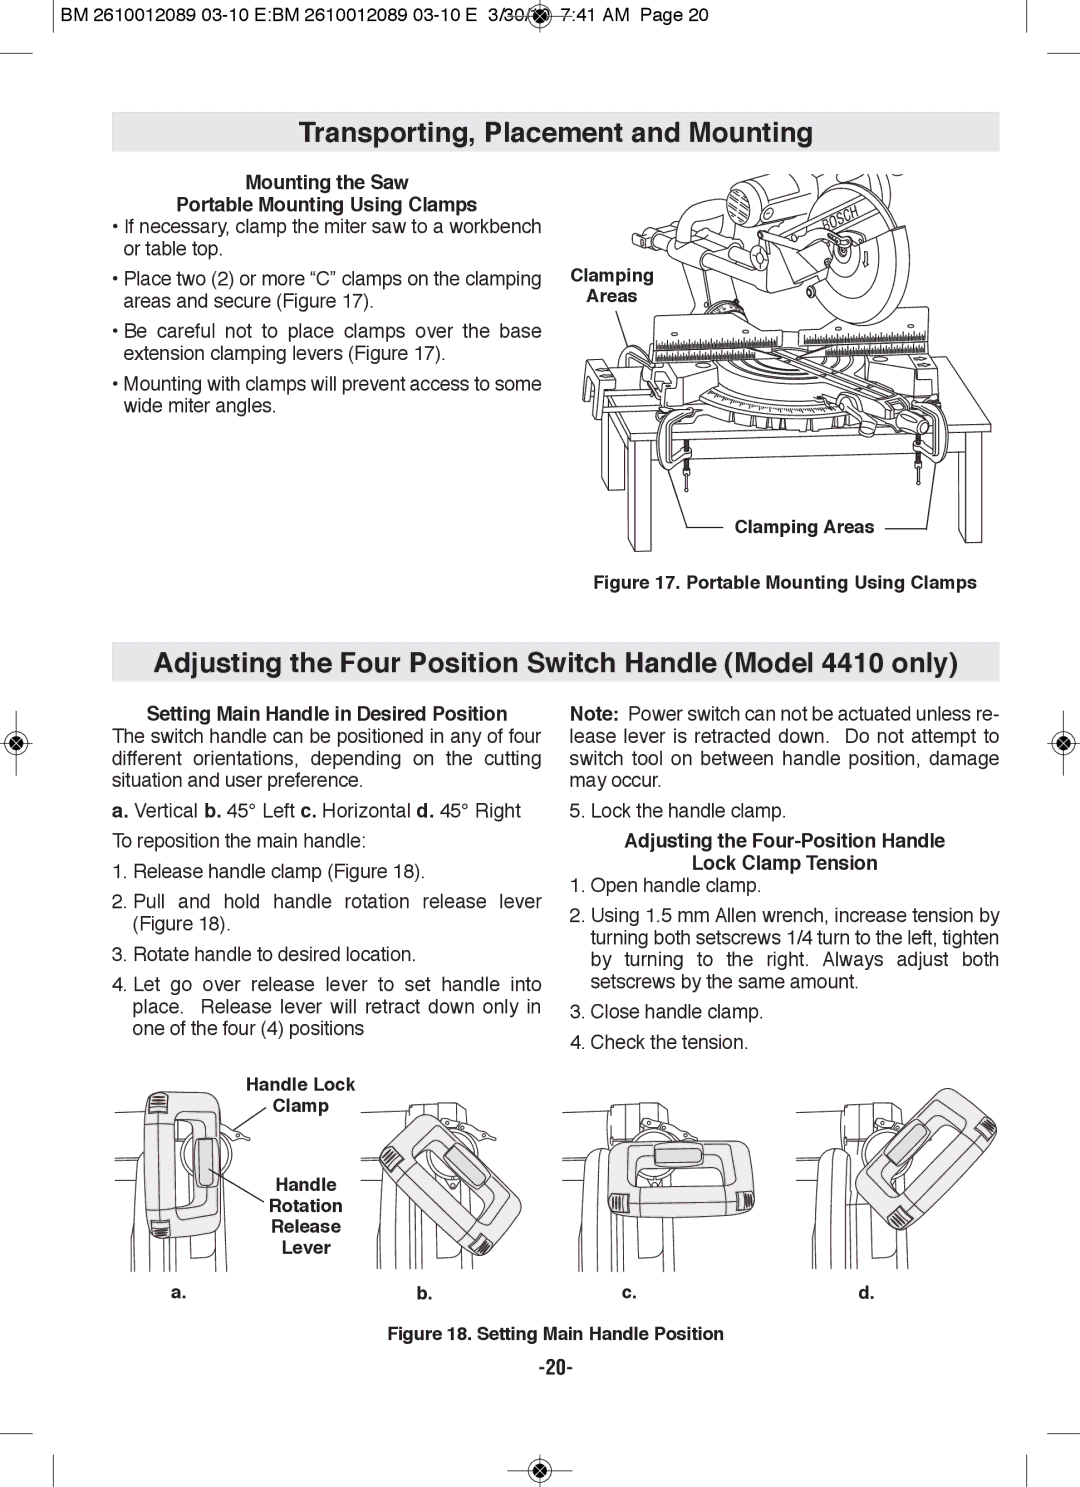
•Place two (2) or more “C” clamps on the clamping areas and secure (Figure 17).
•Be careful not to place clamps over the base extension clamping levers (Figure 17).
•Mounting with clamps will prevent access to some wide miter angles.
Clamping
Areas
Clamping Areas
figure 17. portable Mounting Using Clamps
Adjusting the four position Switch Handle (Model 4410 only)
Setting Main Handle in Desired position
The switch handle can be positioned in any of four different orientations, depending on the cutting situation and user preference.
a. Vertical b. 45° Left c. Horizontal d. 45° Right
To reposition the main handle:
1.Release handle clamp (Figure 18).
2.Pull and hold handle rotation release lever (Figure 18).
3.Rotate handle to desired location.
4.Let go over release lever to set handle into place. Release lever will retract down only in one of the four (4) positions
Note: Power switch can not be actuated unless re- lease lever is retracted down. Do not attempt to switch tool on between handle position, damage may occur.
5. Lock the handle clamp.
Adjusting the four-position Handle
lock Clamp Tension
1.Open handle clamp.
2.Using 1.5 mm Allen wrench, increase tension by turning both setscrews 1/4 turn to the left, tighten by turning to the right. Always adjust both setscrews by the same amount.
3.Close handle clamp.
4.Check the tension.
Handle lock
Clamp
Handle
Rotation
Release
lever
a. | b. | c. | d. |