![]() BM 2610012089
BM 2610012089
Basic Saw Operations
Body and Hand position
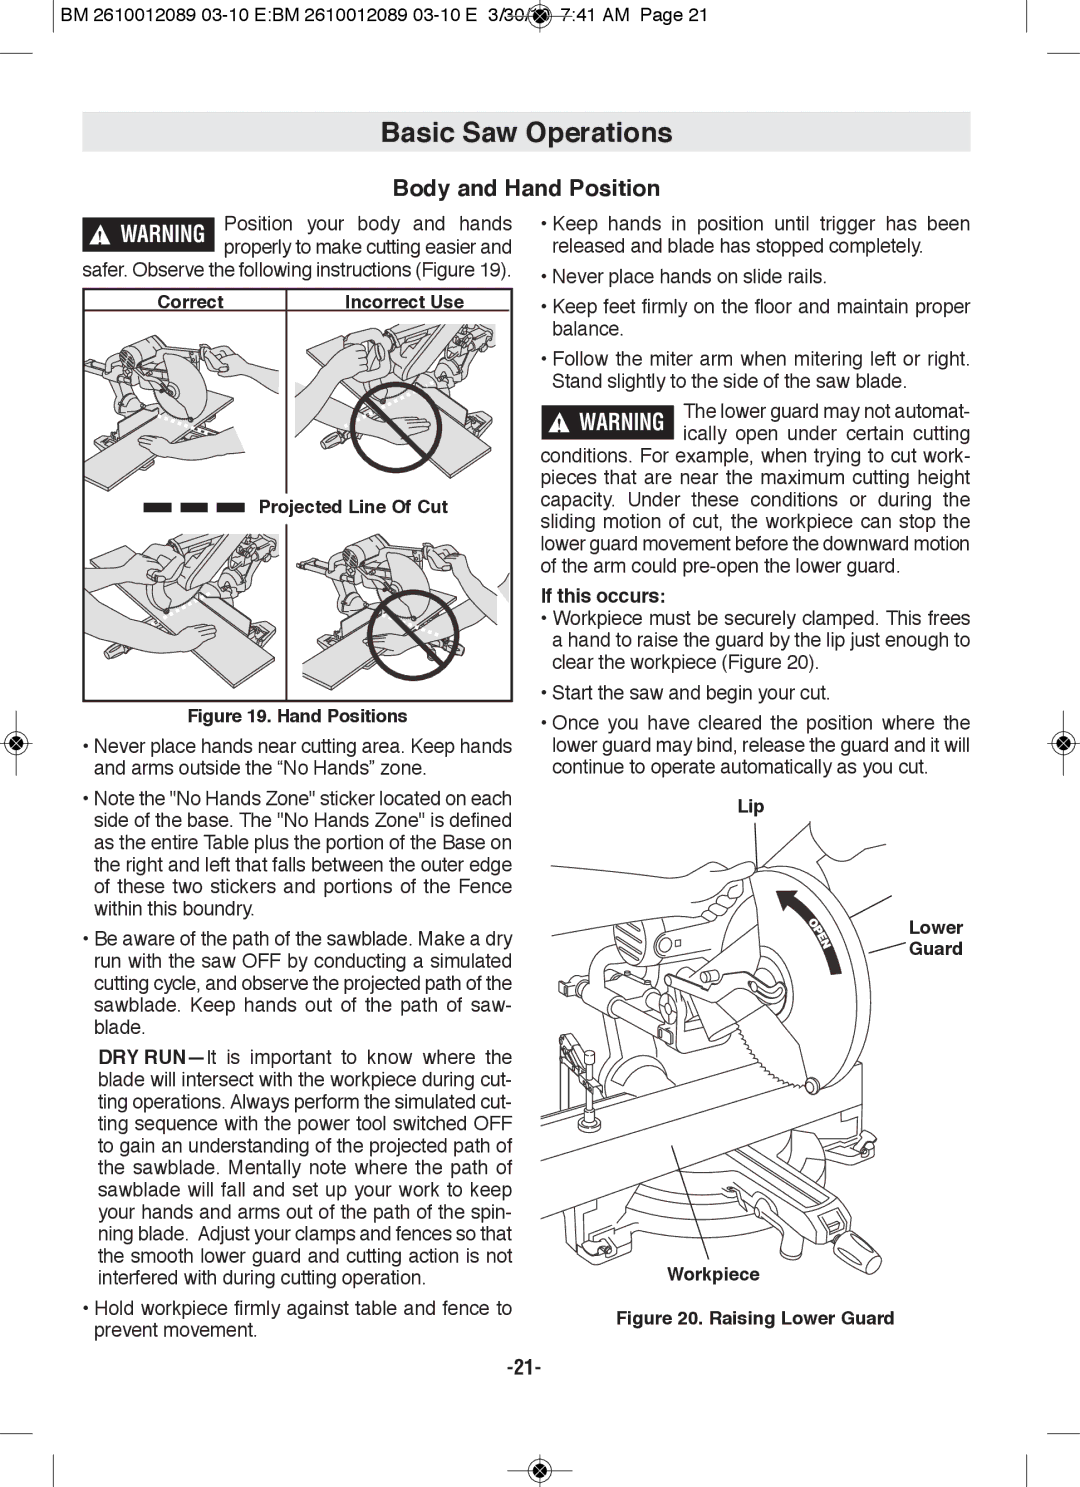
!WARNING Position your body and hands properly to make cutting easier and
safer. Observe the following instructions (Figure 19).
Correct | Incorrect Use |
| projected line Of Cut |
figure 19. Hand positions
•Never place hands near cutting area. Keep hands and arms outside the “No Hands” zone.
•Note the "No Hands Zone" sticker located on each side of the base. The "No Hands Zone" is defined as the entire Table plus the portion of the Base on the right and left that falls between the outer edge of these two stickers and portions of the Fence within this boundry.
•Be aware of the path of the sawblade. Make a dry run with the saw OFF by conducting a simulated cutting cycle, and observe the projected path of the sawblade. Keep hands out of the path of saw- blade.
•Hold workpiece firmly against table and fence to prevent movement.
•Keep hands in position until trigger has been released and blade has stopped completely.
•Never place hands on slide rails.
•Keep feet firmly on the floor and maintain proper balance.
•Follow the miter arm when mitering left or right. Stand slightly to the side of the saw blade.
The lower guard may not automat- ically open under certain cutting conditions. For example, when trying to cut work-
pieces that are near the maximum cutting height capacity. Under these conditions or during the sliding motion of cut, the workpiece can stop the lower guard movement before the downward motion of the arm could
If this occurs:
•Workpiece must be securely clamped. This frees a hand to raise the guard by the lip just enough to clear the workpiece (Figure 20).
•Start the saw and begin your cut.
•Once you have cleared the position where the lower guard may bind, release the guard and it will continue to operate automatically as you cut.
lip
lower ![]() Guard
Guard
Workpiece